10 Beautiful Hallway Wall Decor Ideas for a Cozy Vibe
Look, we need to talk about your hallway. You know, that forgotten strip of space you rush through every day without giving it a second thought? Yeah, that one. I get it – hallways seem like the most boring part of any home, but here’s the thing: they’re actually prime real estate for showing off your style.
I spent years ignoring my hallway until one day I realized my guests were literally staring at blank walls while waiting for me to grab my keys. Talk about awkward! That’s when I decided to turn my sad corridor into something worth looking at. And trust me, once you nail your hallway decor, you’ll wonder why you waited so long.
Let’s transform that neglected passageway into something that actually makes you smile when you walk through it. Ready?
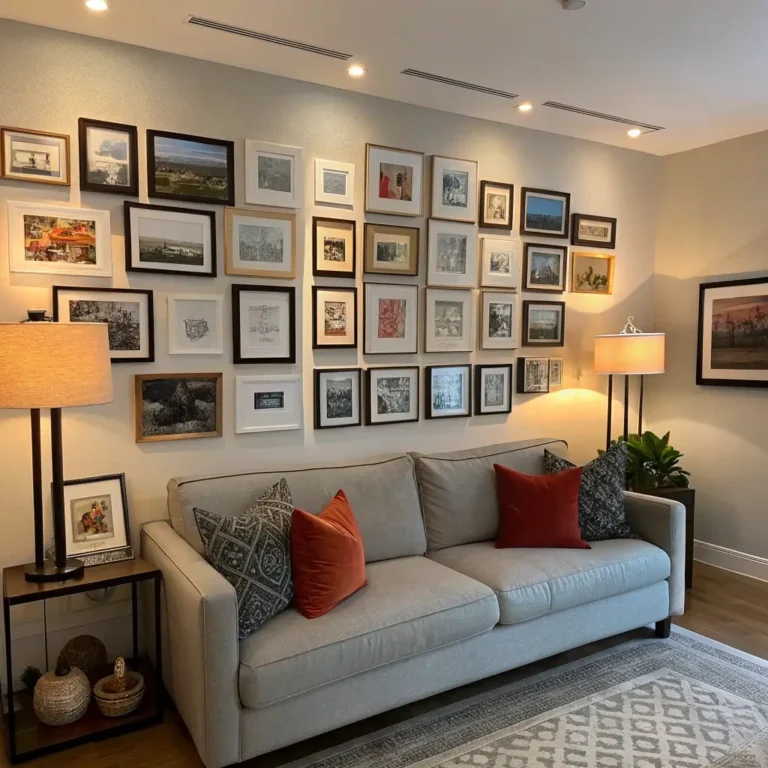
Gallery Wall with Family Photos
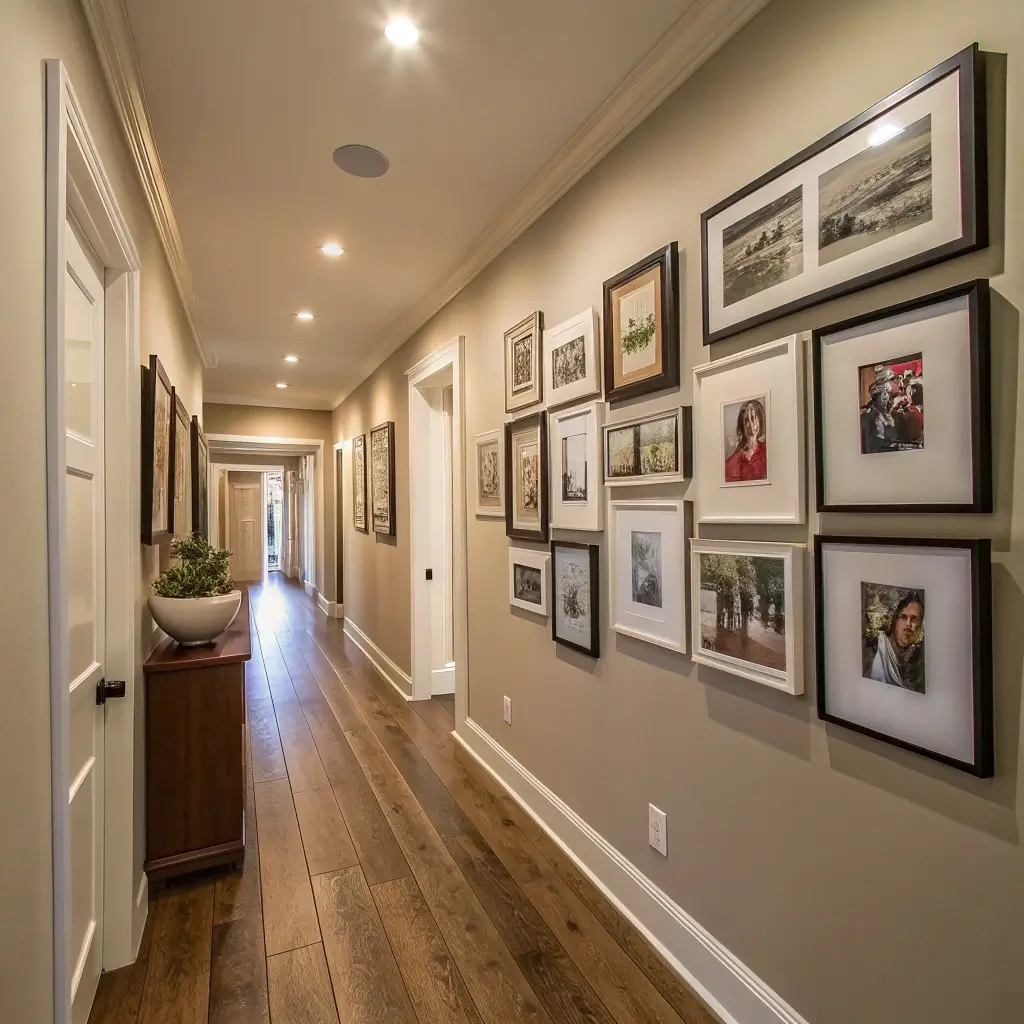
Why Family Photos Hit Different in Hallways
Here’s my hot take: hallways are literally the perfect spot for family photo galleries. Think about it – where else do you have a long, uninterrupted wall just begging for content? Plus, there’s something poetic about walking down memory lane while you’re literally walking down a lane.
I started my gallery wall with just five frames, thinking I’d keep it minimal. Three months later? I’ve got 27 photos up there, and honestly, I’m not even sorry. The trick is starting with a plan (even though I completely ignored mine).
Want to know what really works? Mix your frame sizes like you’re creating a visual rhythm. I go with this pattern:
- Large anchor photo in the center or slightly off-center
- Medium frames surrounding it
- Small frames filling the gaps
- One or two unexpected shapes (hello, hexagon frame!)
The Layout Game Plan
Ever stood in your hallway with 15 frames on the floor, completely paralyzed by choices? Been there! Here’s what finally saved my sanity: the paper template method.
Cut paper to match each frame size, tape them to the wall with painter’s tape, and play around until it looks right. Move them, swap them, go wild – it’s just paper. Once you nail the arrangement, mark where the nails go and boom, you’re golden.
Pro tip that I learned the hard way: keep the center of your gallery at eye level, which is roughly 57-60 inches from the floor. Unless you’re a family of NBA players, then adjust accordingly 🙂
Making It Personal Without Being Cheesy
Nobody wants their hallway looking like a discount portrait studio, right? Mix in some personality with your photos. I throw in concert tickets, kids’ artwork, even that hilarious receipt from the time we accidentally ordered 50 pizzas instead of 5.
Consider these mix-ins:
- Vintage postcards from family trips
- Hand-written notes or recipes
- Small mirrors between photos
- Pressed flowers or leaves
- Mini artwork prints
Floating Shelves with Greenery

The Plant Parent’s Dream Setup
Okay, floating shelves with plants might sound basic, but hear me out – when you nail this combo, it’s pure magic. My hallway gets maybe three hours of indirect light, tops, and my plants are thriving. The secret? Choosing the right green friends for the job.
I started with two shelves and four plants. Now I’m running what my partner calls “a botanical halfway house” with six shelves and… let’s not count the plants. The transformation happened gradually, and that’s actually the beauty of it.
Shelf Placement That Actually Makes Sense
You want to stagger those shelves, not line them up like soldiers. I learned this after my first attempt looked like a boring library stack. Asymmetry is your friend here, especially in narrow hallways where you need visual interest.
Here’s my current setup that gets compliments:
- First shelf at 5 feet high
- Second shelf 18 inches up and 12 inches to the right
- Third shelf back to the left, 20 inches higher
The zigzag pattern draws your eye up and makes the ceiling feel higher. It’s basically an optical illusion that costs less than $50 in shelves.
Plant Selection for Hallway Heroes
Not all plants can handle hallway life. Trust me, I’ve murdered enough to know. Your hallway probably has weird lighting, temperature fluctuations, and zero humidity. You need tough plants that can handle neglect.
My ride-or-die hallway plants:
- Pothos (literally impossible to kill)
- Snake plants (they thrive on neglect)
- ZZ plants (water once a month and forget)
- Philodendrons (the drama-free option)
- Air plants (no soil, no mess, no problem)
Mix real plants with a couple quality fakes if you must. I won’t judge – I’ve got two fake ones myself because that corner gets zero light. Life’s too short to watch plants die slowly.
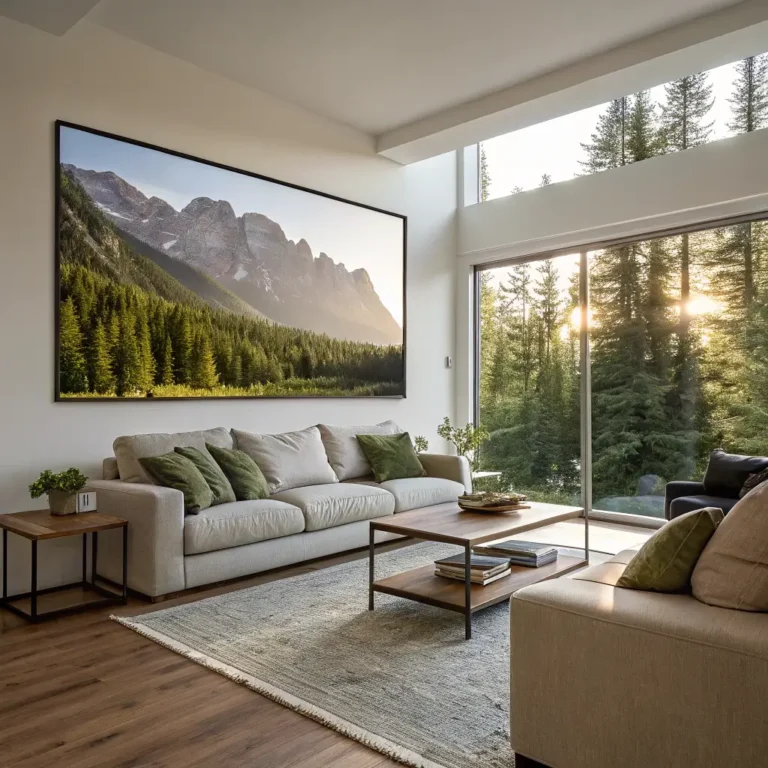
Large Statement Mirror
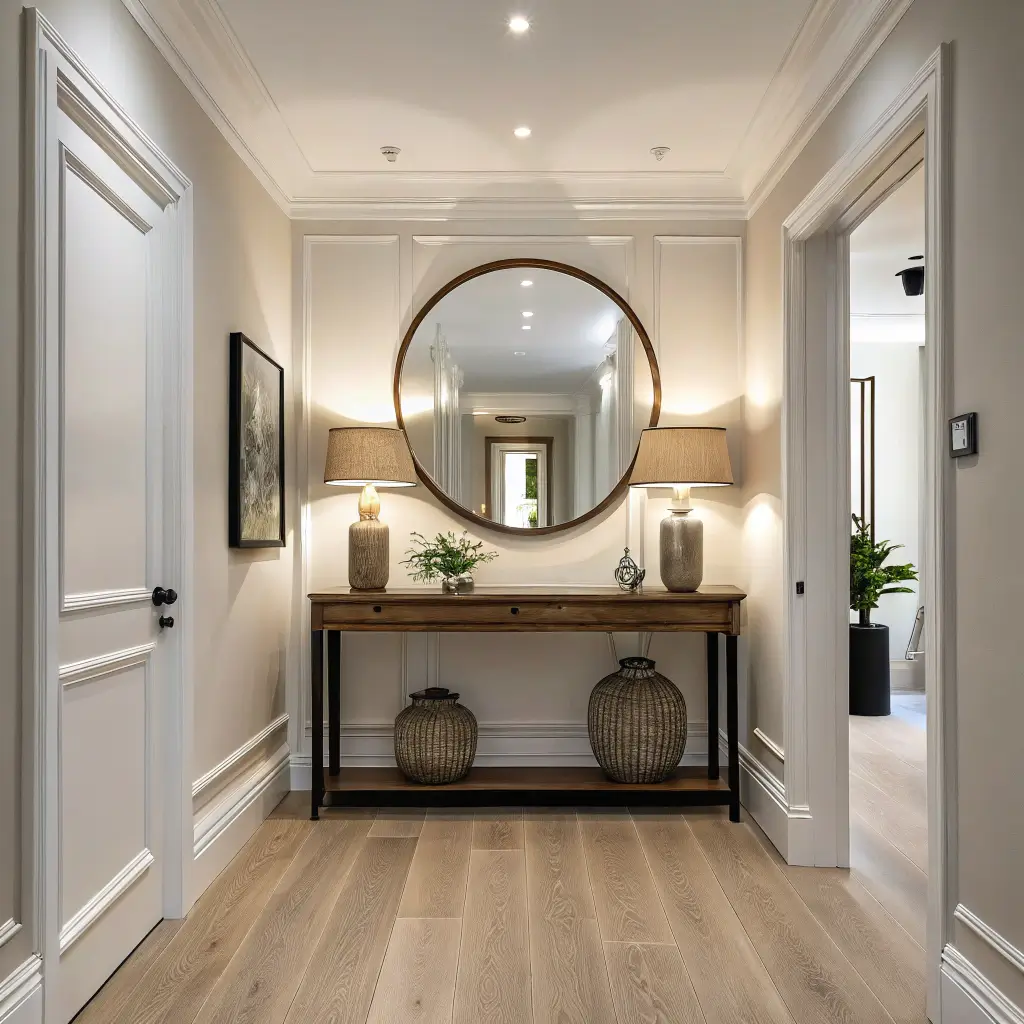
Why Size Actually Matters Here
Let’s get one thing straight: tiny mirrors in hallways are pointless. You need something substantial that commands attention and actually serves a purpose. I’m talking at least 30 inches, but honestly, bigger is almost always better in hallways.
My hallway mirror is 4 feet tall, and yes, it was a pain to hang. But you know what? It literally doubled the visual space of my narrow corridor. That mirror has done more for my hallway than any paint job ever could.
The Strategic Placement Guide
Where you hang that mirror matters more than the mirror itself. Across from a window? Genius – you’ve just doubled your natural light. At the end of a dark hallway? Instant depth and brightness.
I tried three spots before finding the sweet spot:
- First attempt: Too high (gave everyone a forehead view)
- Second attempt: Too close to the door (scary when opened)
- Final position: Opposite the hallway’s halfway point, perfectly centered
The magic height? Center of the mirror at 5’6″ from the ground. It works for most people and doesn’t make your hallway feel like a funhouse.
Frame Styles That Don’t Suck
Your mirror frame sets the entire vibe. I went through a phase where I thought frameless was sophisticated. Spoiler alert: it just looked unfinished. The frame is where personality lives.
Currently obsessing over:
- Vintage brass or gold (instant warmth)
- Chunky wood (rustic without trying too hard)
- Ornate antique (if you can pull it off)
- Modern geometric (clean lines, big impact)
Whatever you choose, make sure it can support the weight. My first mirror came crashing down at 2 AM. Nothing says “home improvement fail” like explaining to your landlord why there’s a mirror-shaped dent in the floor.
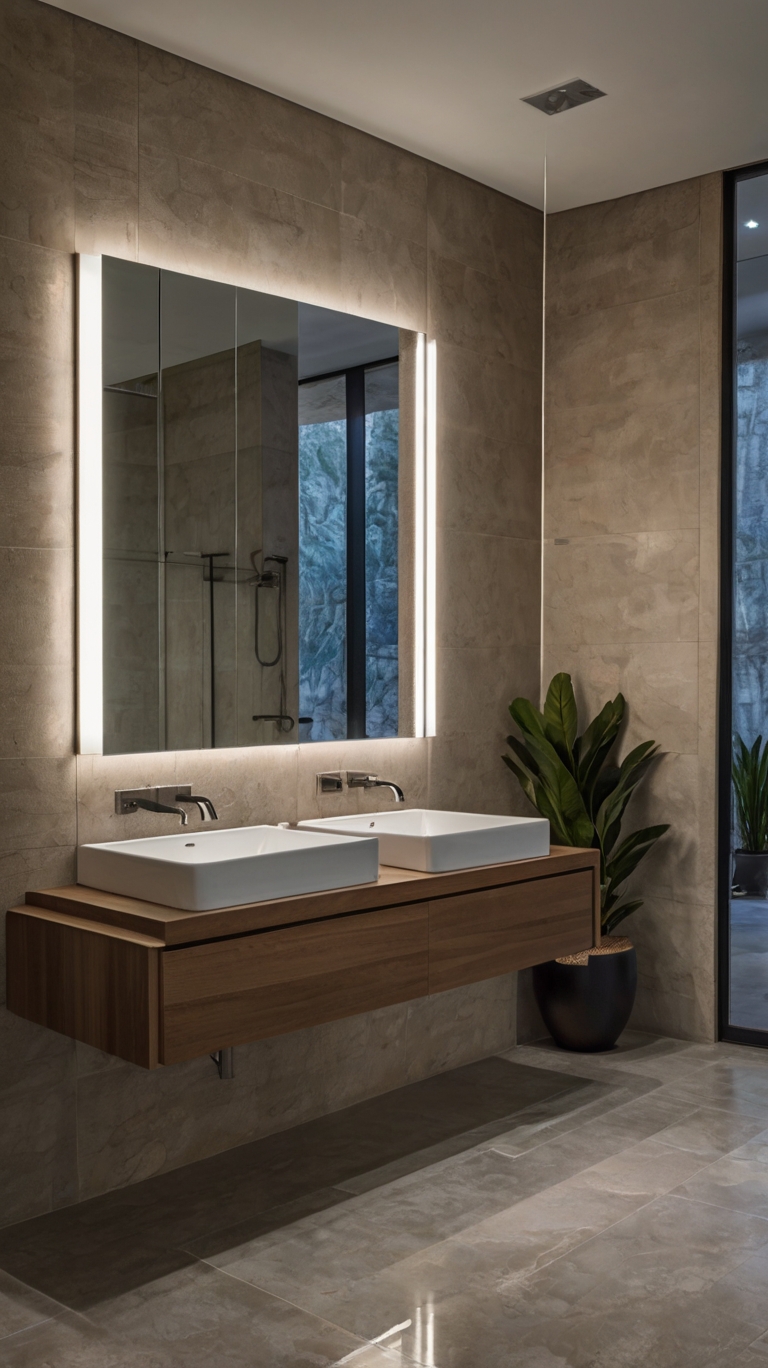
Also Read: 10 Chic Bathroom Wall Decor Ideas to Elevate Your Style
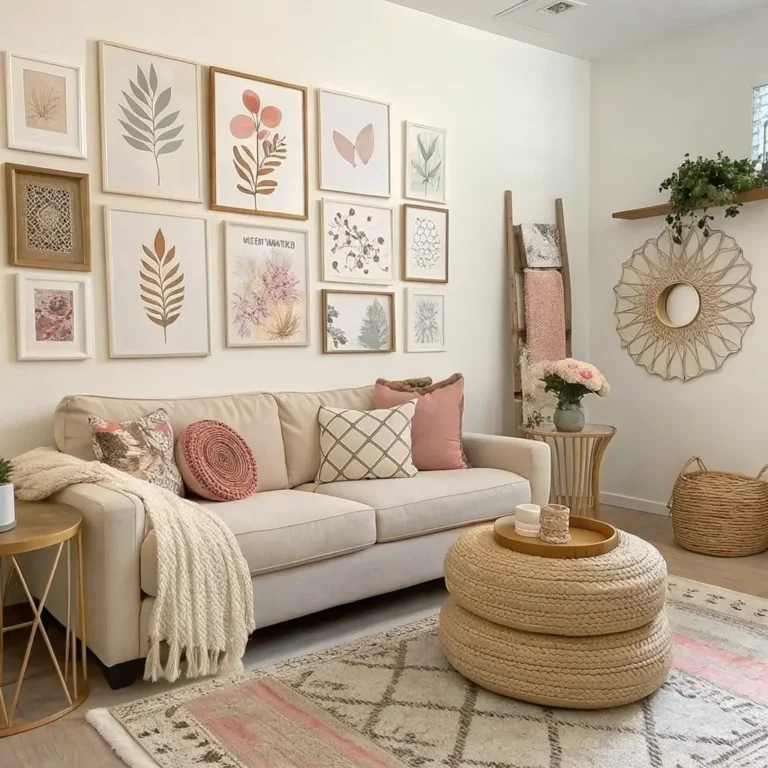
Minimalist Geometric Art

Finding the Balance Between Boring and Busy
Minimalist geometric art in hallways is like the perfect little black dress – it always works when done right. The challenge? Not making it so minimal that it disappears or so geometric that it gives people vertigo.
I went through my “I’m sophisticated now” phase where everything was black and white triangles. My friend said my hallway looked like a geometry textbook exploded. Fair point. Now I stick to 2-3 pieces max, with plenty of breathing room between them.
Color Schemes That Actually Work
Here’s what nobody tells you about geometric art in hallways: the lighting changes everything. That soft grey that looked perfect in the store? It’s basically invisible in my dimly lit corridor.
My current winning formula:
- One bold color against neutrals
- Stick to 3 colors maximum
- Include at least one metallic accent
- Make sure there’s actual contrast
Black, white, and gold is my go-to trilogy. It’s classic, doesn’t clash with anything, and looks expensive even when you DIY it (which, FYI, is totally doable).
DIY vs. Buying: The Real Talk
You can absolutely make your own geometric art. I’ve done it with painter’s tape and canvas, and people literally ask where I bought it. The secret is patience and really good tape.
But sometimes, buying makes more sense:
- When you find the perfect piece on sale
- If you’re artistically challenged (no shame!)
- When you want something specific and complex
- If DIY supplies cost more than buying
I mix both – two DIY pieces and one “investment” print. It keeps things interesting and doesn’t blow the budget.
Vintage Wall Sconces Display
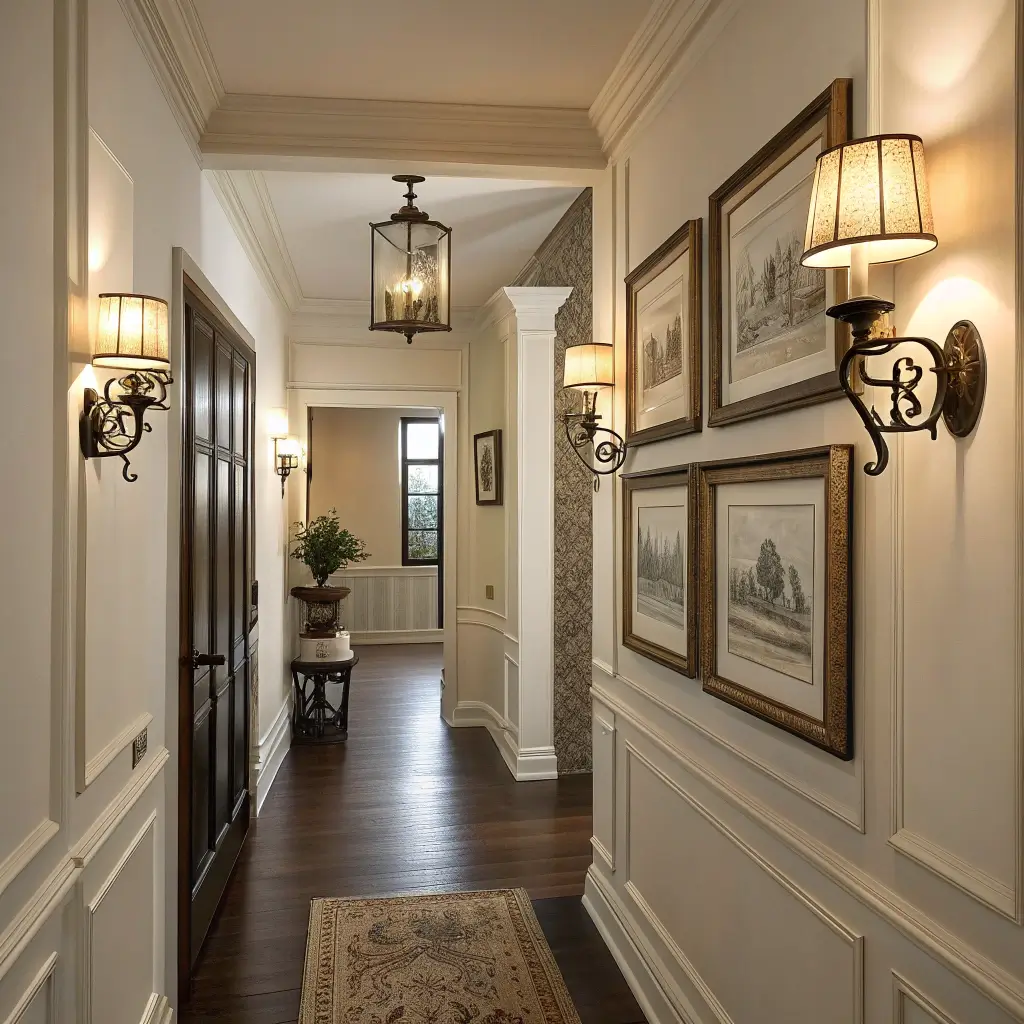
Creating Ambiance Without Rewiring Everything
Wall sconces in hallways are having a moment, and I’m here for it. But let’s be real – most of us aren’t rewiring our hallways for mood lighting. Battery-operated and plug-in sconces have come so far that nobody can tell the difference anymore.
I installed four vintage-style sconces in my hallway last year. Two are hardwired (came with the place), and two are battery-operated. Nobody has ever noticed which is which. The battery ones actually give off better light!
The Hunt for Perfect Vintage Pieces
Finding authentic vintage sconces is like treasure hunting, except the treasure might electrocute you if you’re not careful. Always check the wiring on actual vintage pieces – I learned this after buying gorgeous Art Deco sconces that turned out to be fire hazards.
My favorite hunting grounds:
- Estate sales (early bird gets the sconce)
- Facebook Marketplace (negotiate everything)
- Architectural salvage yards (pricey but worth it)
- Antique malls (hit or miss, mostly miss)
Mixing Periods Without Looking Confused
You don’t need matching sconces. In fact, matched sets can look boring in hallways. I mix Victorian with mid-century modern, and somehow it works. The trick is finding a common thread – maybe they’re all brass, or all have glass shades, or all have similar shapes.
Current hallway lineup:
- 1920s brass pharmacy sconce
- Pair of 1960s globe sconces
- Modern industrial cage light
They shouldn’t work together, but the brass finish ties everything together beautifully.
Framed Travel Posters
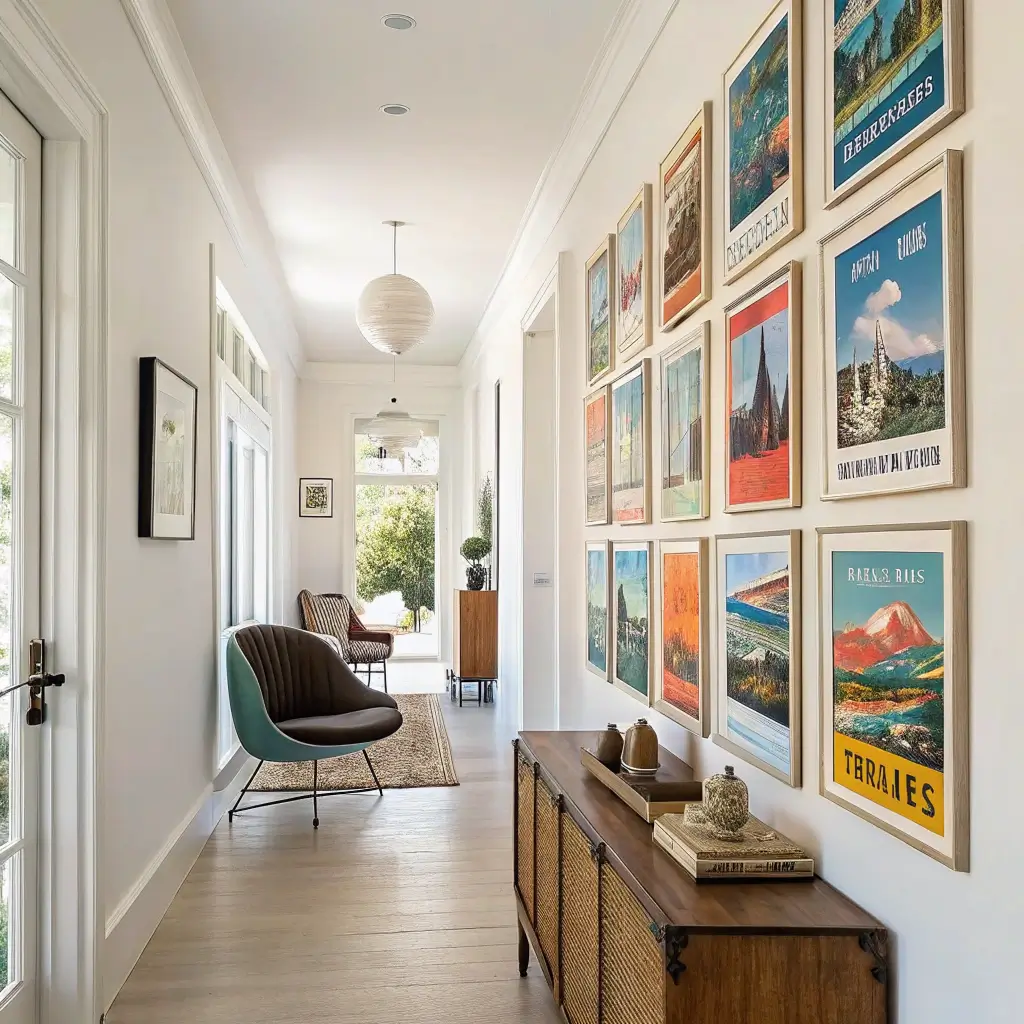
Beyond Basic Tourist Prints
Look, we’ve all seen those generic Paris/London/New York prints. They’re fine, but your hallway deserves better. Vintage travel posters have soul – they tell stories and spark conversations in ways that modern prints just don’t.
I started collecting vintage-style travel posters from places I’ve actually been. That sounds pretentious, but it makes each piece meaningful. My Turkish Airlines poster from 1970? Found it in an Istanbul flea market. The hand-painted Costa Rica surf poster? Bought from the artist on the beach.
Creating a Cohesive Collection
The key to multiple travel posters is finding your thread. Mine started accidentally – I kept buying posters with orange accents. Now it’s intentional, and the orange thread ties together posters from five continents.
Ways to unify your collection:
- Stick to one era (all 1950s, all Art Deco)
- Choose a color palette
- Frame everything identically
- Focus on one region or theme
- Mix sizes but keep proportions similar
The Frame Game for Maximum Impact
Cheap frames will murder your beautiful posters. I tried to save money with basic black frames from that Swedish furniture store. They looked exactly as cheap as they were. Invest in decent frames – your posters will thank you.
My go-to framing formula:
- Wide white mats for breathing room
- Natural wood or brass frames
- Museum glass if you can swing it (no glare!)
- Consistent frame style across all posters
The difference quality framing makes is insane. Those same posters that looked meh in cheap frames now look like gallery pieces.
Also Read: 10 Stunning Kitchen Wall Decor Ideas for Stylish Homes
DIY Wooden Wall Panels
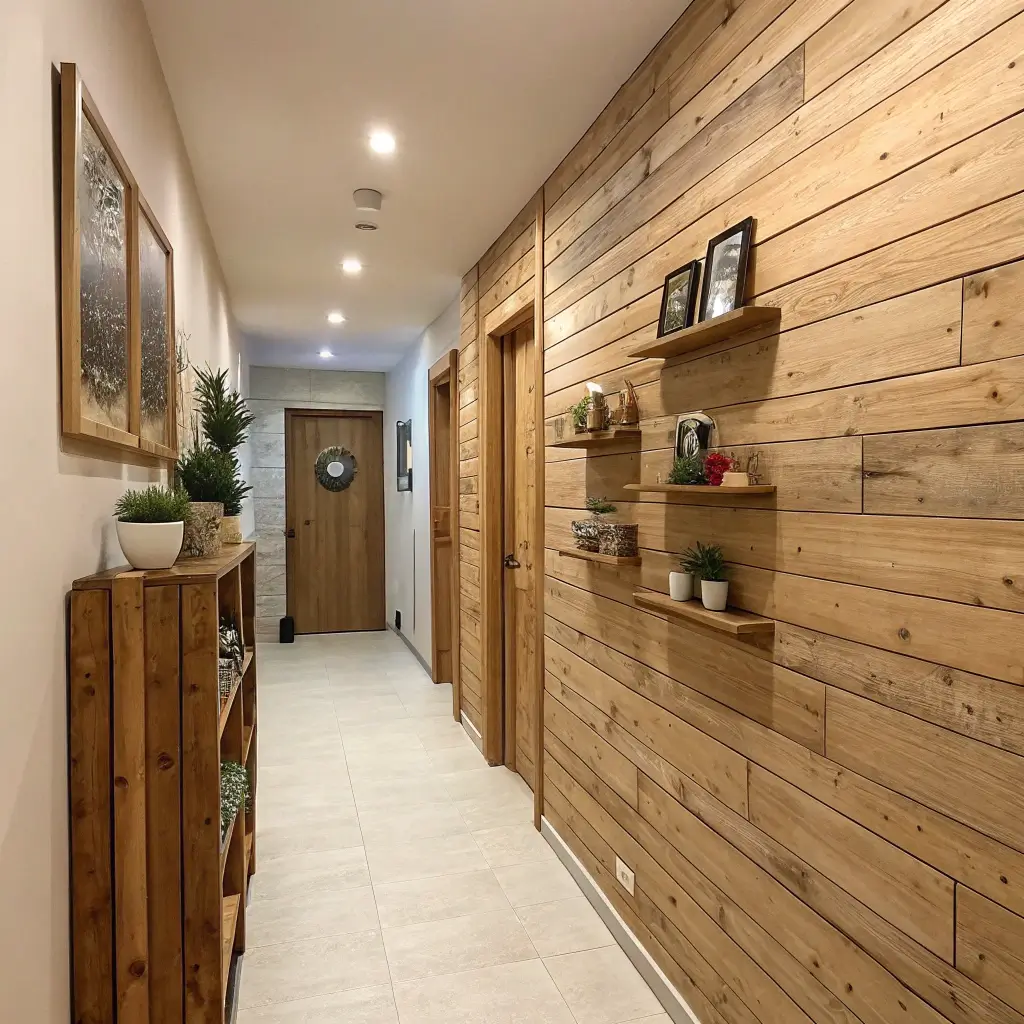
The Weekend Project That Actually Gets Done
Everyone talks about DIY wooden panels like they’re building a house. They’re not that complicated! I installed mine in one weekend, and I’m not particularly handy. The hardest part was deciding on the pattern.
Board and batten is the gateway drug of wall panels. It’s forgiving, looks expensive, and you really can’t mess it up too badly. I started there and now I’m eyeing more complex geometric patterns for the upstairs hallway.
Wood Selection Without Breaking the Bank
MDF is your friend here. I know, I know – real wood sounds better. But MDF is cheaper, easier to work with, and paints beautifully. Nobody walking through your hallway is going to tap on your panels to check if they’re solid oak.
My cost breakdown for a 12-foot hallway:
- MDF strips: $45
- Liquid nails: $8
- Caulk: $5
- Paint: Already had it
- Total: Under $60
Compare that to hiring someone ($500+) or buying real wood panels ($200+), and the choice is obvious.
Installation Tips from Someone Who Messed Up
Learn from my mistakes, please. I hung my first panel crooked and had to pry it off, taking paint and drywall with it. Use a level for everything. Not just the first piece – everything.
Critical steps I wish I’d known:
- Mark your studs first (yes, all of them)
- Cut all pieces before installing any
- Dry fit everything with tape
- Prime the MDF before installing
- Caulk every single seam (tedious but crucial)
The finished product looks like it came with the house. My mother-in-law asked who we hired. IMO, that’s the ultimate compliment :/
Seasonal Wall Decor Rotation
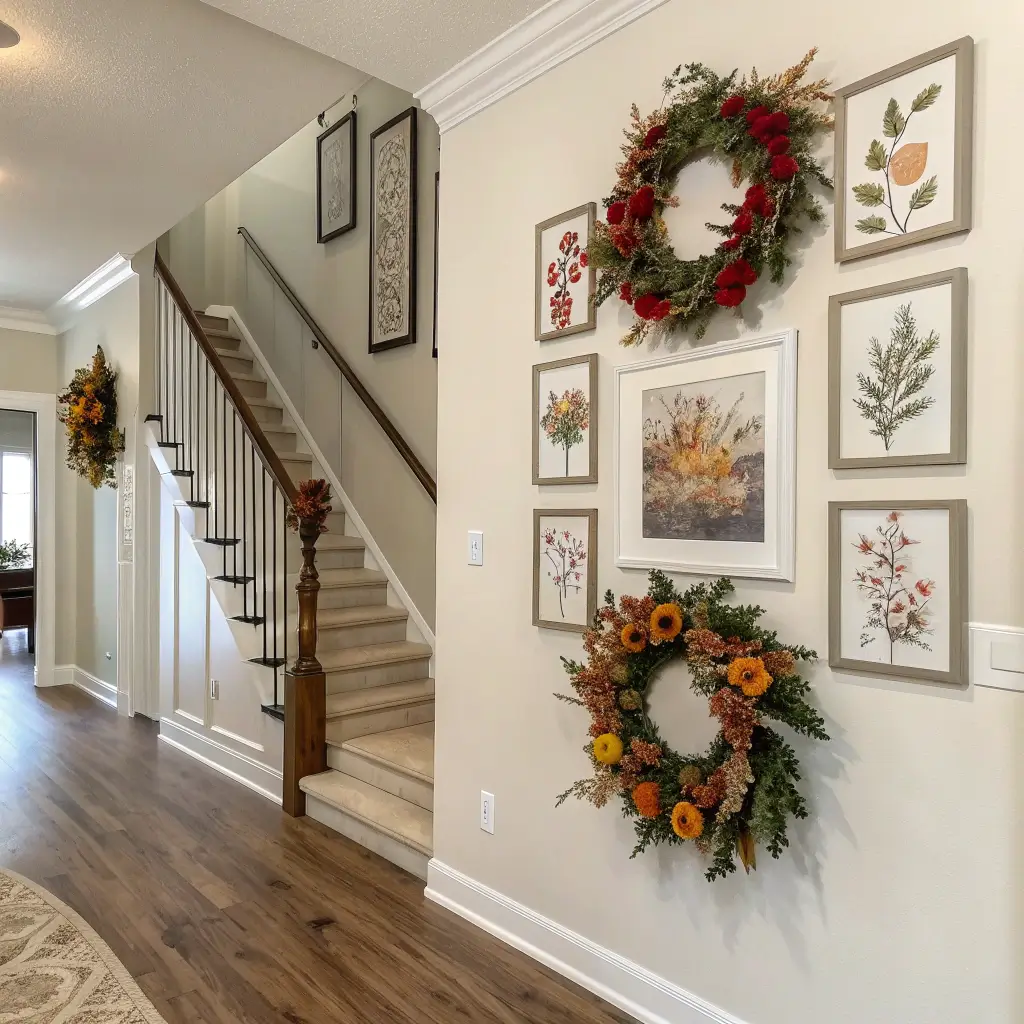
The Commitment-Phobe’s Dream Solution
Can’t decide on permanent decor? Welcome to my world. Seasonal rotation lets you change things up without the guilt of constantly redecorating. Plus, it gives you an excuse to shop for new stuff four times a year.
I use a command strip system that lets me swap art and decor without turning my walls into Swiss cheese. Spring botanical prints become summer beach scenes, then autumn leaves, then winter geometric patterns. It keeps the hallway fresh and gives me something to look forward to.
Storage Solutions That Don’t Suck
The downside of seasonal decor? Storage. I tried keeping everything in the attic until I realized I was too lazy to actually rotate things. Now everything lives in a slim closet organizer at the end of the hallway.
My system:
- Each season gets one storage box
- Label with photos of what’s inside
- Keep hanging hardware with each piece
- Store frames separately from prints
- One “transition” box for pieces that work year-round
Making Transitions Smooth
The secret to seasonal rotation is planning your transitions. I overlap seasons by a few weeks, gradually swapping pieces rather than doing everything at once. It feels more natural and way less overwhelming.
Current rotation schedule:
- March: Start adding spring elements
- June: Full summer swap
- September: Autumn creeps in
- December: Winter wonderland
This way, I’m never staring at snowflakes in April or pumpkins in January.
Patterned Wallpaper Accent
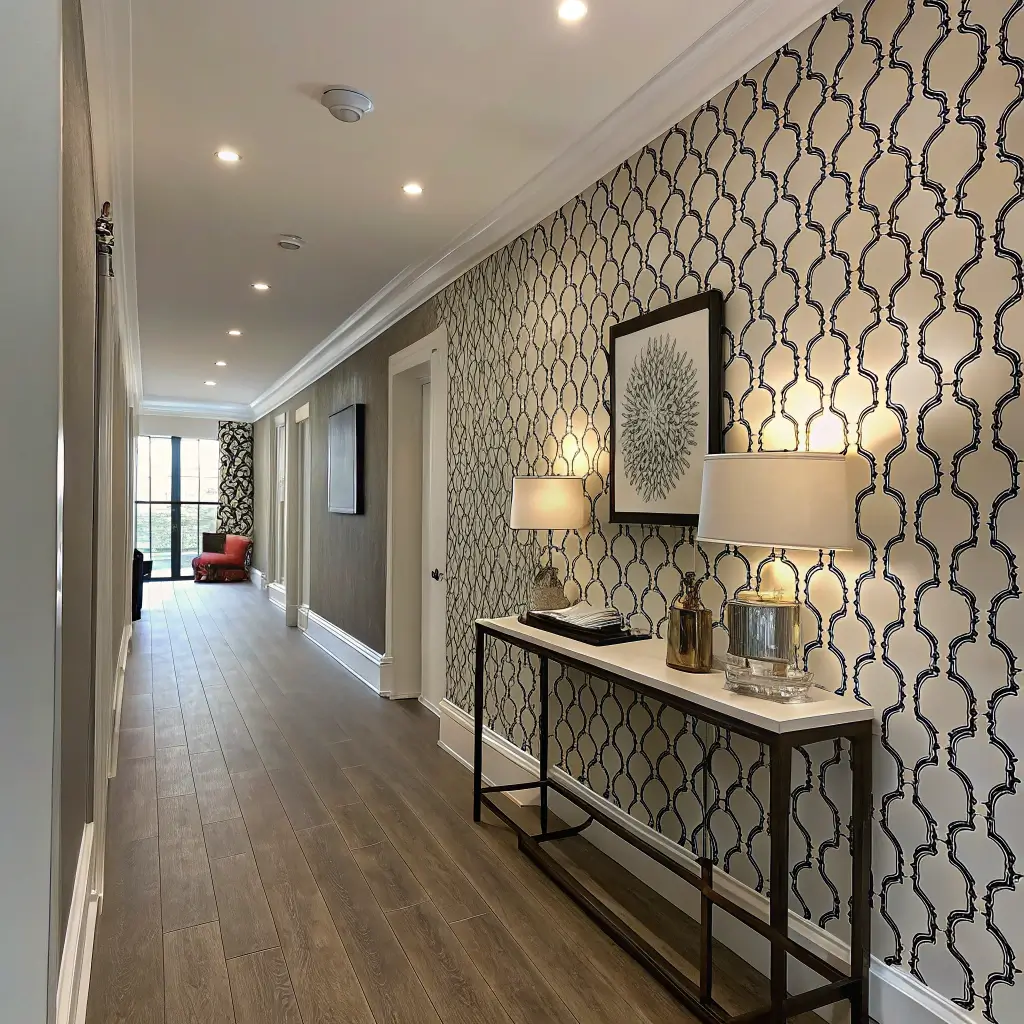
One Wall Wonder Strategy
Wallpapering an entire hallway is a commitment I’m not ready for. But one accent wall? That’s manageable. It adds personality without overwhelming the space or your budget.
I chose the wall at the end of my hallway – it’s what you see when you enter, so maximum impact. The pattern is bold geometric (sensing a theme here?) in navy and gold. It cost $120 for the wallpaper and took one afternoon to install.
Pattern Selection for Narrow Spaces
Hallways have rules when it comes to patterns. Large patterns in narrow spaces can feel claustrophobic. Tiny patterns can look busy and make people dizzy. Medium-scale patterns with vertical elements are your sweet spot.
Patterns that work:
- Vertical stripes (classic for a reason)
- Geometric with vertical flow
- Botanical with upward growth
- Abstract with movement
- Damask or medallion (if spaced well)
Peel and Stick vs. Traditional
I’m team peel-and-stick for hallways, and here’s why: hallways get beat up. Kids with backpacks, moving furniture, general life – traditional wallpaper is a pain to repair. Peel and stick? Just replace that section.
The quality has improved dramatically. My peel-and-stick wallpaper has survived two years, three parties, and one incident involving a skateboard (don’t ask). It still looks perfect.
Pros of peel-and-stick:
- Renter-friendly
- Easy to replace sections
- No commitment anxiety
- Actually stays up (if you prep right)
- Costs less than traditional + installation
Also Read: 10 Gorgeous Neutral wall decor Living Room ideas Wall Makeovers to Inspire Style
Wall-Mounted Planter Arrangement
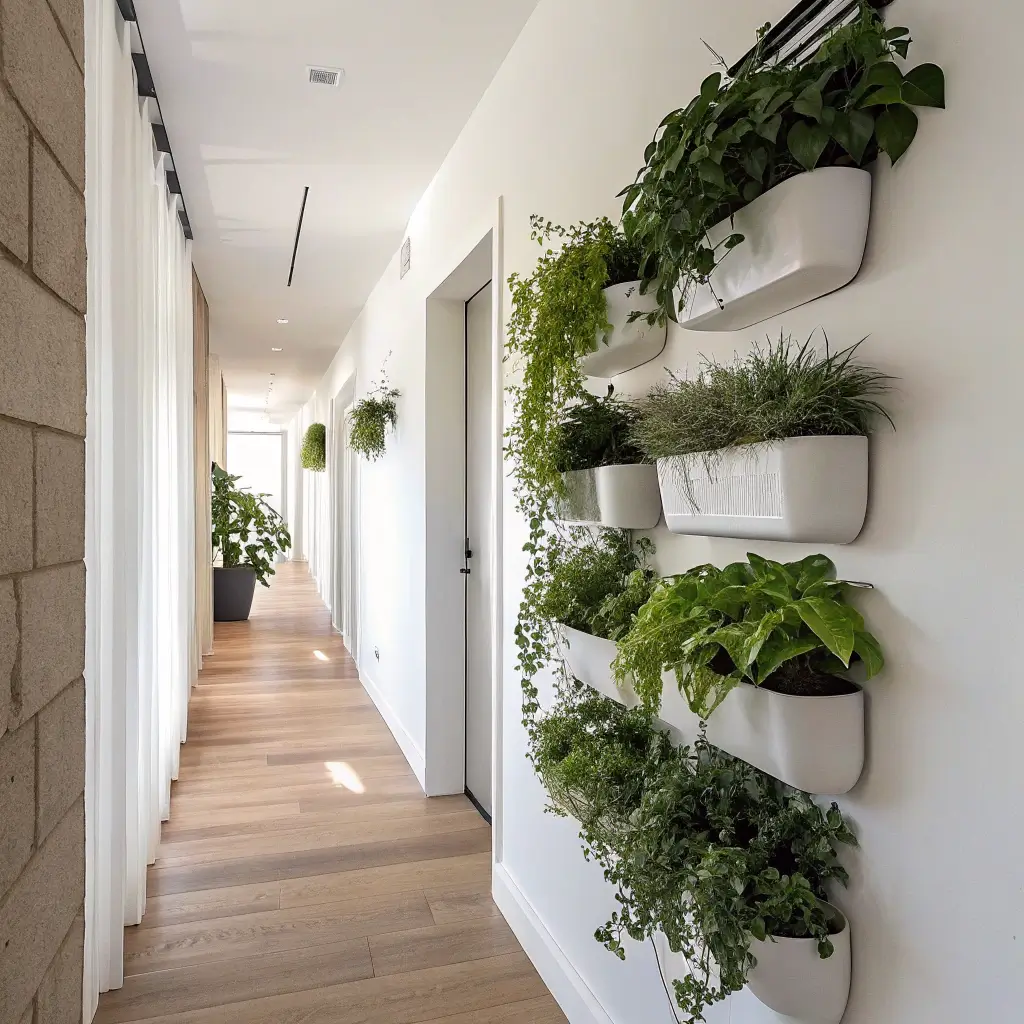
Vertical Gardens That Don’t Leak
The fear of water damage keeps people from wall planters. Valid concern! The secret is proper planning and the right planters. I use a combination of sealed planters and plants that barely need water.
My setup includes:
- Self-watering wall planters (game-changer)
- Ceramic pots with sealed saucers
- Macrame hangers at varying heights
- One trailing pothos that started small and now owns half the wall
Zero leaks in two years. The trick is removing plants for watering rather than watering them on the wall.
Creating Living Art Arrangements
Think of wall planters as 3D art that happens to be alive. The arrangement matters as much as the plants. I started with a grid pattern (boring), then evolved to an organic cluster that actually looks intentional.
My current arrangement philosophy:
- Odd numbers look more natural
- Vary heights dramatically
- Mix trailing and upright plants
- Include one statement planter
- Leave breathing room between groupings
Maintenance Reality Check
Wall-mounted planters need more attention than shelf plants. They dry out faster, collect dust, and can be awkward to maintain. But when they’re thriving? Absolutely worth it.
Weekly maintenance routine:
- Quick dust with a paintbrush
- Check soil moisture
- Rotate plants for even growth
- Trim dead leaves immediately
- Monthly deep water in the sink
The payoff is huge. Living walls make hallways feel alive and fresh. Plus, everyone assumes you’re some kind of plant wizard.
Pulling It All Together
So there you have it – ten ways to turn that sad hallway into something spectacular. You don’t need to do all of them (please don’t), but pick two or three that speak to you and start there.
My hallway journey started with one mirror and now it’s basically a gallery, greenhouse, and lighting showroom combined.
The best part about hallway decor? Nobody expects it. When guests see a decorated hallway, they know you’ve got your life together (even if you absolutely don’t). It’s the ultimate fake-it-till-you-make-it space.
Start small, have fun with it, and don’t take it too seriously. At the end of the day, it’s just a hallway – but it’s YOUR hallway, and it deserves to look good.
Trust me, once you start seeing your hallway as an actual room instead of just a thoroughfare, you’ll wonder why everyone doesn’t do this.
Now excuse me while I go rearrange my gallery wall for the fifth time this month. What? It’s called evolution, not indecision! 😉