10 Easy DIY Wall Decor Ideas to Transform Your Space
You know that feeling when you walk into someone’s home and their walls just speak to you? Yeah, I spent years living with blank walls wondering why my place felt like a waiting room. Then I discovered the magic of DIY wall decor, and let me tell you – it changed everything.
I’m about to share 10 ridiculously easy wall decor projects that’ll make your friends think you hired an interior designer. Spoiler alert: you won’t need fancy tools or a trust fund to pull these off. Just some creativity, basic supplies, and maybe a glass of wine for motivation (that last part’s optional but highly recommended).
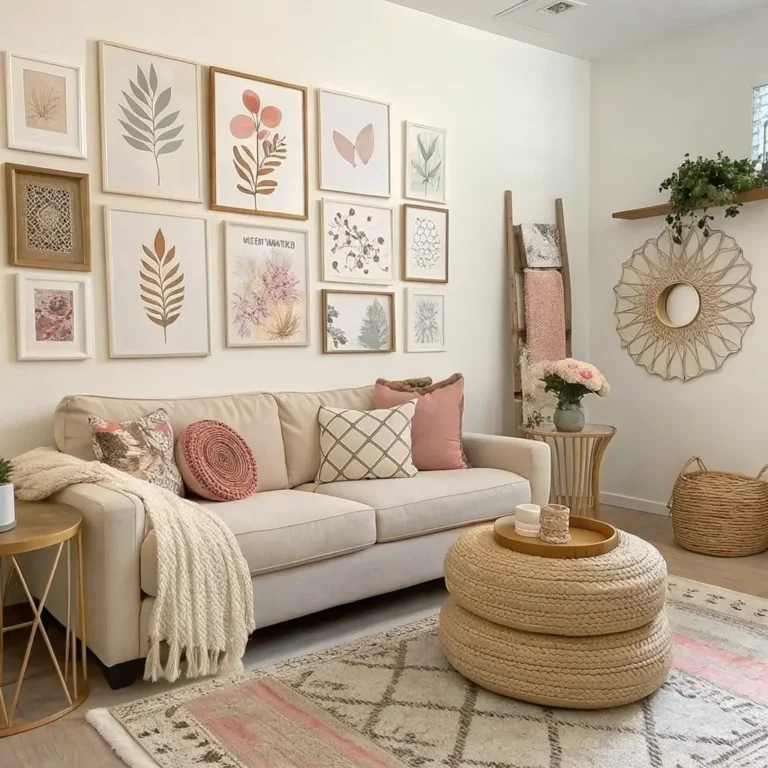
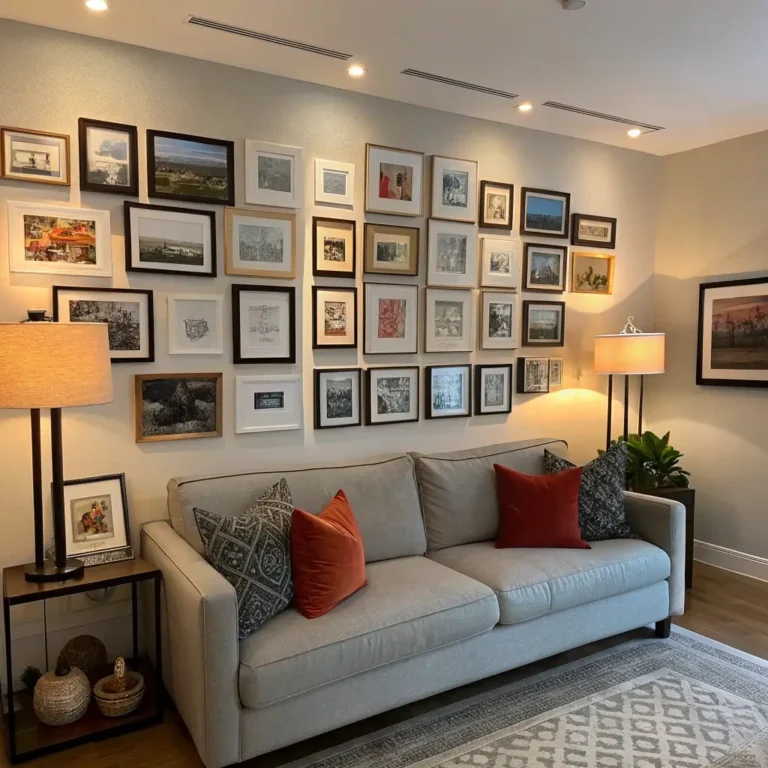
Rustic Wooden Frame Gallery Wall
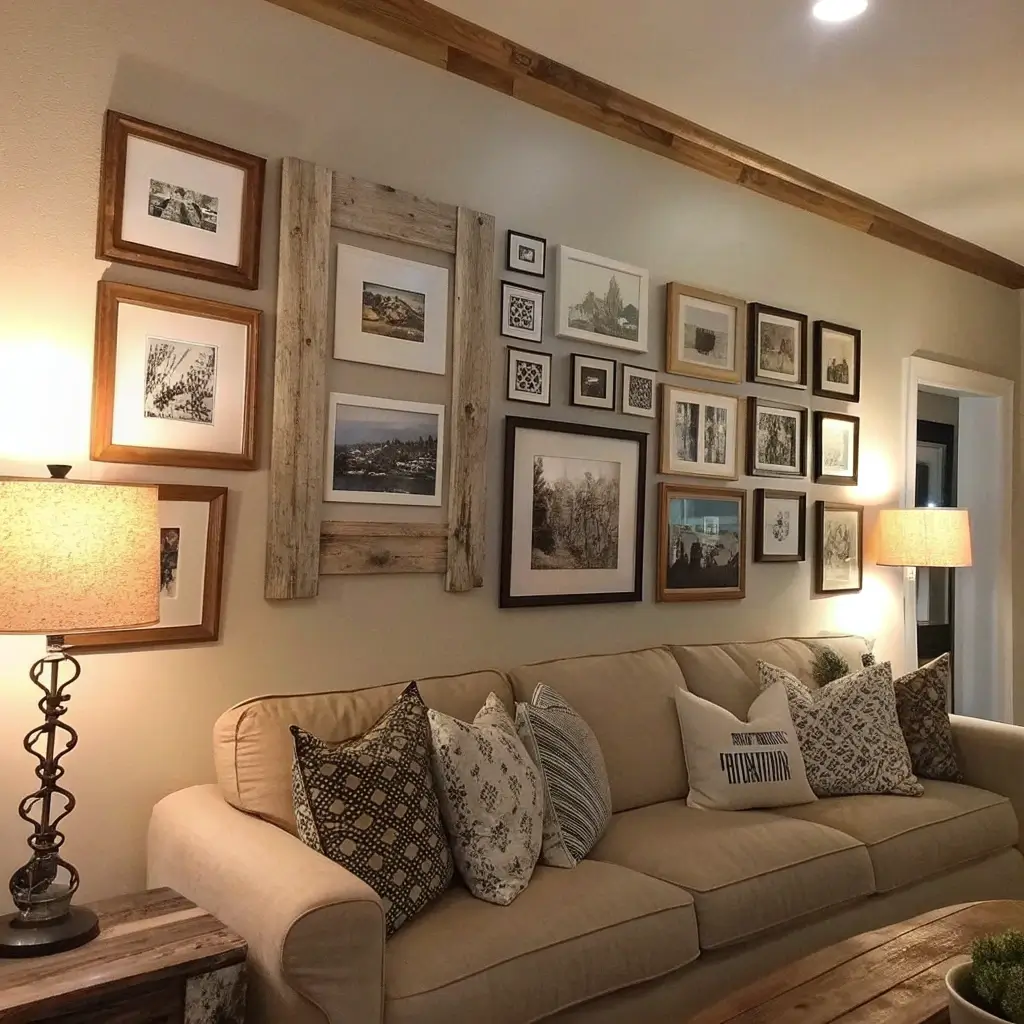
Why Gallery Walls Work Every Single Time
Remember when gallery walls were just for fancy museums? Well, those days are long gone, and thank goodness for that. Creating your own rustic wooden frame gallery brings instant personality to any room, and the best part? You control exactly what story it tells.
I started my first gallery wall with five mismatched frames from various thrift stores. The key here isn’t perfection – it’s character. You want frames that look like they’ve lived a little, maybe even survived a few garage sales.
Getting That Perfect Rustic Look
Here’s what makes rustic frames so special:
- Weathered wood textures that add depth
- Natural imperfections that tell a story
- Varying sizes that create visual interest
- Mixed finishes from light oak to deep walnut
Want to know a secret? I actually roughed up some new frames with sandpaper to get that weathered look. Just grab some 120-grit sandpaper and go to town on the edges and corners. Focus on areas that would naturally wear over time.
Planning Your Layout Like a Pro
Before you start hammering nails into your wall (learned that one the hard way), lay everything out on the floor first. I like to cut paper templates the size of each frame and tape them to the wall. This way, you can rearrange without turning your wall into Swiss cheese.
Pro tip: Keep about 2-3 inches between frames for breathing room. Too close and it looks cramped; too far and you lose that cohesive gallery feel. And please, for the love of all things holy, use a level. Crooked frames will haunt you every time you walk past them.
Floating Shelves with Mini Planters
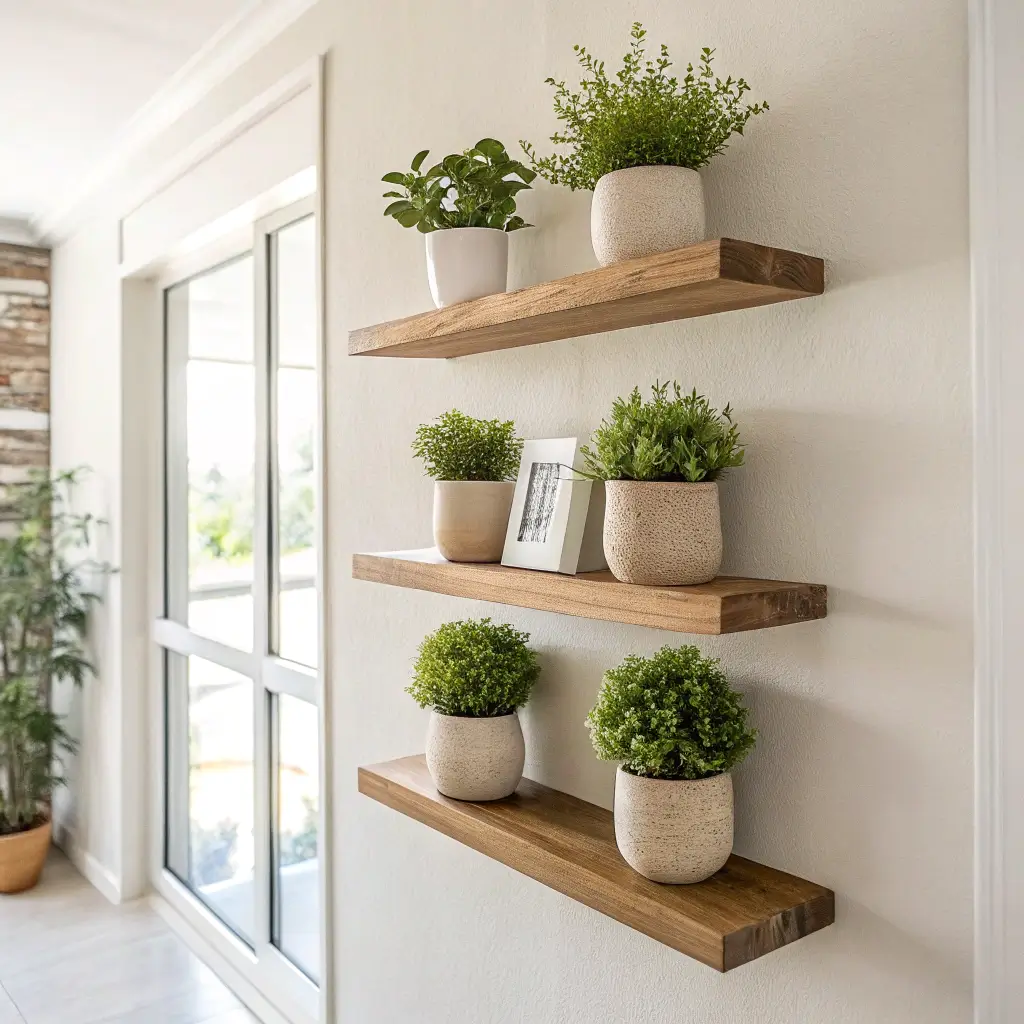
The Plant Parent’s Dream Display
Who says walls are just for hanging things? Floating shelves with mini planters bring life – literally – to your vertical spaces. I’ve killed my fair share of houseplants (RIP, countless succulents), but this setup actually makes plant care easier because everything’s at eye level.
Start with sturdy floating shelves that can handle the weight of your planters plus water. I learned this lesson when my first cheap shelf started sagging after a month. Now I always spring for brackets rated for at least 20 pounds per foot.
Choosing Your Green Companions
Not all plants play nice on shelves. Here are my tried-and-true winners:
- Pothos – practically indestructible and trails beautifully
- Snake plants – thrives on neglect (my kind of plant)
- Air plants – no soil needed, how cool is that?
- Small succulents – just don’t overwater them like I did
Mix different heights and textures for visual interest. I pair tall, spiky plants with trailing varieties and throw in a few colorful pots for good measure. The result? An Instagram-worthy plant wall that actually survives.
Styling Your Shelf Garden
Don’t just line up your plants like soldiers. Stagger them at different depths and add some non-plant elements too. I tuck in small framed photos, crystals, or tiny sculptures between the greenery. It creates layers and prevents that “plant shop display” look.
Geometric Tape Wall Art
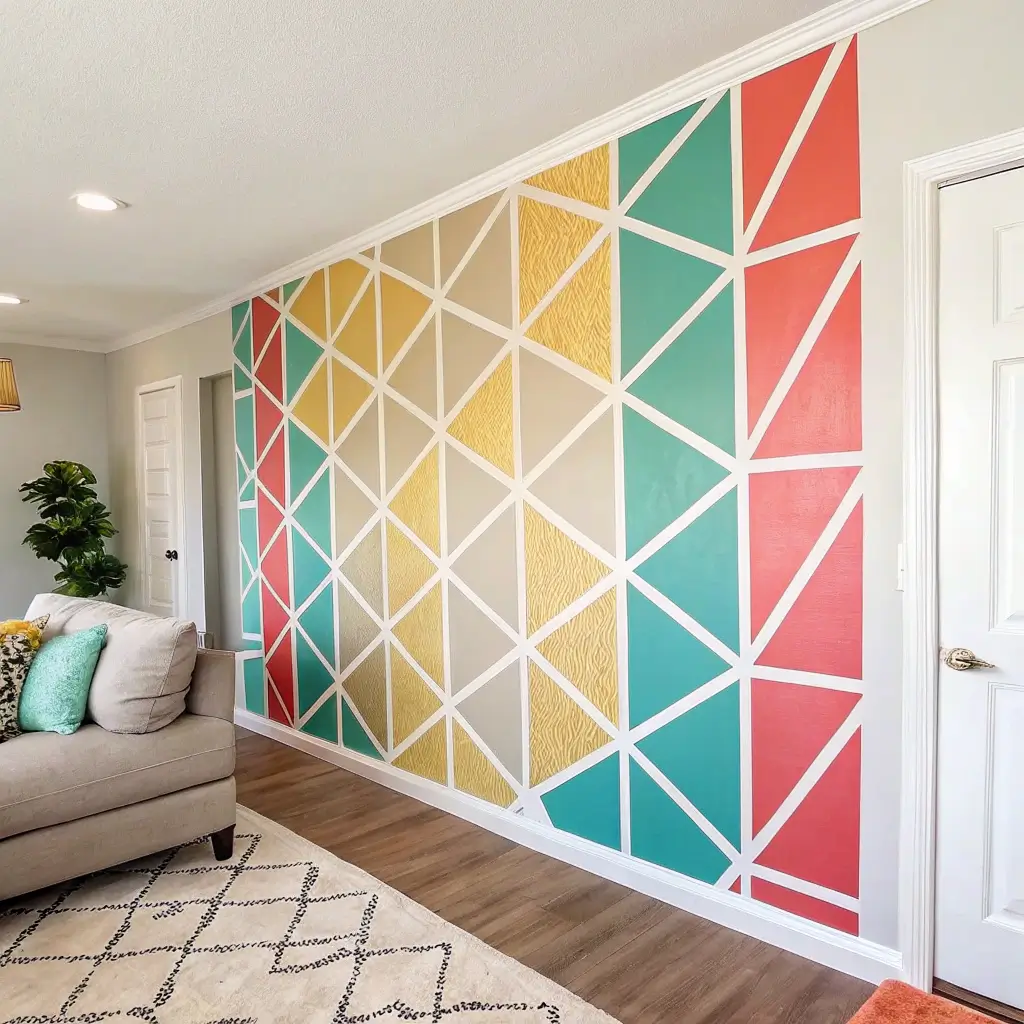
When Paint Feels Too Permanent
Ever wanted to try a bold wall design but chickened out because paint feels so… final? Enter geometric tape art – the commitment-phobe’s answer to accent walls. I discovered this technique when I was renting and desperately wanted to add personality without losing my security deposit.
The beauty of tape art? You can create complex patterns that would cost hundreds if done by a professional painter. Plus, if you hate it, just peel it off. No harm, no foul.
Creating Your Design Without the Drama
Start with painter’s tape or washi tape (FYI, washi tape comes in way cooler colors). Map out your design with pencil marks first – trust me, winging it rarely ends well. I once tried to freestyle a design and ended up with something that looked like a geometry test gone wrong.
Essential tips for tape success:
- Press down edges firmly to prevent bleeding
- Use a credit card to smooth out bubbles
- Remove tape at a 45-degree angle when you’re done
- Work in sections to avoid overwhelming yourself
Pattern Ideas That Actually Work
Triangles are your gateway drug into geometric art. Start simple with a mountain range effect or scattered triangles. Once you nail that, graduate to hexagons or chevron patterns. I spent an entire weekend creating a honeycomb pattern in my hallway, and honestly? Best weekend ever.
Also Read: 15 DIY Wall Decor Ideas to Transform Your Space
Macramé Wall Hangings
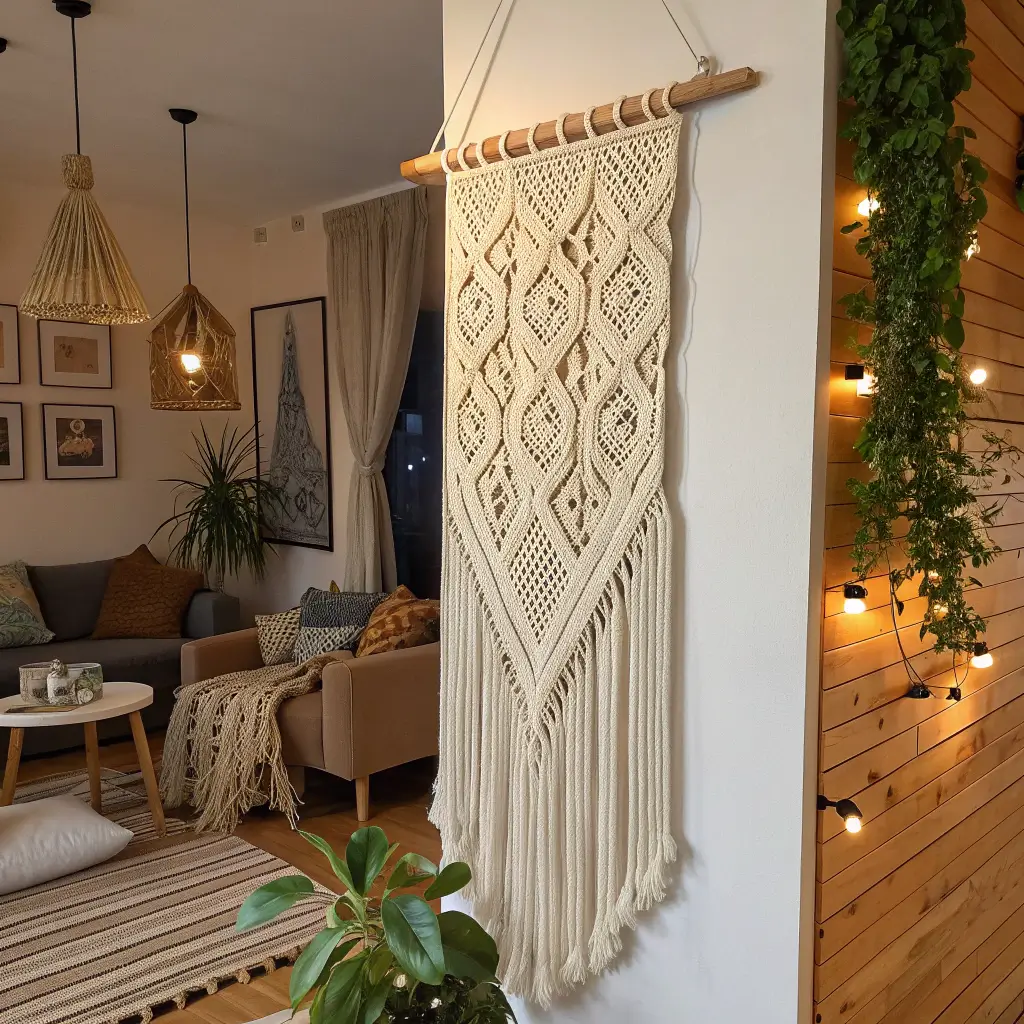
The Boho Trend That Refuses to Die
Macramé had its moment in the ’70s, disappeared for a while, and now it’s back with a vengeance. And you know what? I’m here for it. Modern macramé wall hangings add texture and warmth that paintings just can’t match.
I’ll admit, my first attempt looked like a tangled fishing net. But once you learn the basic knots (there are really only like three you need to know), it becomes almost meditative. Plus, it’s the perfect activity for binge-watching your favorite shows.
Mastering the Basics Without YouTube University
The essential knots you actually need:
- Square knot – your bread and butter
- Half hitch – for those diagonal patterns
- Gathering knot – to finish things off nicely
Start with cotton cord – it’s forgiving and doesn’t show mistakes as much as jute or hemp. I keep mine simple with natural cream colors, but I’ve seen people create rainbow pieces that look absolutely stunning.
Sizing and Placement Secrets
Here’s something nobody tells you: scale matters more than complexity. A simple large piece makes a bigger impact than an intricate tiny one. I hang mine above the couch or bed where it can really command attention. Just make sure your dowel or branch is level (there’s that level again – seriously, buy one).
DIY Canvas Paintings with Metallic Accents
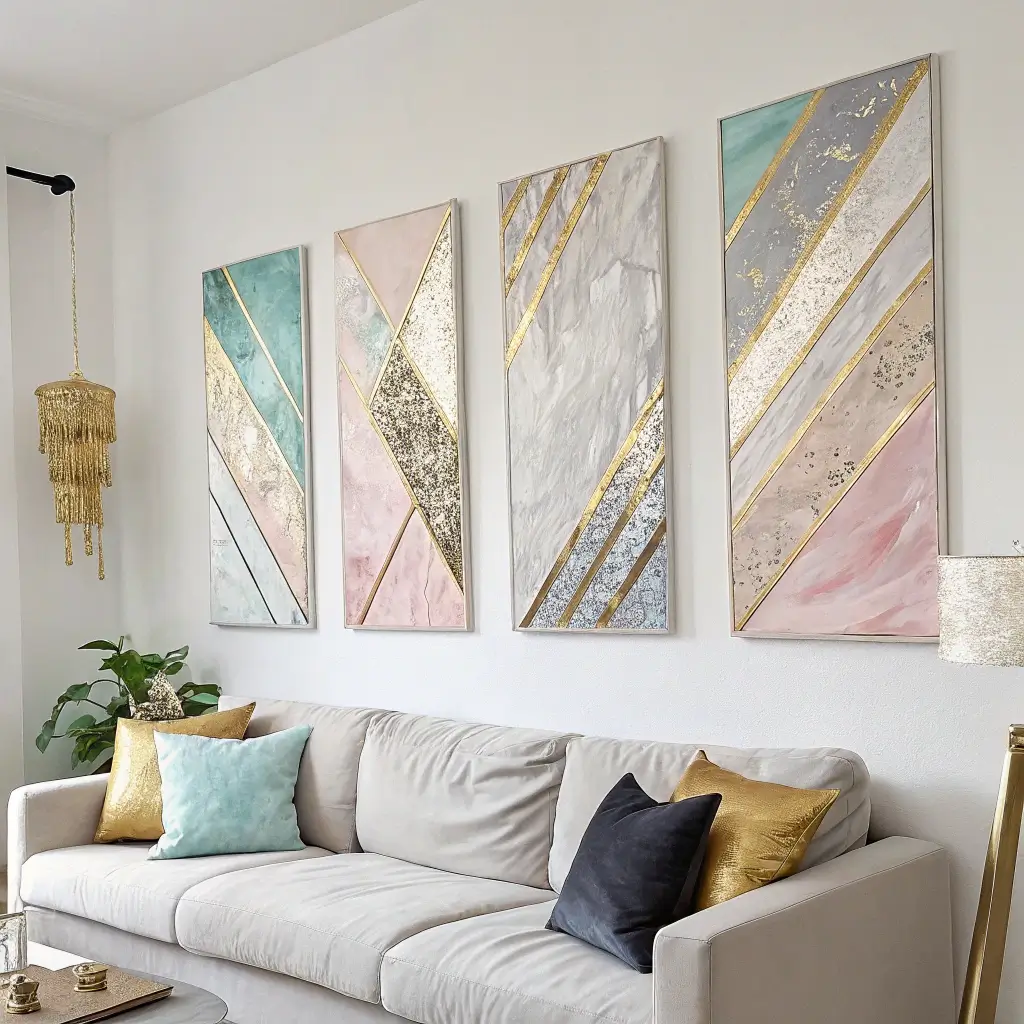
Abstract Art for People Who “Can’t Paint”
Let’s bust a myth right now: you don’t need artistic talent to create stunning canvas art. Abstract paintings with metallic accents look expensive and sophisticated, but they’re basically controlled chaos with some shiny bits thrown in.
I discovered this during a wine and paint night that went off-script. Instead of attempting the instructor’s landscape, I just started throwing paint around. Added some gold leaf, and suddenly everyone wanted to know where I bought it. 🙂
The Foolproof Technique
Here’s my go-to method:
- Start with a base coat in a neutral color
- Add abstract shapes with 2-3 complementary colors
- Let it dry completely (patience is key here)
- Apply metallic accents with a small brush or sponge
- Seal everything with a clear coat
The metallic paint catches light differently throughout the day, making your piece look dynamic and alive. I use copper for warm rooms and silver for cooler spaces.
Working with Metallic Paints Like a Boss
Quality matters when it comes to metallic paints. The cheap stuff looks… well, cheap. Spring for the good stuff – you’re not using much anyway. I also discovered that applying metallics with a palette knife instead of a brush creates amazing texture.
Washi Tape Quote Wall

Words That Actually Inspire (Not Just Decorate)
We’ve all seen those “Live, Laugh, Love” decals, right? But what if you could create custom quote art that actually means something to you? Washi tape quote walls let you spell out whatever speaks to your soul, whether that’s Shakespeare or Schitt’s Creek.
I have “But First, Coffee” spelled out above my kitchen coffee station. Judge me all you want, but it makes me smile every morning. The beauty of washi tape? When that quote stops resonating, you just peel it off and start fresh.
Choosing Fonts Without Going to Design School
You don’t need perfect handwriting for this. Print out your quote in a font you love, trace it onto the wall lightly with pencil, then apply tape following your lines. I use:
- Sans serif fonts for modern vibes
- Script fonts for romantic feels
- Block letters for bold statements
Keep letter spacing consistent – nothing ruins a quote faster than wonky spacing. I use a ruler as a guide to keep everything aligned.
Placement That Makes Sense
Location matters as much as the quote itself. Motivational quotes work great in home offices or gyms. Funny sayings belong in bathrooms or kitchens. Bedroom quotes should be calming (learned that after putting “Hustle Harder” above my bed – not conducive to sleep).
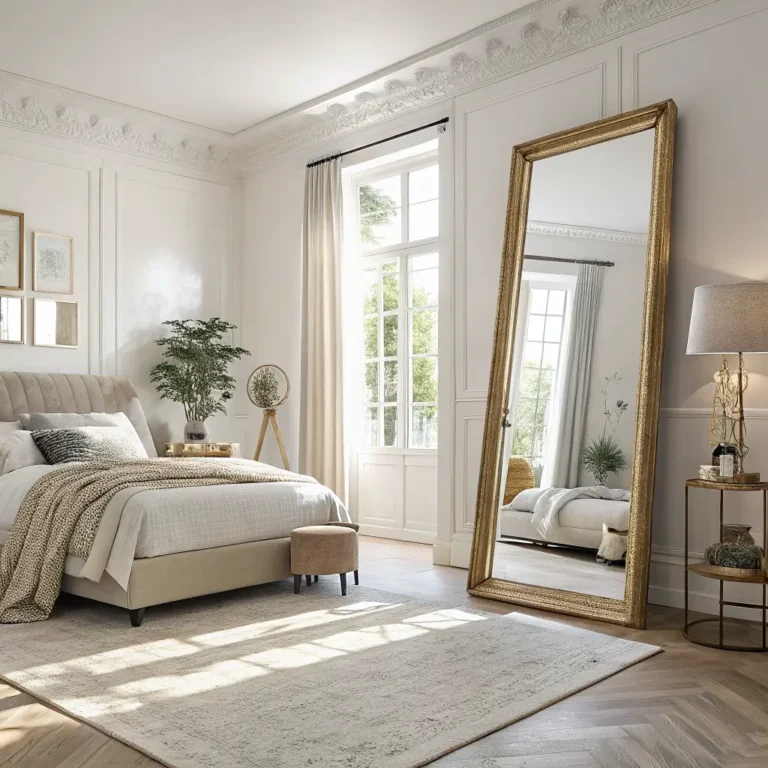
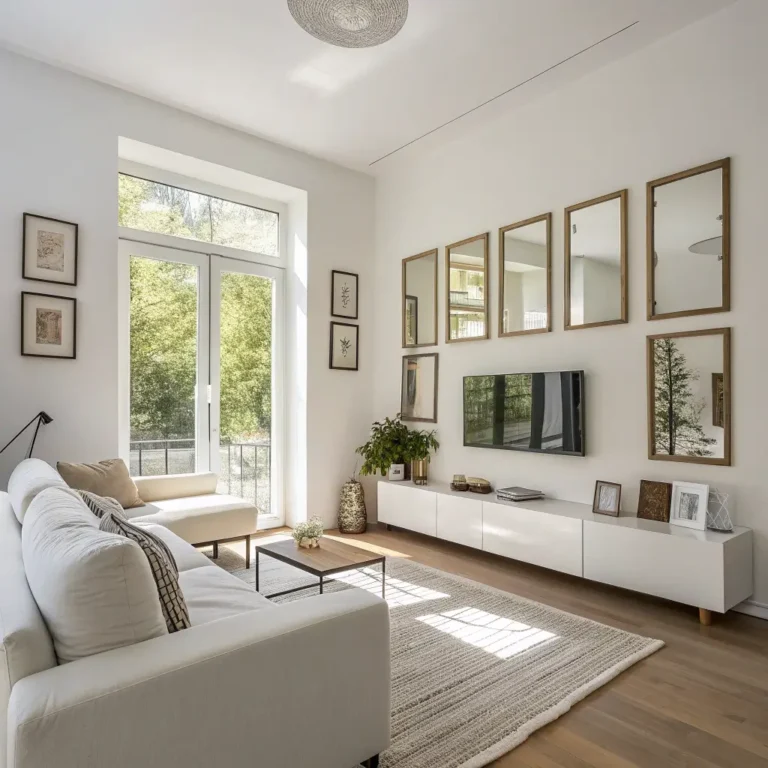
Also Read: 10 Stunning Mirror Wall Decor Ideas to Brighten Your Home
Upcycled Pallet Photo Display
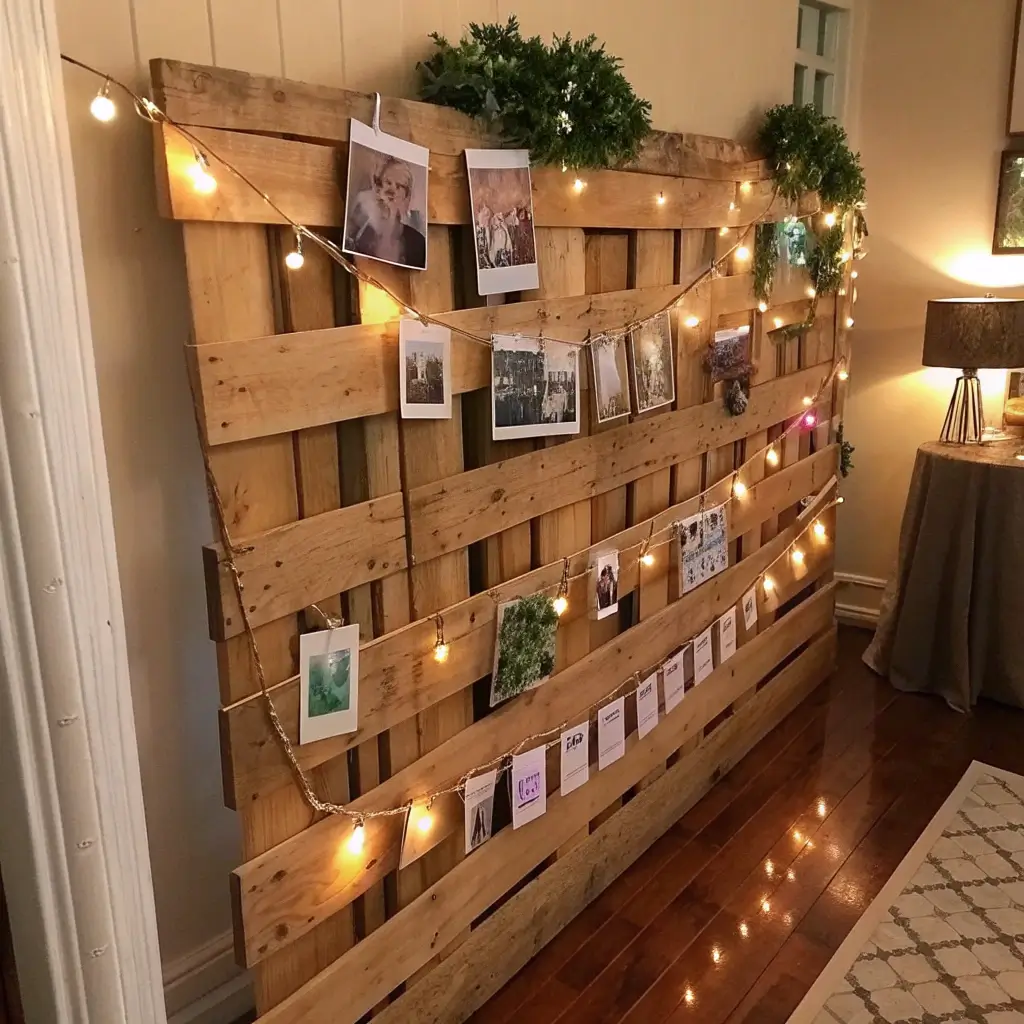
Turning Trash into Photographic Treasure
Pallets are everywhere – behind stores, on Craigslist, probably in your neighbor’s garage. Transforming them into photo displays gives you rustic charm while keeping memories front and center. Plus, you get major eco-friendly points.
My first pallet project started when I found one behind a local grocery store. After some sanding (wear a mask, trust me) and staining, it became the focal point of my living room. Now people think I shop at fancy reclaimed wood stores. If only they knew!
Prepping Pallets Without Splinter City
Safety first, folks. Here’s your pallet prep checklist:
- Sand thoroughly with progressively finer grits
- Check for loose nails or staples
- Clean with TSP or degreaser
- Apply wood conditioner before staining
- Seal with polyurethane for durability
Don’t skip the sanding unless you enjoy pulling splinters out of your fingers. I speak from painful experience here.
Creative Display Methods
Forget basic photo hanging. Try these instead:
- Wire and clothespins for easy swapping
- Small shelves attached between slats
- Magnetic strips with metal photo corners
- Twine grid for a more organic look
I change my photos seasonally, which keeps the display fresh and gives me an excuse to print new memories. IMO, physical photos beat digital frames every time.
Boho Fabric Wall Panels
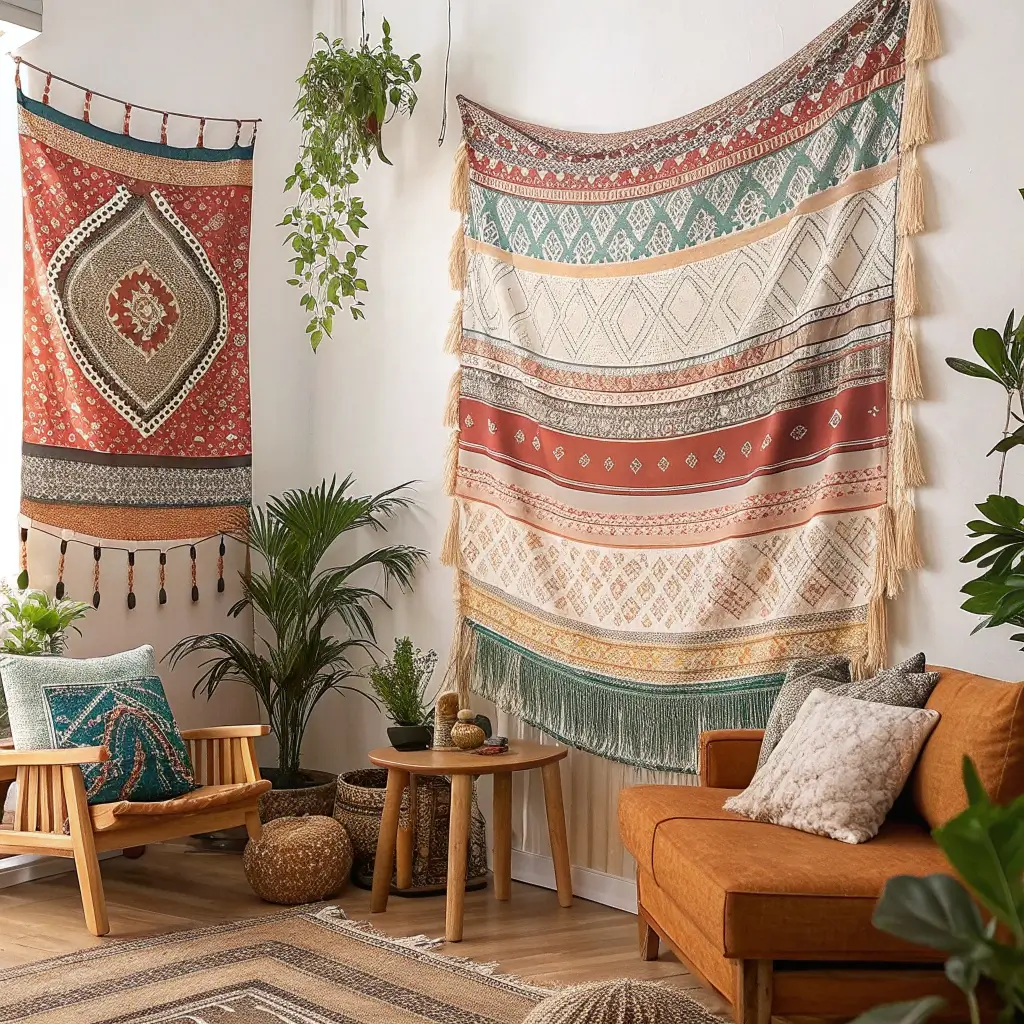
Soft Art for Soft Aesthetics
Fabric wall panels solve two problems: blank walls and terrible acoustics. Ever notice how empty rooms echo? Fabric panels absorb sound while adding color and pattern. It’s basically functional art, and we love a multitasker.
I made my first set for my home office after realizing my Zoom calls sounded like I was broadcasting from a cave. Now my walls look amazing AND my audio quality rocks. Win-win!
Choosing Fabrics That Won’t Disappoint
Not all fabrics are created equal for wall panels:
- Canvas or duck cloth for durability
- Upholstery fabric for rich textures
- Tapestry material for bold patterns
- Linen for that effortless boho vibe
Skip anything too thin or stretchy. You want fabric that holds its shape without sagging over time. I learned this after my jersey knit panels started looking droopy after a month. :/
Building Panels That Stay Put
The frame is everything. I use canvas stretcher bars from the art store – they’re cheap and already have the right corners. Stretch your fabric tight (like, really tight) and staple gun it to the back. Add picture hanging hardware, and you’re golden.
For a softer look, add batting behind the fabric. This creates a padded, luxurious appearance that also boosts the sound-dampening effect.
String Art Inspirational Words
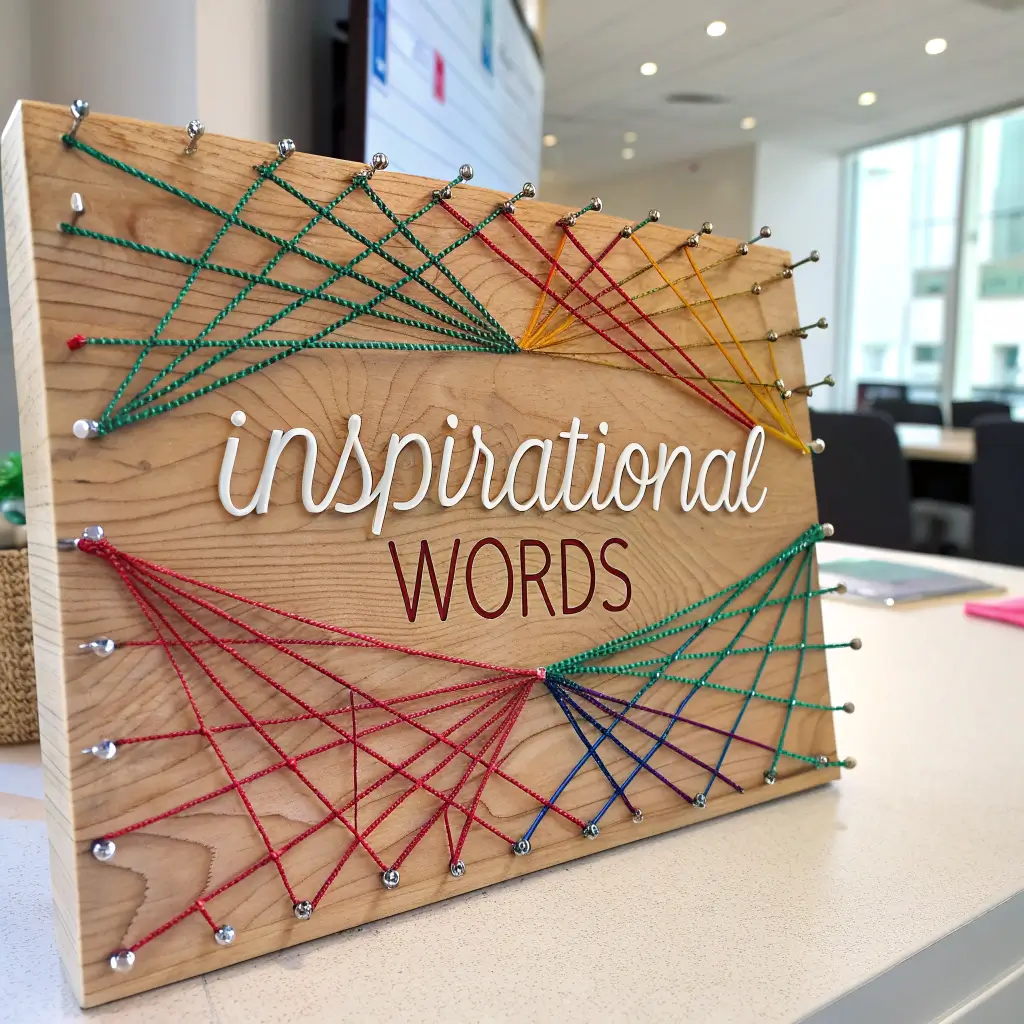
Threading Your Way to Wall Art Glory
String art looks complicated, but it’s secretly one of the easiest DIY projects ever. Pick a word, hammer some nails, wrap some string, and boom – custom typography art that looks like you paid big bucks for it.
My gateway drug into string art was a simple ampersand for our bedroom. Three hours and one slightly sore thumb later (missed the nail, hit the finger), I had a piece that still gets compliments years later.
The Setup That Saves Your Sanity
Here’s what you actually need:
- Wood board (sand and stain it first)
- Small nails (1-inch works perfectly)
- Embroidery thread or thin string
- Paper template of your word
- Hammer (obviously)
- Patience (the most important supply)
Print your word at the size you want, tape it to the board, and hammer nails along the outline about ½ inch apart. Remove the paper, then start wrapping string from nail to nail. There’s no wrong way to wrap – random patterns often look the best.
Color Combinations That Pop
Contrast is your friend here. Dark wood with bright string, or light wood with deep colors. I’ve done neon pink string on black-stained wood that literally stops people in their tracks. Don’t be afraid to use multiple colors in one piece either – gradient effects look absolutely stunning.
Also Read: 10 Beautiful TV Wall Decor Ideas for a Stylish Home
Hanging Herb Garden Wall
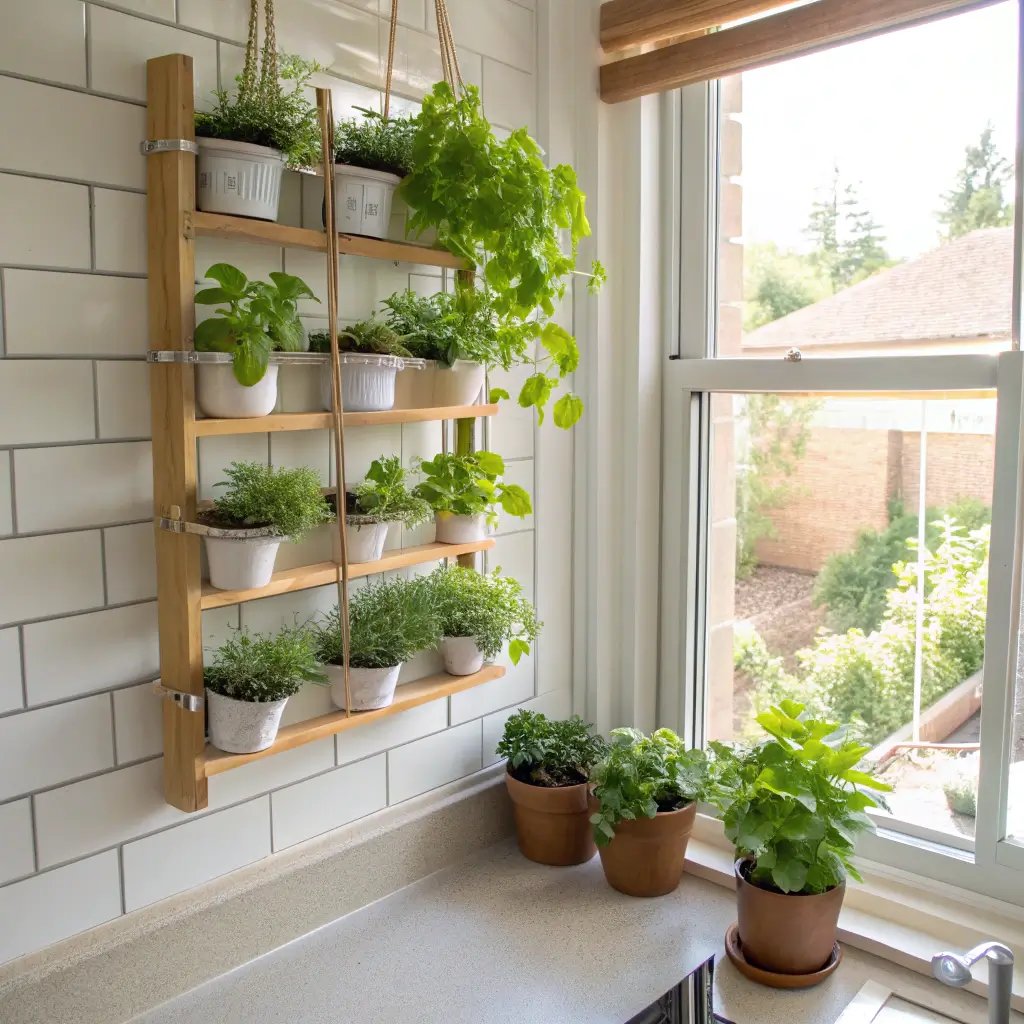
Fresh Herbs and Fresh Style
Why should outdoor gardens have all the fun? A hanging herb garden wall brings fresh flavors to your kitchen while solving the “what do I put on this wall” dilemma. Plus, nothing beats grabbing fresh basil for your pasta without leaving the house.
I started mine after killing yet another grocery store basil plant on my windowsill. Turns out, hanging them on the wall near my kitchen window gives them better light and makes me remember to actually water them. Revolutionary, I know.
Container Solutions That Actually Work
Forget those Pinterest-perfect mason jar gardens (unless you enjoy root rot). Here’s what really works:
- Wall-mounted planters with drainage holes
- Vertical pocket planters in felt or canvas
- Individual terra cotta pots on floating shelves
- Repurposed tin cans with drainage added
Whatever you choose, drainage is non-negotiable. I learned this after my first mason jar herb garden turned into a science experiment in anaerobic bacteria. Not cute.
Herbs That Thrive Indoors
Some herbs are drama queens indoors. Stick with the easy-going ones:
- Basil – grows like crazy with enough light
- Mint – actually better contained indoors
- Chives – practically indestructible
- Parsley – slow but steady
- Oregano – surprisingly low maintenance
Position your herb wall where it gets at least 4-6 hours of sunlight. South-facing windows are gold, but east-facing works too. Just avoid north-facing walls unless you want to invest in grow lights.
Styling Your Edible Wall Art
Mix herbs with different leaf textures and heights for visual interest. Label your plants with cute tags or painted markers – trust me, oregano and marjoram look identical when they’re small. I arrange mine by height, with trailing herbs like thyme on top shelves and bushy ones like basil at eye level.
Bringing It All Together
So there you have it – ten ways to transform your walls from boring to brilliant without selling a kidney or hiring a pro. The best part about these projects? They’re all completely customizable to your style, skill level, and budget.
Start with one project that speaks to you. Maybe it’s the instant gratification of geometric tape art, or perhaps you’re ready to tackle that gallery wall you’ve been pinning for years. Whatever you choose, just start. Your walls are begging for some personality, and now you’ve got ten ways to deliver.
Remember, the goal isn’t perfection – it’s creating a space that feels like you. My walls are covered in slightly crooked frames, not-quite-symmetrical string art, and herbs that occasionally look a bit sad. But every piece has a story, every project taught me something, and together they make my house feel like home.
What wall are you going to tackle first? Whatever you choose, embrace the imperfections, enjoy the process, and don’t forget to step back and admire your handiwork. You’ve earned those bragging rights!