10 Inspiring Nursery Wall Decor Ideas for Modern Parents
Look, I get it. You’re staring at those blank nursery walls like they personally offended you, aren’t you? Trust me, I’ve been there—coffee in one hand, Pinterest board open on my phone with approximately 847 saved nursery ideas, wondering how on earth I’m supposed to transform this plain room into an Instagram-worthy sanctuary without selling a kidney.
Here’s the thing about nursery wall decor: it’s not just about making things look cute (though, let’s be honest, that’s a huge part of it). You’re creating the first little world your baby will know, and somehow that feels both incredibly exciting and mildly terrifying. But breathe—I’ve got your back. After going through this whole nursery decorating rodeo myself and helping more friends than I can count, I’ve compiled the absolute best wall decor ideas that actually work in real life, not just in those impossibly perfect photos.
Ready to turn those walls into something special? Let’s jump right in.
Floating Cloud Shelves
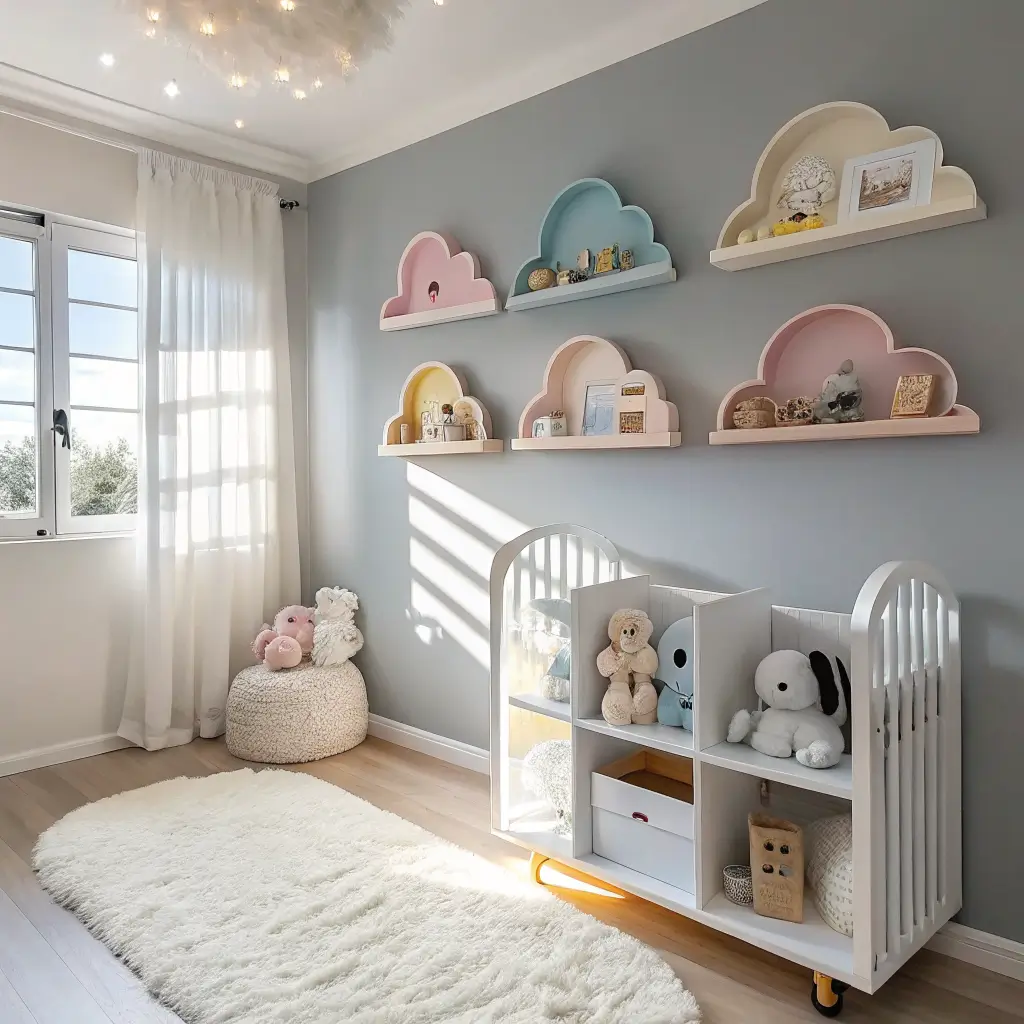
Okay, can we talk about how adorable floating cloud shelves are? These little beauties literally look like fluffy clouds hanging on your wall, except they actually hold stuff. I installed three of these in my niece’s nursery last year, and honestly, they might be my favorite thing in the entire room.
Why they’re awesome: These shelves combine form and function in the most charming way possible. You can display those cute board books, tiny stuffed animals, or little keepsakes without needing a bulky bookshelf taking up precious floor space. And because they’re shaped like clouds, they add this whimsical, dreamy vibe that perfectly suits a nursery.
Here’s what makes them particularly brilliant:
- They’re usually lightweight and easy to install (even for those of us who aren’t exactly handy)
- You can arrange multiple shelves at different heights to create visual interest
- They work with literally any nursery theme—gender-neutral, boho, modern, you name it
- Most come in white, but you can also find them in gray, pink, or even paint them yourself
Pro tip: Don’t overload these babies. I know it’s tempting to cram every adorable thing onto them, but restraint is your friend here. A few carefully chosen items look infinitely better than a cluttered mess. FYI, I learned this the hard way when one of mine started sagging under the weight of too many stuffed elephants :/
The installation is pretty straightforward—most come with mounting hardware, and you’ll want to make sure you’re hitting a stud or using proper wall anchors. Nobody wants a cloud shelf crashing down at 2 AM during a feeding session, right?
Where to use them: I love placing them above the changing table (easy to grab those diaper creams and lotions) or creating a little display area over a reading nook. Some people even use them as a subtle growth chart area, adding items as baby grows.
DIY Animal Wall Decals
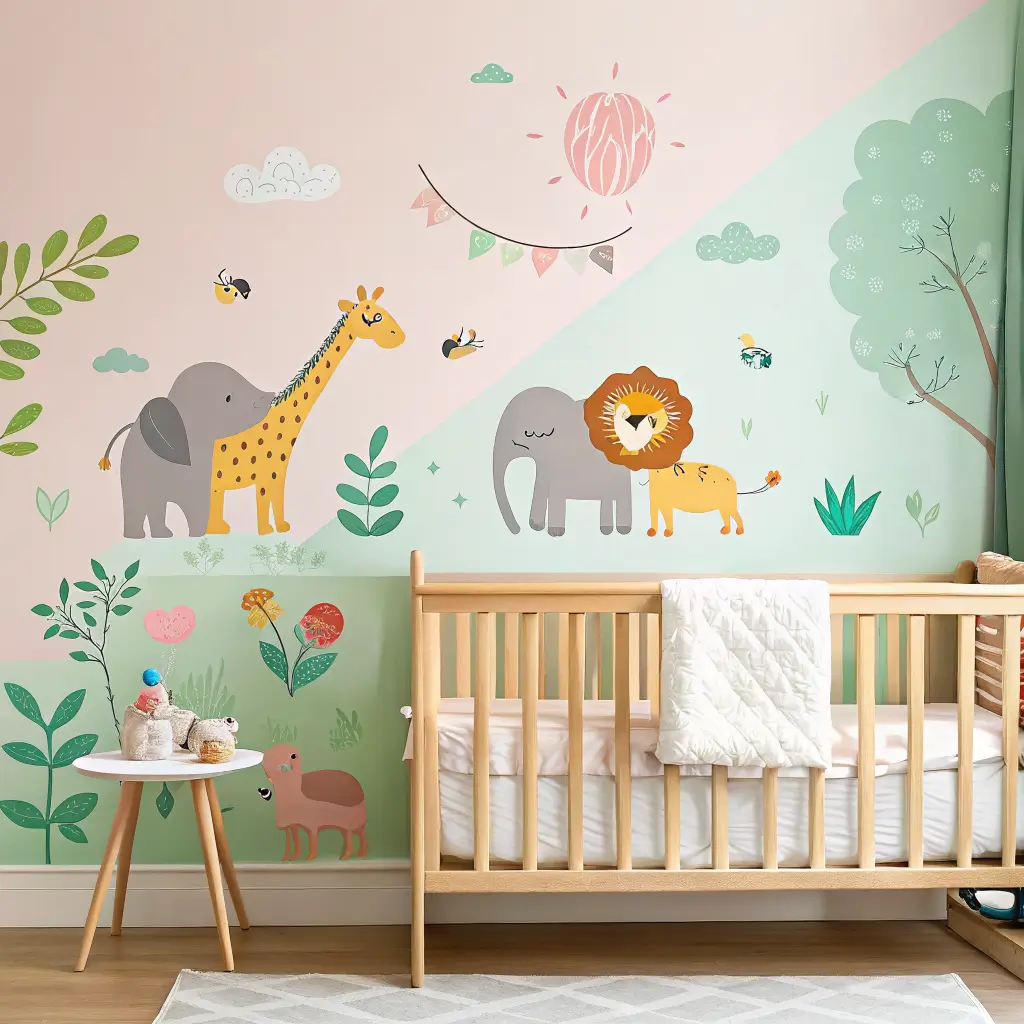
Ever wondered why nurseries and animal decals go together like peanut butter and jelly? There’s something about cute little woodland creatures or safari animals that just screams “baby’s room.” And honestly, decals are a game-changer when you’re renting or don’t want to commit to permanent wallpaper.
I went the DIY route with these, and let me tell you—it was way easier than I expected. You can buy pre-made decals (which is totally fine, no judgment!), or if you’re feeling crafty, you can create your own using vinyl cutting machines or even just contact paper and a steady hand.
The beauty of DIY animal decals:
- Total customization – You pick the animals, the colors, the sizes, everything
- Budget-friendly – Seriously, you can do an entire wall for like $20-30 if you’re smart about it
- Renter-friendly – These bad boys peel right off without damaging paint
- Easy to change – When you inevitably get sick of the giraffe’s face staring at you during 3 AM feedings, swap it out
Here’s my favorite trick: create a whole scene instead of just random animal stickers. I did a woodland theme with a fox, deer, trees, and little mushrooms all working together to tell a story. It looked like something out of a storybook, and people always asked where I bought the “wallpaper.”
Application tips: Clean your wall first (boring but necessary), start from the center and work outward, and use a credit card or squeegee to smooth out bubbles. Patience is key—rushing this will leave you with wrinkles that’ll bug you forever. Been there, fixed that at midnight before the baby shower. Not fun.
The animals I’d recommend? Elephants, giraffes, woodland creatures (foxes, bears, deer), or those adorable sleeping moon faces. Steer clear of anything too scary-looking because, IMO, nurseries should be soothing, not nightmare-inducing.
Personalized Name Wooden Letters
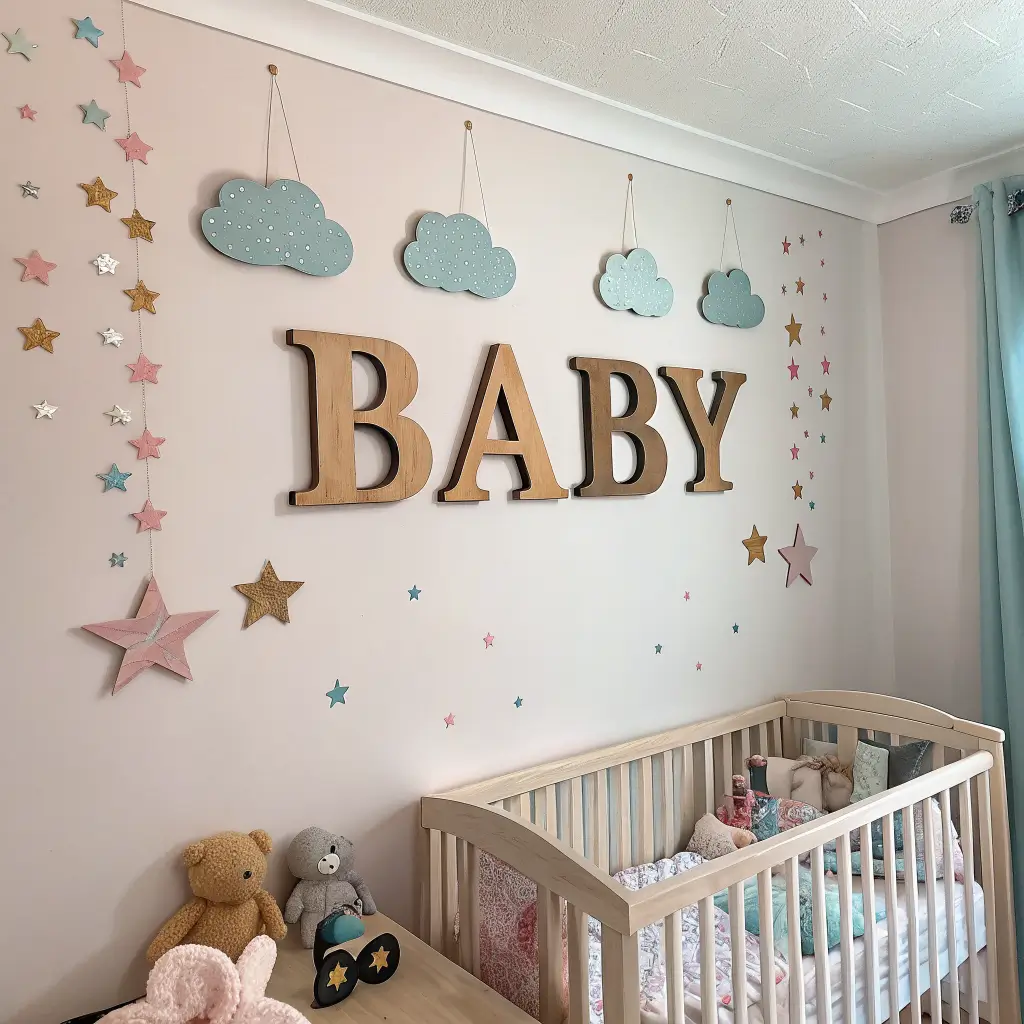
Nothing says “this room belongs to someone special” quite like their name spelled out on the wall. Personalized wooden letters have become crazy popular, and for good reason—they add that custom touch that makes the space feel uniquely theirs.
I’ve seen these done a million different ways, and each one brings something different to the table. You’ve got your classic painted letters, your glitter-covered ones (if you’re brave enough to deal with glitter—respect), your wrapped-in-fabric versions, and everything in between.
What makes wooden letters worth it:
- They’re three-dimensional, which adds depth and interest to your wall
- You can paint, stain, or decorate them to match any theme
- They’re substantial enough to make a statement without overwhelming the space
- They create an instant focal point above the crib or changing table
Getting creative with them: Here’s where you can really let your personality shine. I’ve wrapped letters in yarn that matched the nursery colors, decoupaged them with pages from vintage children’s books, and even added little embellishments like butterflies or flowers.
You can buy pre-made letters from craft stores (Michael’s, Hobby Lobby, etc.) or order custom ones from Etsy shops. The Etsy route tends to be pricier but offers more unique styles. If you’re on a budget, grab the plain wooden letters and DIY the decoration—it’s honestly pretty therapeutic.
Mounting options: Command strips work for lighter letters, but for anything with some heft, you’ll want to screw them directly into the wall. Space the letters out a bit more than you’d think—cramming them together looks cluttered. I usually go for about half an inch to an inch between each letter.
Fair warning: if you haven’t decided on baby’s name yet, maybe wait on this one. I had a friend who ordered expensive custom letters, then changed the name at the last minute. Yikes.
Also Read: 10 Amazing Fabric Wall Decor Ideas for Stylish Interiors
Boho Macramé Wall Hangings
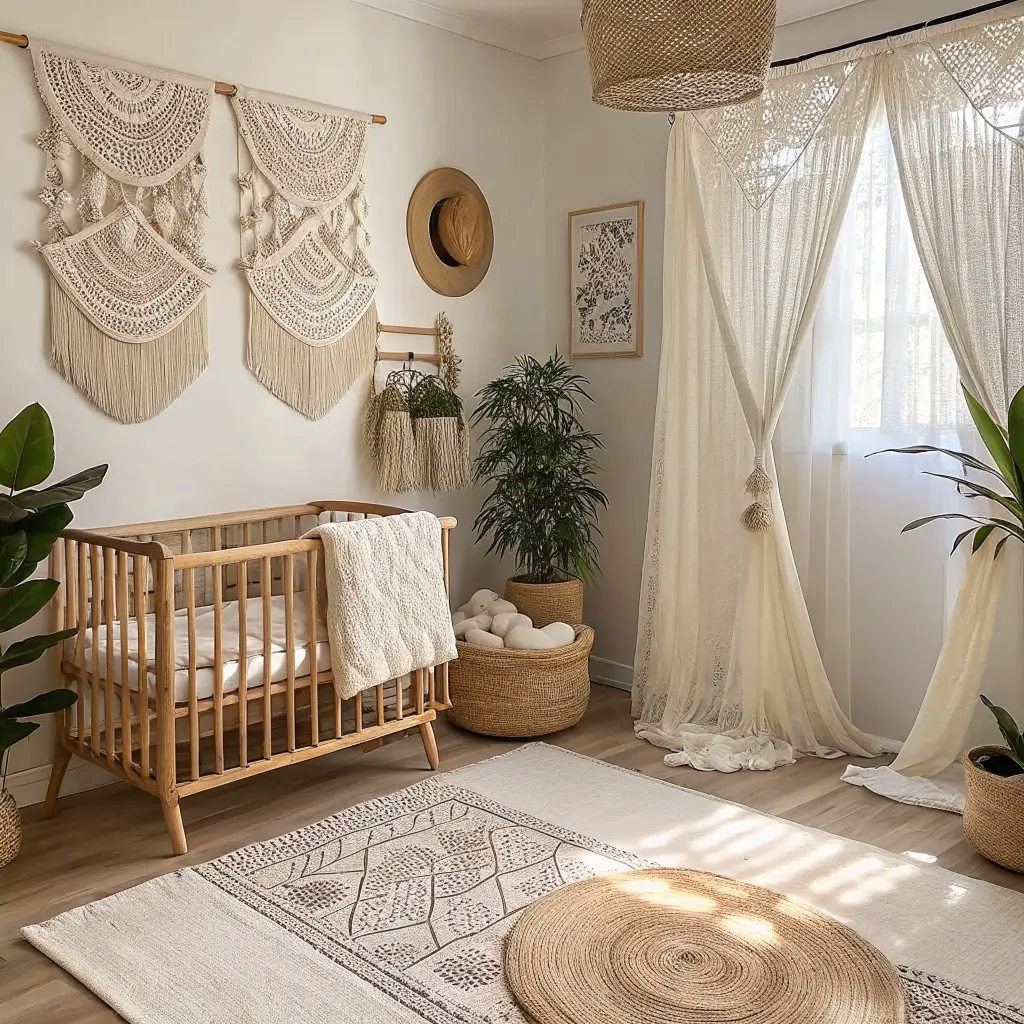
Can we talk about the boho nursery trend? Because I’m here for it. There’s something about macramé wall hangings that instantly makes a space feel cozy and intentional. Plus, they add texture, which is key when you’re working with a lot of smooth surfaces.
I’ll be straight with you—I tried making my own macramé piece once. Once. It took forever, my fingers hurt, and it looked like a sad, tangled mess. So I happily purchased mine from a talented artisan on Etsy, and I’ve never looked back 🙂
Why macramé works in nurseries:
- Texture, texture, texture – It breaks up all those flat walls and smooth furniture surfaces
- Neutral and versatile – Natural cotton works with virtually any color scheme
- Handmade feel – Even if you buy it, it adds that artisanal, crafted vibe
- Statement piece – A large macramé hanging becomes an instant focal point
Choosing the right piece: Size matters here, folks. A tiny macramé piece on a huge wall looks lost, while an enormous one in a small nursery can feel overwhelming. Measure your wall space and aim for something that fills about two-thirds of the area you’re decorating.
I love placing these above the crib (make sure it’s securely mounted and not a falling hazard) or behind a rocking chair to create a cozy corner. Some designs incorporate driftwood, beads, or even little pom-poms for extra whimsy.
Color considerations: While natural cotton is classic and safe, you can find dyed macramé in soft pastels or even bold colors. I’d stick with the neutral route if you want longevity—it’ll transition better as your kid grows and their tastes change.
The beauty of macramé is that even simple patterns look impressive. You don’t need some crazy complex design to make an impact. Sometimes a simple, well-made piece with clean lines is all you need.
Watercolor Mountain Mural
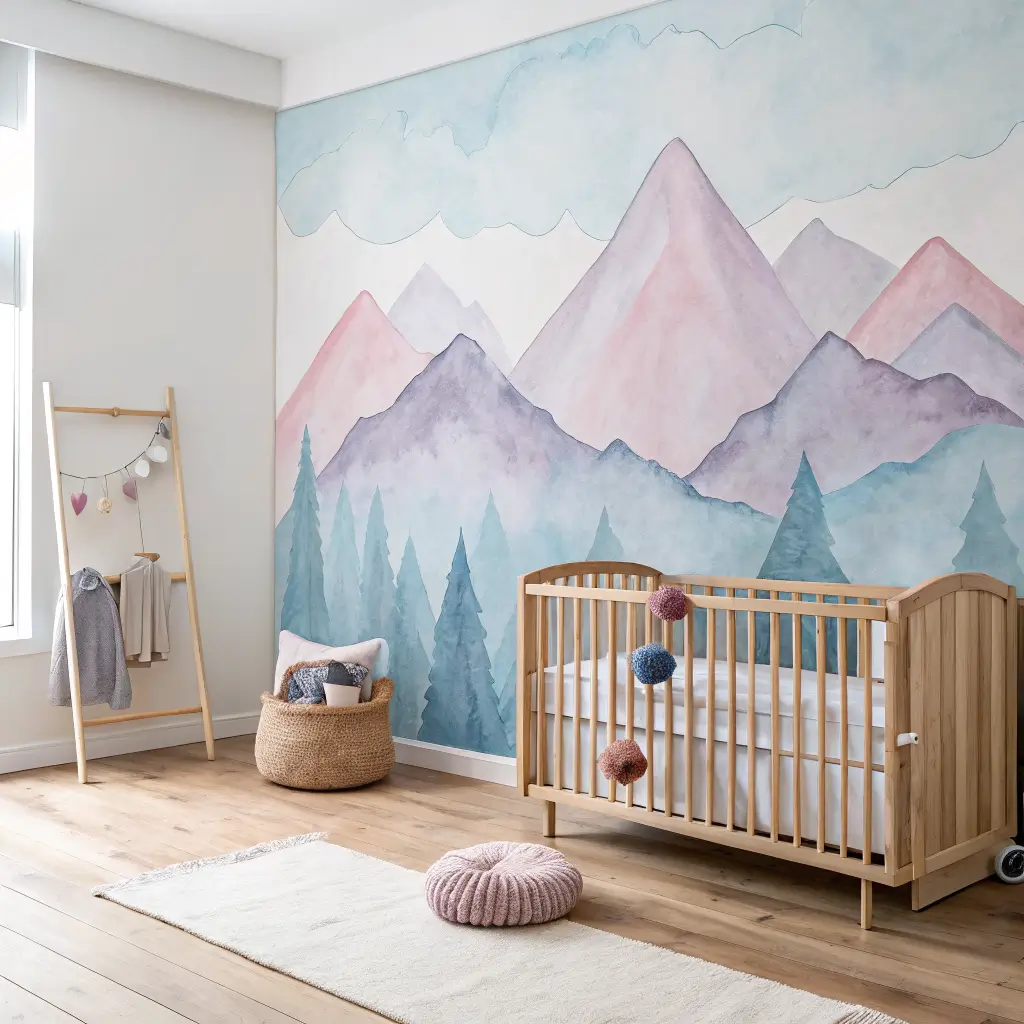
Alright, let’s talk murals. Specifically, watercolor mountain murals that have basically taken over Pinterest and nursery Instagram accounts everywhere. And honestly? I totally understand why. They’re gorgeous, they’re sophisticated, and they create this serene, adventurous vibe all at once.
Now, before you panic about your artistic abilities (or lack thereof), hear me out. You don’t have to be Picasso to pull this off. There are several ways to approach this, depending on your skill level and commitment.
Option 1: Hire a muralist. Yes, it’s pricier, but if you’ve got the budget and want something truly custom, this is the way. A professional can nail those watercolor effects and create exactly what you’re envisioning.
Option 2: Use a wall decal or stencil. These exist specifically for watercolor mountain designs, and they’re shockingly convincing. You literally just apply them like giant stickers. Easy peasy.
Option 3: DIY it. With painter’s tape, the right paint colors, and some blending techniques, you can actually create this look yourself. I won’t lie—it takes some guts and patience, but the results can be stunning.
What you’ll need for the DIY route:
- Painter’s tape to mark off your mountain shapes
- Several shades of blue, gray, and maybe purple or pink
- Sponges or large brushes for blending
- A spray bottle with water for that watercolor effect
- Courage and maybe a glass of wine (for after, not during)
The trick to making it look authentically watercolor is in the blending and layering. You want softer edges, gradual color transitions, and maybe even some intentional drips. The beauty of this style is that it’s supposed to look organic and slightly imperfect.
Placement ideas: Most people do this on the wall behind the crib, which creates a stunning focal point. But I’ve also seen it work beautifully on the wall opposite the door—so it’s the first thing you see when you walk in. Some adventurous souls do an entire room, but that’s a serious commitment.
Pro tip: Start with lighter colors and build up to darker. It’s way easier to add depth than to lighten things up once you’ve gone too dark. Also, step back frequently to check your work from a distance—you’ll catch things you miss up close.
This mural style works especially well with adventure or nature themes, obviously, but it’s also neutral enough to work with other elements. I’ve seen it paired with everything from woodland creatures to minimalist Scandinavian vibes.
Framed Baby Handprint Art
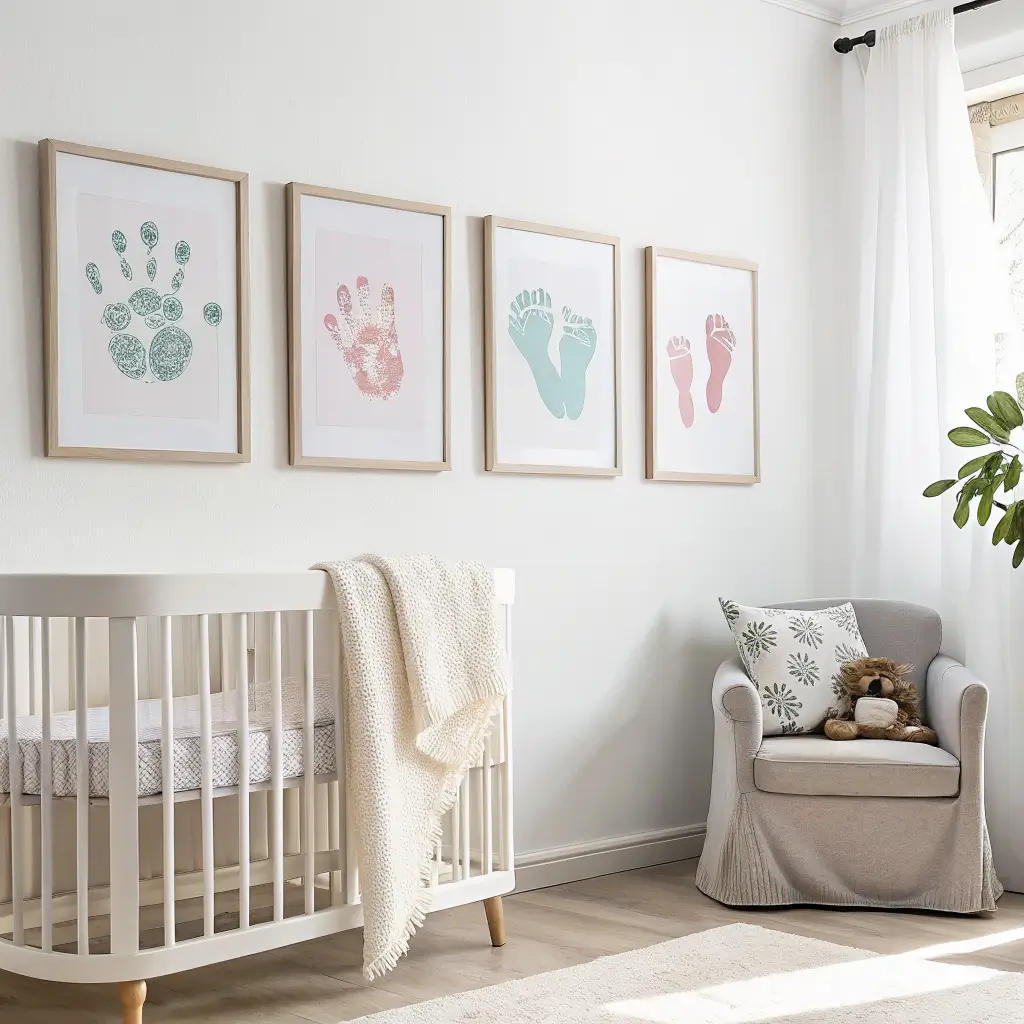
Okay, prepare for the feels on this one. Framed baby handprint and footprint art gets me every single time. There’s something about those tiny prints that just captures a moment in time, and having them beautifully framed on the wall turns them into actual art rather than just crafts shoved in a drawer somewhere.
I’m a huge advocate for doing this early and often because babies grow at a frankly alarming rate. Those pudgy little hands and feet won’t stay tiny forever (sad but true), so capturing them is precious.
Ways to create handprint art:
- Professional printing services – Many studios offer this, creating beautiful clay impressions or professional prints
- Ink pads – Baby-safe, non-toxic ink pads made specifically for this purpose
- Paint – Washable, non-toxic paint that you can use to create colorful prints
- Clay or plaster kits – These create 3D impressions you can frame in shadow boxes
I went the paint route because I wanted something colorful and cheerful. We did handprints in various colors arranged in a rainbow pattern, and honestly, it’s one of my favorite things in the whole room. Every time I look at it, I remember how tiny those hands once were.
Creative presentation ideas:
- Create a growth series—do prints every few months and frame them together to show progression
- Incorporate the prints into a larger artwork with meaningful quotes or dates
- Use the prints to create animals or objects (footprints become butterflies, handprints become flowers, etc.)
- Frame them alongside a photo from the same age for a touching comparison
Framing matters: Don’t cheap out on the frame here. This is keepsake-quality stuff, so invest in proper framing. I love white or natural wood frames for a clean, timeless look. Shadow boxes work great if you’re doing clay impressions or want to include other small items like the hospital bracelet.
Timing tip: Don’t wait too long to do this! I tried getting a perfect footprint when my nephew was two weeks old, and that squirmy little guy made it nearly impossible. But by six weeks, he was just calm enough during an awake period to get good prints. You want them alert but not fussy—easier said than done, I know.
Some parents do multiple sets throughout the first year, creating a collection that shows growth. It’s undeniably adorable but requires commitment and good timing. No judgment if you just manage to get one good set—that’s honestly an accomplishment in itself.
Also Read: 10 Chic Wall Decor Bedroom Ideas for a Modern Look
Starry Night Glow-in-the-Dark Decals
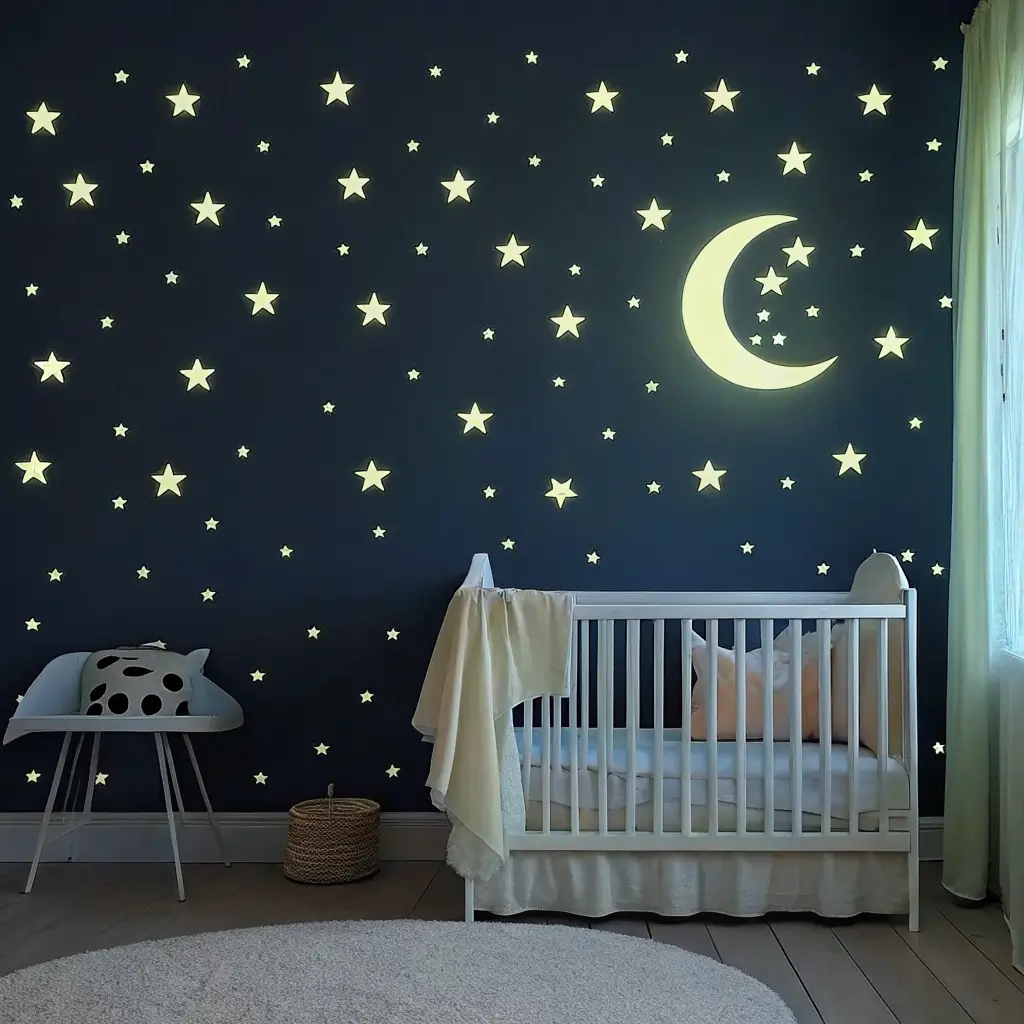
Let’s be real—glow-in-the-dark anything automatically makes you cooler. And when we’re talking nursery decor, glow-in-the-dark star decals are both functional and magical. They provide gentle nighttime ambiance that helps with those middle-of-the-night navigation sessions when you’re half-asleep and trying not to stub your toe on the rocking chair (again).
I installed these in a friend’s nursery, and watching them “charge up” during the day and then glow softly at night was honestly mesmerizing. The baby seemed to dig them too, which is ultimately the point, right?
Why these are brilliant:
- Subtle nightlight alternative – They provide just enough glow to see by without being too bright
- Soothing visual element – Babies and toddlers love looking at them
- Easy to apply and remove – No electrical work or permanent installation required
- Budget-friendly – You can cover a whole ceiling for under $20
Application strategies: You can go full random scatter (like actual stars in the sky) or get strategic with it. Some people create constellations, which is adorable if you’re into astronomy. Others spell out words or create patterns. I’ve even seen people combine stars with moon decals to create a whole celestial theme.
The ceiling is the obvious placement, but I’ve also seen them used effectively on walls, especially in reading nooks or above the crib. Just make sure you’re following safety guidelines about anything near where baby sleeps.
Quality matters: Not all glow-in-the-dark decals are created equal. Cheaper ones barely glow and fade quickly. Look for reviews mentioning strong, long-lasting glow. You want these to still be doing their job at 3 AM, not just for the first hour after lights out.
Charging them up: They need light exposure to “charge” and glow properly. Natural sunlight works best, but regular room lights will do. The longer they’re exposed to light, the longer they’ll glow. Position them where they’ll get decent daylight if possible.
One thing to note—the glow is subtle, not like a neon sign. We’re talking soft, gentle luminescence that won’t keep anyone awake but will provide just enough light to navigate by. Perfect for checking on baby without flooding the room with harsh light.
Ombre Painted Accent Wall
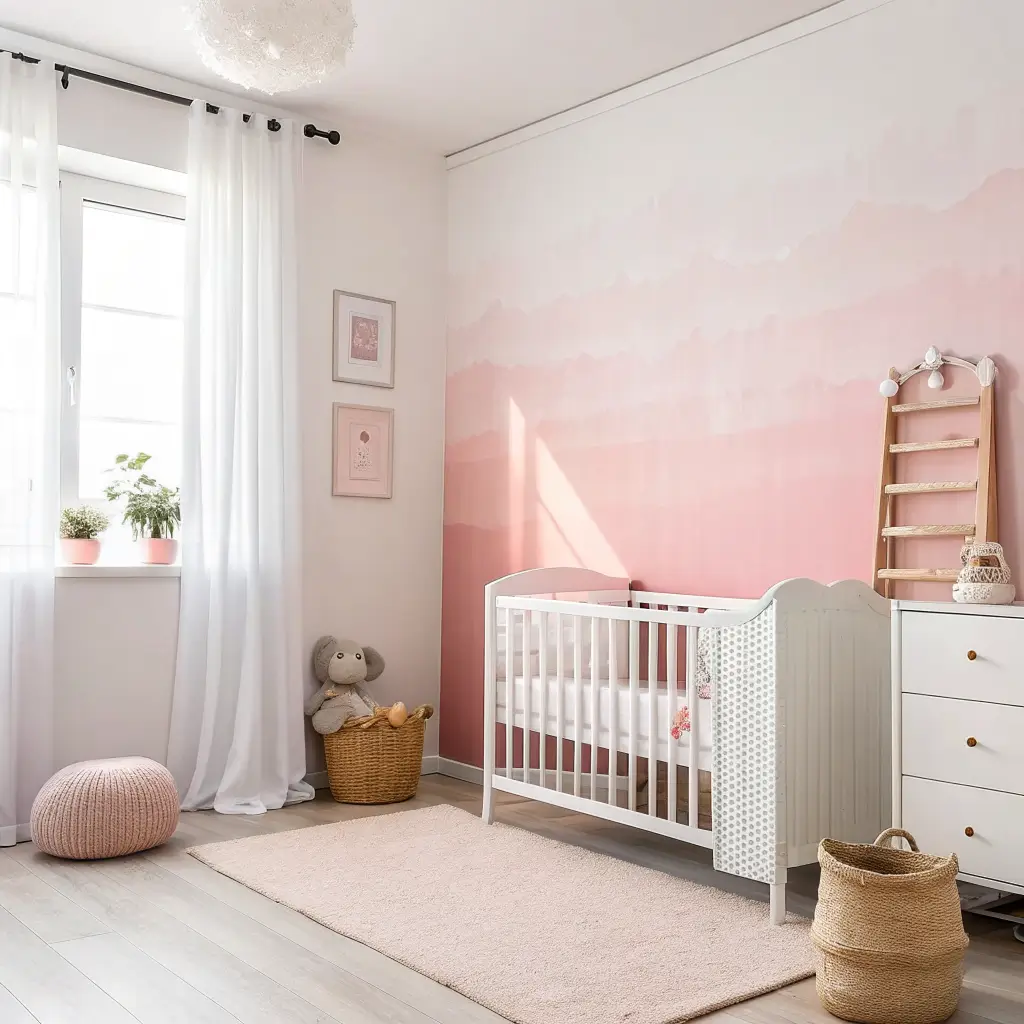
If you’re willing to put in a little elbow grease, an ombre painted accent wall delivers serious visual impact. This technique, where color gradually transitions from dark to light (or vice versa), creates depth and interest that a simple solid color wall just can’t match.
I’ll admit, I was intimidated by this project at first. Blending paint sounds complicated, right? But after watching a few tutorials and gathering my courage, I tackled it, and honestly, it was way more forgiving than I expected.
The appeal of ombre walls:
- Unique and custom – No two ombre walls are exactly alike
- Color without overwhelming – You get your color fix without the intensity of a fully saturated wall
- Grows with the room – This technique doesn’t scream “baby nursery,” so it can transition as your kid grows
- Budget-friendly – Just paint and some blending tools, no special materials needed
How to actually do this: You’ll need your chosen color in multiple shades (usually 3-5 shades from dark to light work well) or you can buy one color and white to mix your own gradients. Horizontal ombre (lighter at top, darker at bottom or vice versa) is most common, but vertical works too.
Step-by-step basics:
- Divide your wall into equal horizontal sections using painter’s tape
- Paint each section in its corresponding shade
- While the paint is still wet, blend the edges where colors meet using a dry brush or blending tool
- Work quickly and in sections—wet paint is your friend here
- Step back frequently to check your progress
The blending is where the magic happens. You’re essentially feathering the two colors together where they meet, creating that seamless gradient. It takes a bit of practice, but honestly, even imperfect blending looks intentionally artistic.
Color choices: Soft blues transitioning to white create a sky effect. Pinks to white feel feminine without being overwhelmingly girly. Greens to white bring in that nature vibe. Gray gradients are super popular for modern, minimalist nurseries.
Time investment: Set aside a full day for this project. You’ll need time for taping, painting, blending, and potentially touch-ups. Don’t rush it—the blending really does need to happen while the paint is workable.
My favorite combo? Soft lavender transitioning to white. It’s calming, it’s pretty, and it works for any gender. Plus, it pairs beautifully with white furniture and natural wood accents.
Hanging Fabric Canopy with Fairy Lights
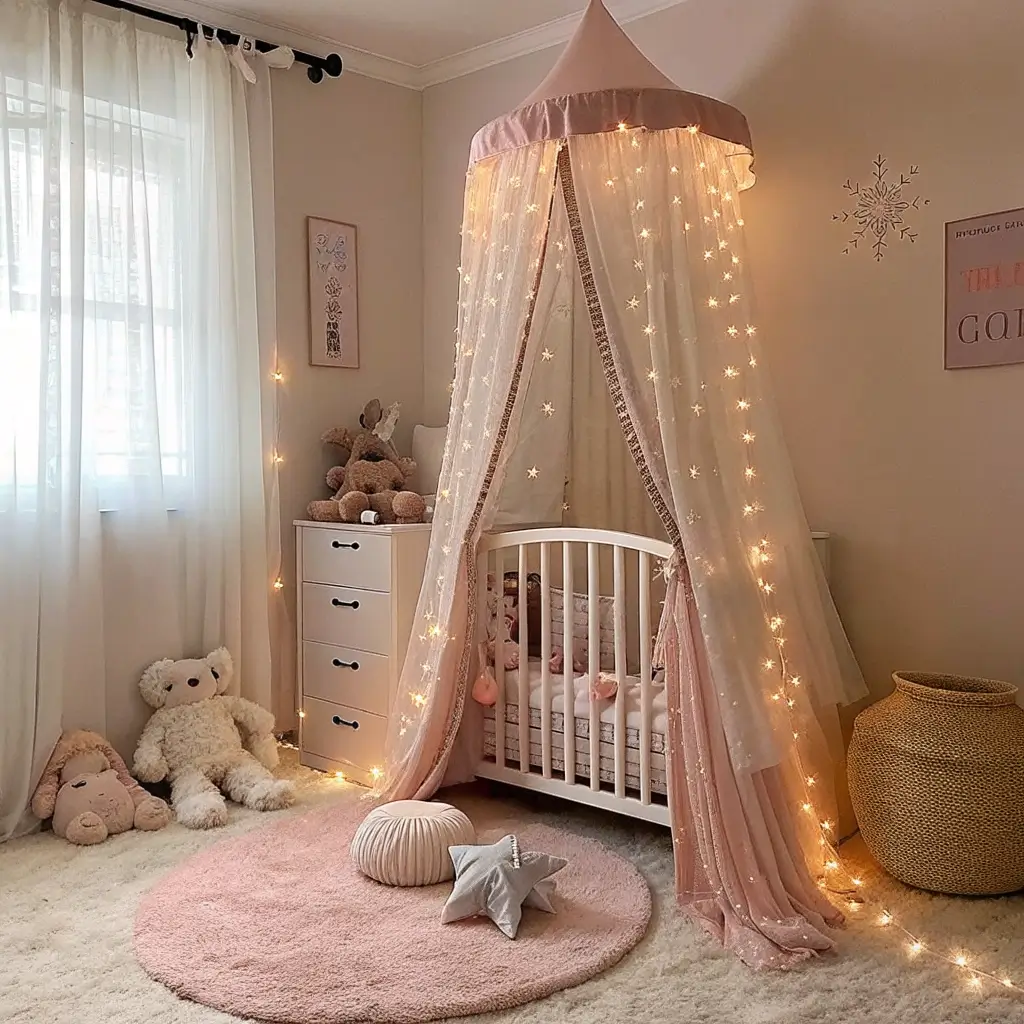
Want to create a dreamy, magical corner in your nursery? Hanging fabric canopy with fairy lights is your answer. This setup transforms a regular corner into a enchanted little hideaway that works beautifully over a crib, reading nook, or even a floor play area.
I’m slightly obsessed with this look because it’s so incredibly versatile and creates instant coziness. The canopy provides that sense of enclosure kids love, while the fairy lights add gentle ambiance that’s perfect for winding down before bed.
What you’ll need:
- A ceiling hook or curtain rod mounted to the wall
- Sheer fabric or netting (tulle, cotton voile, or linen work great)
- Battery-operated fairy lights (important—not plug-in ones near baby)
- Some basic sewing skills or fabric glue
The safety talk: This is crucial, so listen up. If you’re placing this over a crib, make sure it’s securely mounted way out of baby’s reach. The fabric should not be grabbable from the crib, and lights should be battery-operated LED ones that don’t heat up. Safety first, aesthetics second, always.
Creating your canopy: The simplest version uses a ceiling hook or bracket to hold a fabric loop, with the fabric flowing down to create the canopy effect. More elaborate versions use embroidery hoops as the structural base or wooden dowels for a more substantial look.
I love using sheer white or cream fabric for a classic, timeless look, but you can absolutely use colors that match your theme. Some people do two layers in different colors for added dimension, which looks stunning.
Fairy light integration: Weave battery-operated fairy lights through the fabric before hanging it, focusing on the upper portions where they’re totally unreachable. The lights shine through the sheer fabric, creating this magical, starlit effect that’s genuinely breathtaking.
Placement ideas: Over a crib creates a stunning focal point, though you need to be extra careful about safety. Over a reading chair or floor cushion creates a cozy reading nook. Some people even use these to designate a “calm down” corner for when baby becomes a toddler.
Pro tip: Choose warm white lights over bright white—they’re softer and more soothing. And get lights with a timer function so they automatically turn off after a set period. Nothing worse than realizing at 2 AM that you forgot to turn them off, and now you have to tiptoe in and risk waking the baby.
The fabric will collect dust (sorry to be the bearer of bad news), so choose something washable or plan to vacuum it occasionally. I use a handheld vacuum on low setting every few weeks, and it keeps everything fresh.
Also Read: 15 Creative Living Room Decor Apartment Layouts Made Simple
Interactive Chalkboard Wall
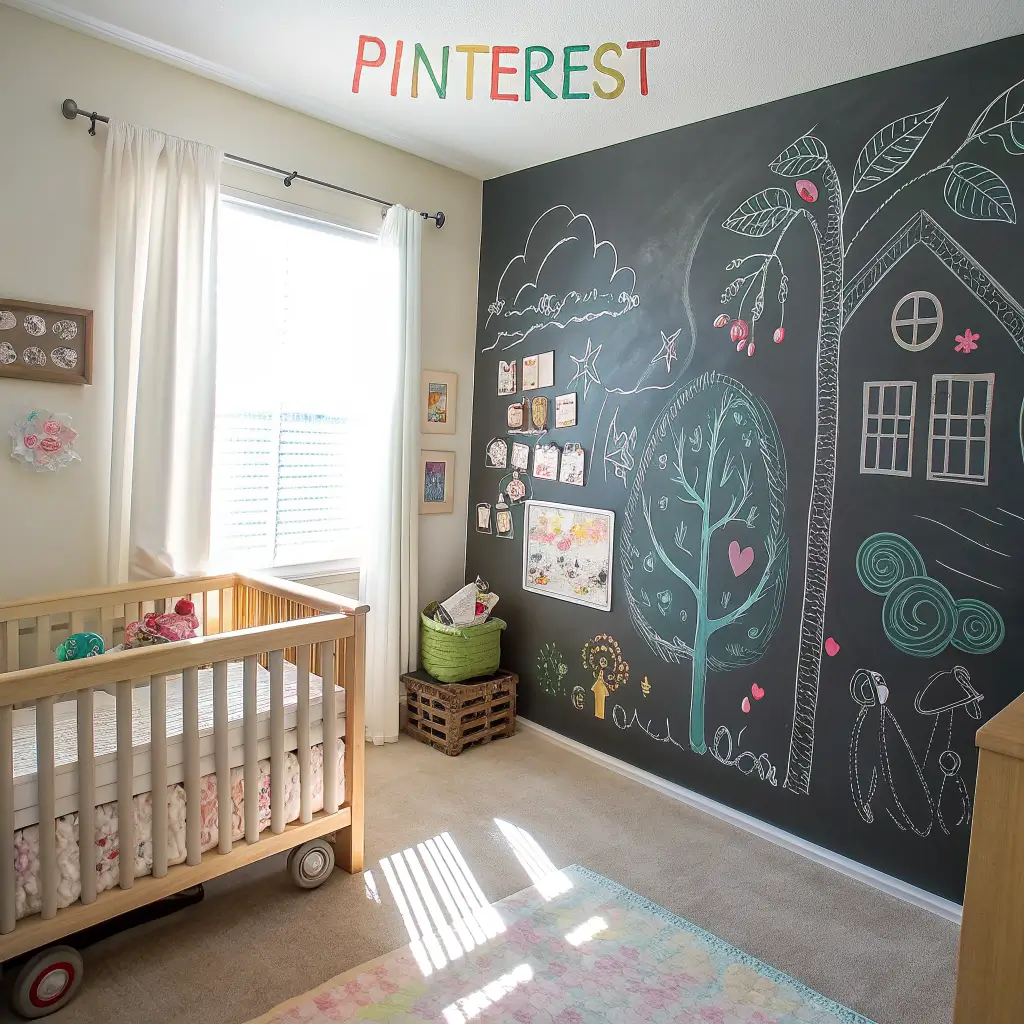
Last but definitely not least, let’s talk about something that grows with your kid—an interactive chalkboard wall. Now, hear me out on this one. I know baby isn’t exactly going to be doing calculus on the wall anytime soon, but this feature has both immediate and long-term benefits that make it worth considering.
Why it works for nurseries:
- Practical right now – Use it for tracking feeding times, diaper changes, or just cute quotes and doodles
- Grows with baby – As they become a toddler, it’s their art space
- Easily changeable decor – You can update the look daily if you want
- Takes up space you might otherwise struggle to decorate
I’ve seen parents create the cutest monthly milestone tracking on chalkboard walls, drawing around baby’s height or creating little growth markers. It becomes this living, changing piece of decor that tells your family’s story.
How to create one: You have options. Chalkboard paint (which you can get in multiple colors now—not just black!) is the most permanent and cost-effective. You paint it directly on your wall. Chalkboard contact paper or large decal sheets work great for renters or those commitment-phobes among us.
Application area: You don’t need to do a whole wall—though you certainly can. A large square or rectangle creates a designated space that feels intentional. I’ve seen beautiful half-wall applications where the bottom half of a wall is chalkboard paint, creating a clear boundary.
Placement considerations: Avoid putting this directly behind the crib where baby might be breathing in chalk dust. A wall adjacent to the changing table is brilliant for making notes. Or create it in a corner where it’ll eventually become a play space.
Making it pretty: Here’s the thing about chalkboard walls—blank ones can look stark and uninviting. Keep some standard decorations on there. I love a simple border drawn around the edge, a cute quote, or even a permanent painted frame around the chalkboard area to make it look more finished.
The chalk dust reality: Yes, chalk creates dust. Dustless chalk exists and is way better for indoor use, especially around babies. Keep a small vacuum nearby and wipe down surfaces regularly. Or, plot twist—use chalk markers instead of traditional chalk. They write like chalk, look great, but don’t create dust. Game changer.
FYI, you’ll want to “prime” your chalkboard surface before using it. Rub chalk all over it and then erase—this prevents ghosting where your first drawings permanently mark the surface. Trust me on this one.
As baby grows: This feature becomes increasingly valuable. Toddlers can scribble, preschoolers can practice letters and numbers, and older kids can use it for homework or expressing themselves. It’s the gift that keeps on giving, which makes the initial investment totally worth it, IMO.
Wrapping This Up
There you have it—ten nursery wall decor ideas that actually work in real life, not just in perfectly curated Instagram photos. From floating cloud shelves to interactive chalkboard walls, each option brings something unique to your nursery.
The beautiful thing about decorating a nursery is that there’s no single “right” way to do it. Your nursery should reflect your style, your baby’s personality (as much as they have one yet!), and your practical needs. Maybe you go all-in on one of these ideas, or maybe you mix and match several. That’s the beauty of it—this is your space to create.
Remember, your baby won’t remember whether their nursery had the perfect macramé hanging or if the ombre wall was blended flawlessly. But you’ll remember creating this special space for them, and that matters. So cut yourself some slack, have fun with the process, and don’t stress about making it perfect.
Start with what excites you most. Maybe it’s those adorable cloud shelves, or perhaps you’re itching to create that watercolor mountain mural. Pick one project, tackle it, and see how you feel. You can always add more later—in fact, the nursery will probably evolve constantly during that first year as you figure out what you actually need versus what just looks cute.
And hey, if all else fails, you can always stick some decals on the wall and call it a day. There’s absolutely zero shame in that game. The most important thing in that nursery won’t be the wall decor anyway—it’ll be the love, the late-night snuggles, and all those precious moments you’ll share there.
Now go make those walls something special! 🙂