10 Amazing Corner Wall Decor Ideas to Brighten Corners
Corners are the awkward middle children of interior design, right? They just sit there, collecting dust and maybe a lonely spider or two, while the rest of your walls get all the attention. I used to walk past my empty corners every single day, knowing something was off but having absolutely zero clue what to do about them.
Here’s the brutal truth: neglected corners make your entire room feel unfinished and kinda sad. But the good news? These forgotten spaces hold massive potential for adding character, functionality, and that “wow, you really know what you’re doing” vibe to any room. After years of trial and error (and yes, some Pinterest-inspired fails), I’ve cracked the code on corner wall decor that actually works.
Whether you’re working with a tiny apartment corner or a spacious room begging for definition, I’ve got you covered with ten corner decor ideas that’ll make you wonder why you ignored these spaces for so long.
Cozy Reading Nook Corner
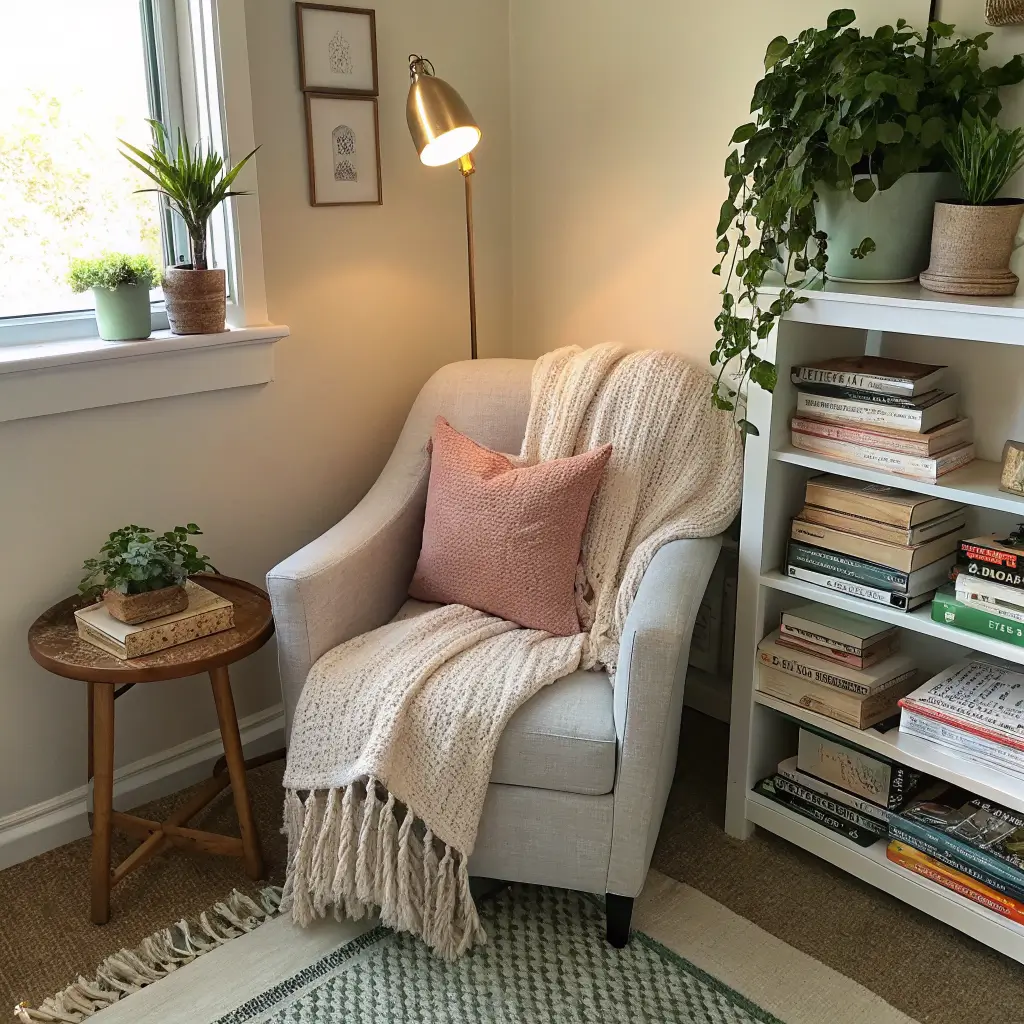
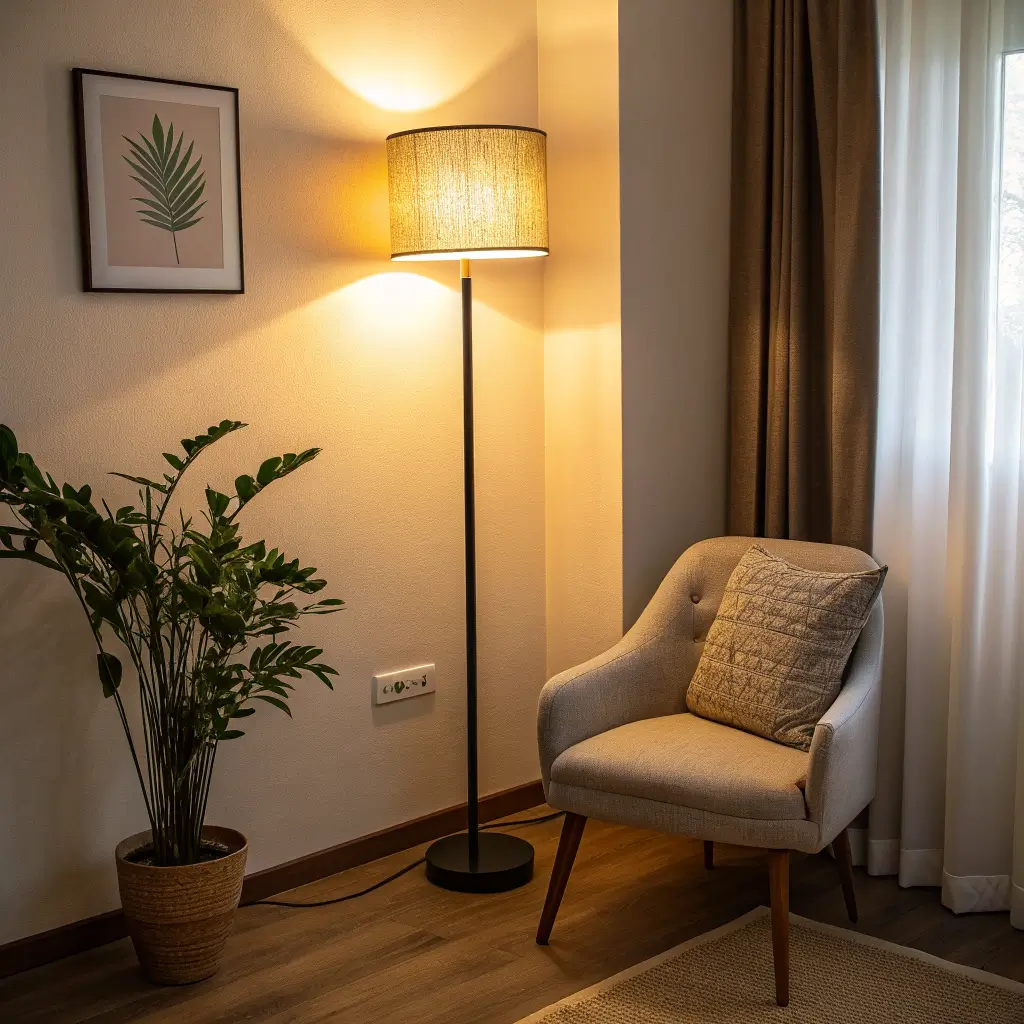
Let’s start with my absolute favorite corner transformation—the reading nook. Nothing beats claiming a forgotten corner and turning it into your personal escape pod from the chaos of life. I created one in my bedroom corner about two years ago, and honestly, it’s become my sanctuary.
What makes a reading nook work: You need three essential elements—comfortable seating, good lighting, and something that defines the space. The corner naturally provides the cozy, enclosed feeling that makes reading nooks so appealing. You’re just enhancing what’s already there.
Here’s what I threw into mine:
- A plush floor cushion (one of those oversized Moroccan-style poufs)
- A small side table for my coffee and current book stack
- A floor lamp with warm, adjustable lighting
- Floating shelves on both corner walls for book storage
- A chunky knit throw blanket because cozy is the whole point
Wall decor elements: This is where you make the corner feel intentional rather than just “chair shoved in corner.” I hung a fabric tapestry on one wall to add texture and warmth. Above the shelves, I added some framed literary quotes that speak to my book-nerd soul. The key is layering—you want the walls to feel as cozy as the seating.
Lighting tricks: Don’t rely solely on overhead lighting. A corner lamp or even some string lights creates that intimate atmosphere you’re after. I use a vintage-style arc lamp that curves over my seating area, providing perfect reading light without taking up floor space.
Personal touch elements: Add things that make this space uniquely yours. I’ve got a small plant, a scented candle, and a basket for storing extra blankets. Some people add a small speaker for ambient music. Others hang artwork that inspires them. There’s no wrong answer here.
The beauty of a reading nook corner is that it works in literally any room. Bedroom corner? Perfect. Living room corner? Absolutely. Even a larger hallway corner can become a reading spot if you’re creative about it.
Floating Shelves Display
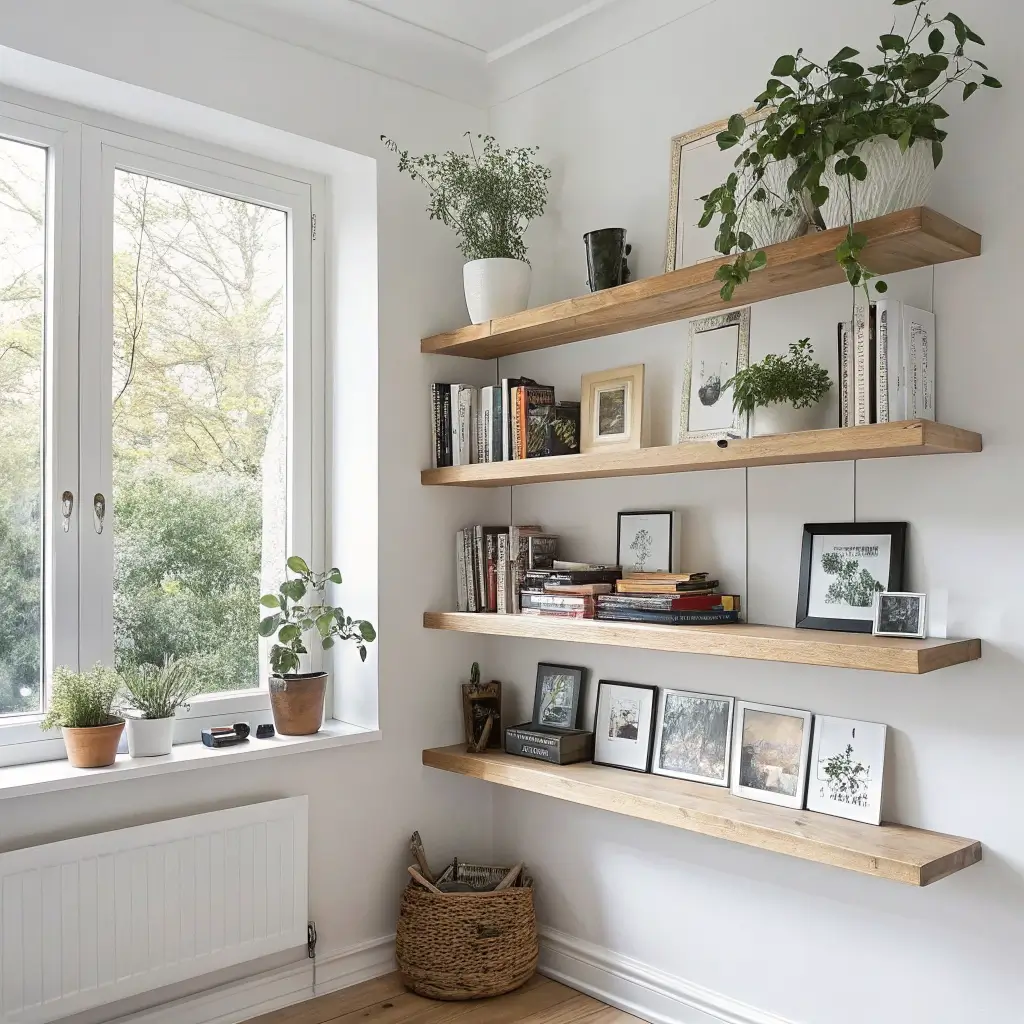
Okay, floating shelves might seem basic, but hear me out—when you install them specifically in corners using that wraparound technique, they become something special. This approach uses both walls that form the corner, creating visual interest and maximizing storage in a way that straight shelves just can’t match.
I installed corner floating shelves in my living room last year, and the difference was immediate. That dead corner suddenly became a focal point that people actually comment on. Who knew?
Installation options:
- Traditional L-shaped shelves – These fit perfectly into the corner angle, using both walls for support
- Staggered individual shelves – Alternate shelves on each wall at different heights for a dynamic look
- Floor-to-ceiling corner shelving – This creates a tower effect that’s both dramatic and functional
What to display: This is where you get to have some fun. I rotate my displays seasonally, but my go-to formula includes:
- Books (always books, arranged both vertically and horizontally)
- Small plants or succulents for living elements
- Decorative objects like ceramics, candles, or small sculptures
- Framed photos or small art pieces leaned against the wall
- A mix of textures—metal, wood, glass, fabric
Styling tips that actually work: The “rule of threes” isn’t just design BS—it really does create pleasing visual arrangements. Group items in odd numbers, vary the heights, and leave some breathing room. Not every shelf needs to be packed full. In fact, restrained displays usually look more sophisticated than cluttered ones.
My biggest mistake? Making all the shelves the same length. It looked boring and predictable. When I switched to varying lengths—shorter shelves higher up, longer ones at eye level—everything clicked into place. The asymmetry made it interesting.
Color coordination: You can go monochromatic for a sleek look, or mix colors for something more eclectic. I tend toward a neutral base (whites, blacks, natural wood tones) with pops of color from book spines and plants. This approach feels collected over time rather than overly coordinated.
FYI, make sure you’re using proper anchors for these shelves, especially in corners where weight distribution can be tricky. The last thing you want is your carefully curated display crashing down at 3 AM. Been there, cleaned that up, learned my lesson.
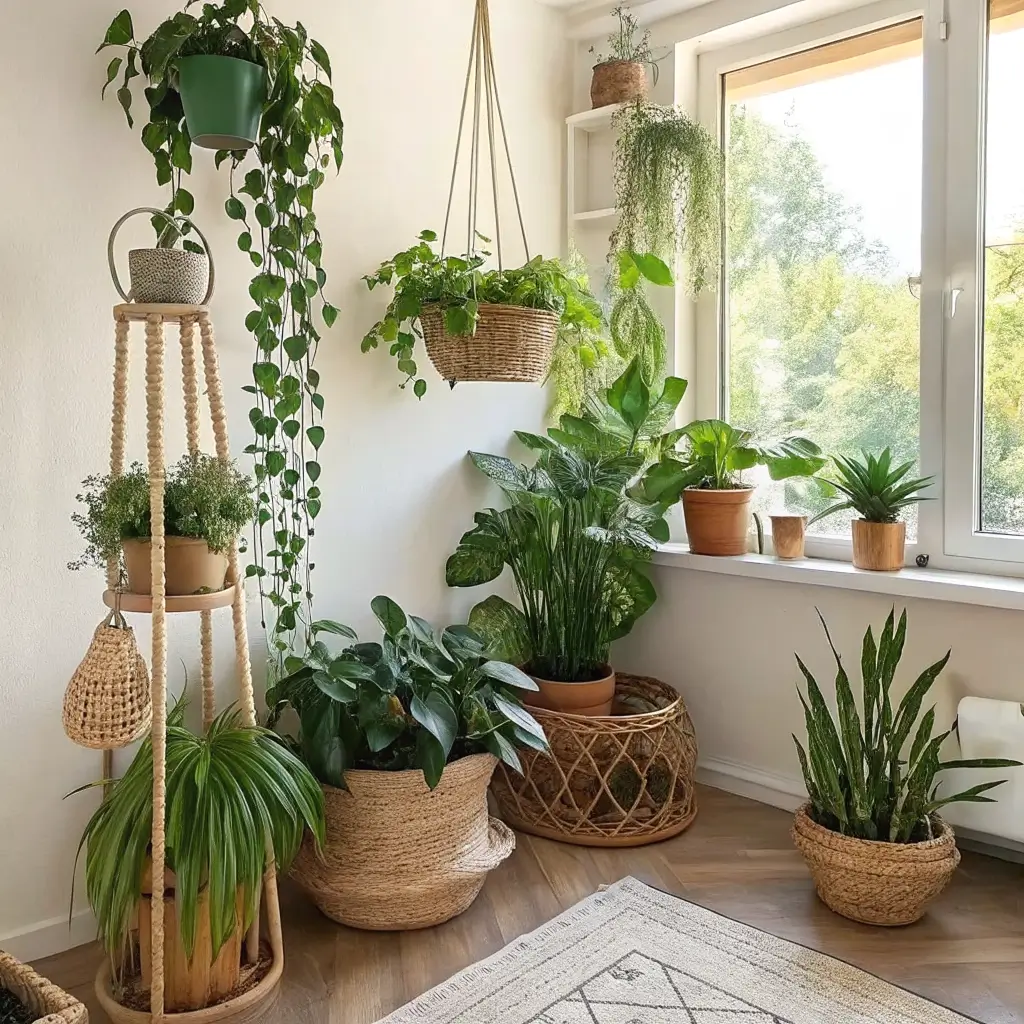
Indoor Plant Corner Oasis
Can we talk about how plants just make everything better? Creating a dedicated plant corner transforms an awkward space into a literal breath of fresh air. I converted a bright corner in my living room into a mini jungle, and it’s become my favorite part of the entire apartment.
Why corners work perfectly for plants: Most plants love light from multiple directions, and a corner (especially one with windows on both walls) provides exactly that. Even if you don’t have that ideal window situation, you can still create a stunning plant display with the right plant choices and supplemental lighting.
Building your plant corner: Start with varying heights to create visual layers. I use a combination of:
- Floor plants – Large potted plants like fiddle leaf figs or monstera deliciosa as anchors
- Mid-height plants – These go on plant stands or small tables
- Hanging plants – Pothos, string of pearls, or spider plants cascading from wall-mounted planters
- Wall-mounted planters – These save floor space while adding greenery to the vertical space
Wall decor integration: Don’t just focus on the plants themselves—the wall behind them matters too. I painted my plant corner wall a soft sage green that complements the foliage. Some people use peel-and-stick wallpaper with botanical prints. Others install a trellis or macramé backdrop for climbing plants.
Practical considerations: Let’s be real about plant care. I chose mostly low-maintenance plants because I’m not trying to run a full-time greenhouse operation. Pothos, snake plants, and ZZ plants thrive on neglect (perfect for forgetful waterers like me). Mix in a few needier plants if you’re up for it, but build your foundation with the hardy survivors.
Lighting solutions: If your corner lacks natural light, grow lights save the day. I use stylish LED grow light strips mounted under floating shelves—they provide what plants need while looking intentional rather than like a science experiment.
The humidity factor: Group plants together to create a microclimate with higher humidity. They literally help each other thrive. I also keep a small humidifier nearby during dry winter months. My plants thank me by not dying, which feels like a huge win :/
Decorative pots matter: This is where you bring in personality and color. I mix ceramic pots in various colors and textures with natural woven baskets. The variety keeps things interesting while the color palette stays cohesive.
Also Read: 15 Elegant Entryway Decor Ideas with Modern Style
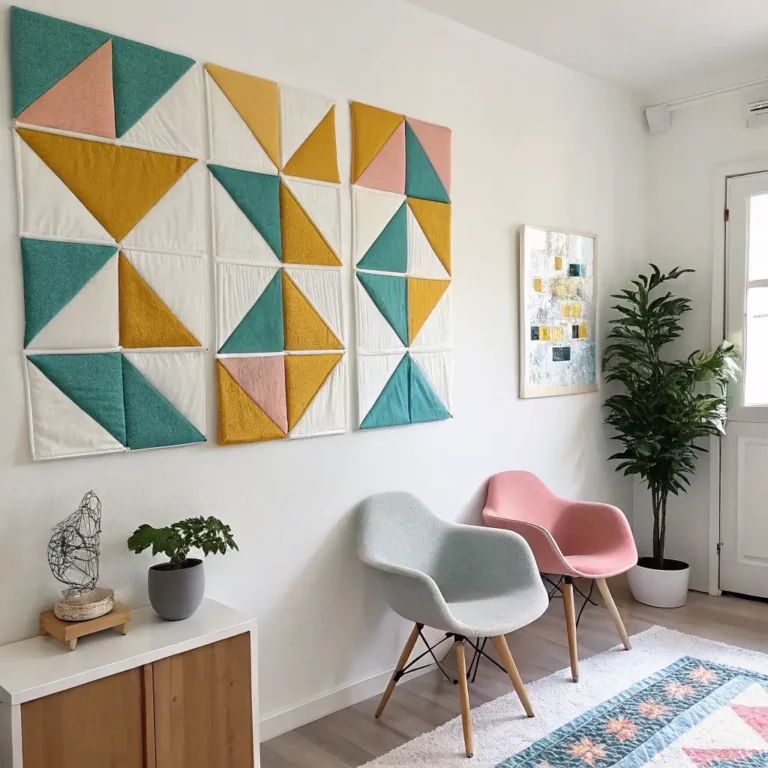
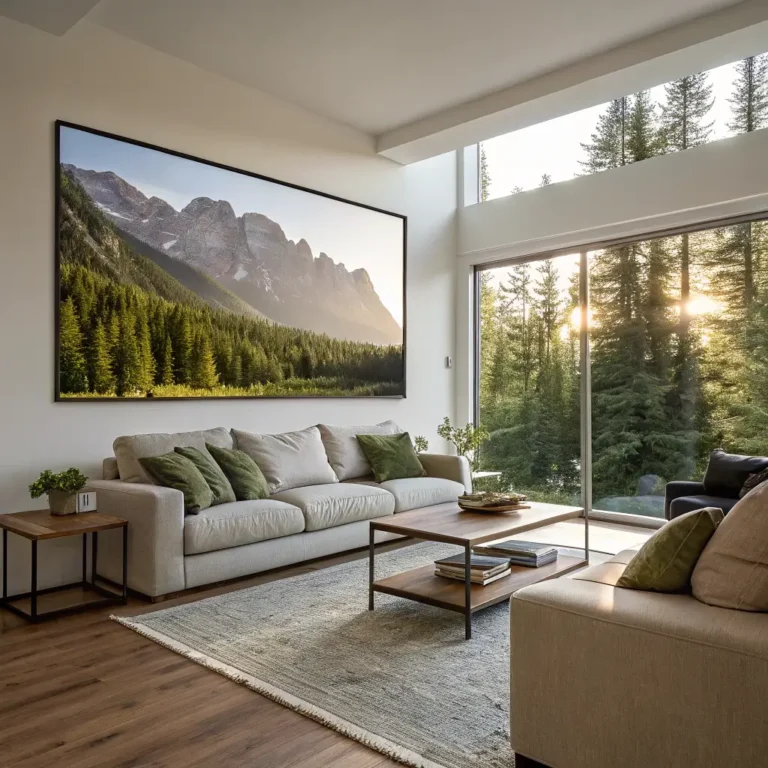
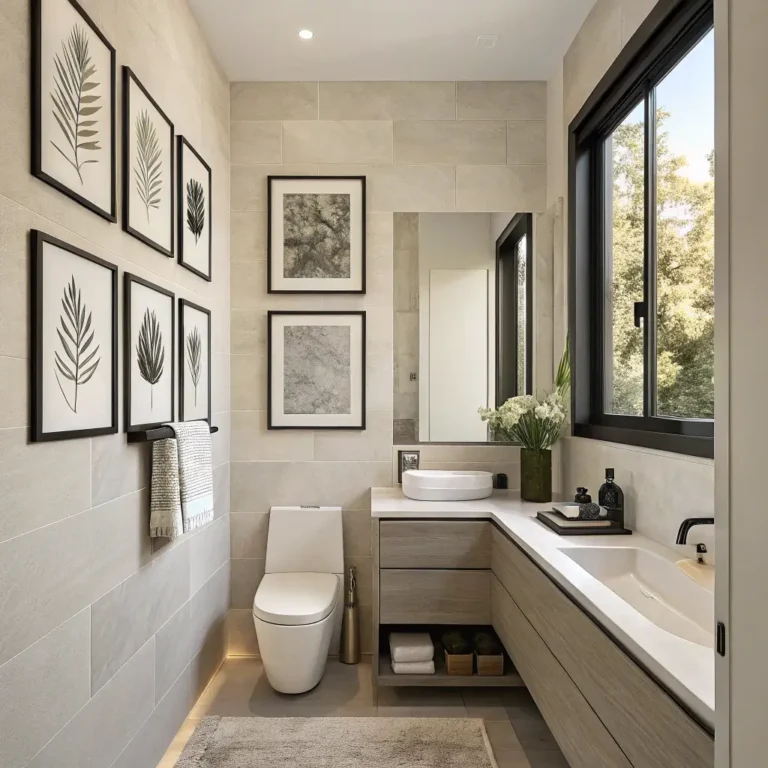
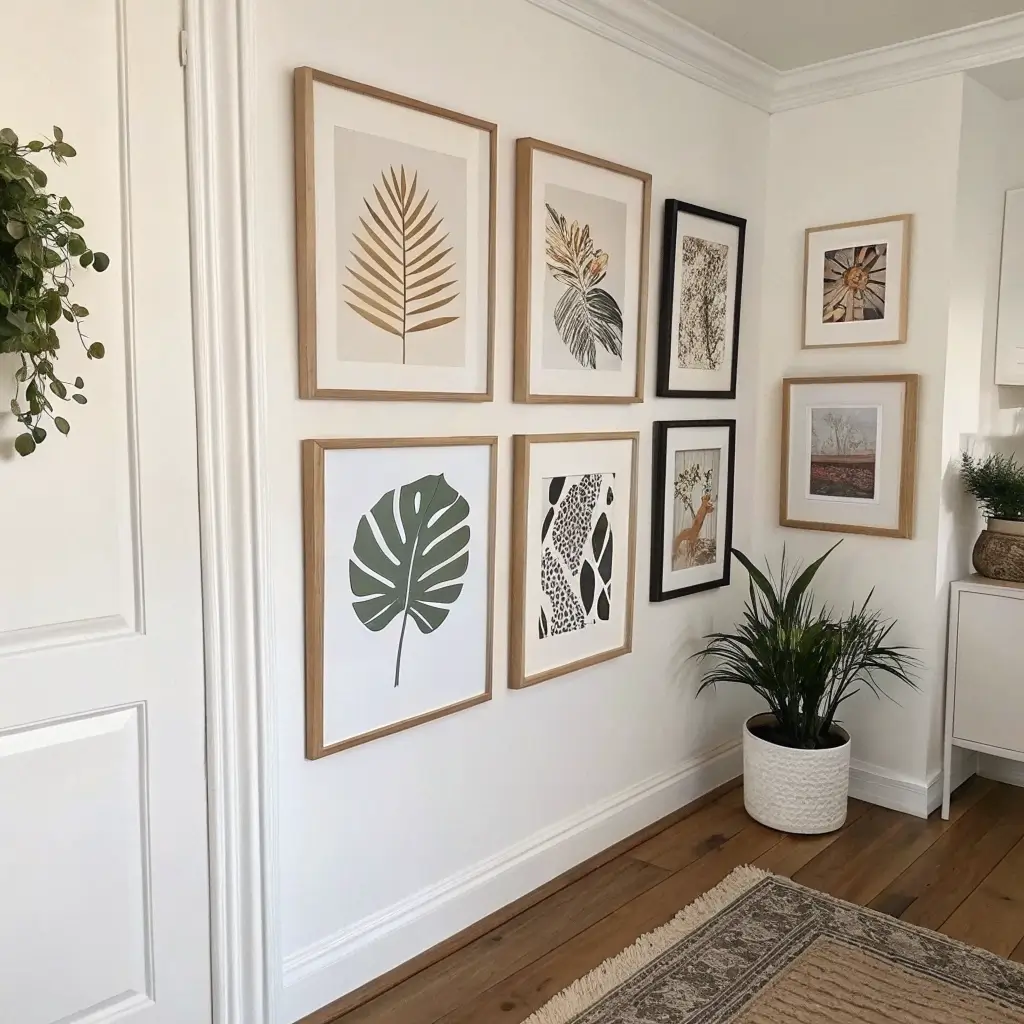
Gallery Wall for Corners
Gallery walls aren’t just for straight walls anymore, folks. Corner gallery walls create this wraparound effect that draws the eye and makes brilliant use of often-wasted space. I’ll admit, planning a corner gallery wall intimidated me at first—the angles seemed complicated. But once I figured out the approach, it became one of my favorite decor projects.
Planning your corner gallery: This takes more forethought than a standard gallery wall. You need to decide whether you want symmetry (frames mirrored on both walls) or asymmetry (a more organic, collected look). I went asymmetric because I’m not patient enough for perfect symmetry, and honestly, it turned out better for it.
Frame selection strategies:
- All matching frames – Creates cohesion and lets the artwork be the star
- Mixed frames in similar colors – Adds interest while maintaining unity
- Completely eclectic mix – Works if you have a good eye for balance (or get lucky)
I chose option two—all my frames are either black, white, or natural wood, but they vary in style and size. This gives me flexibility while avoiding the “grabbed random frames from different decades” look.
Layout techniques: Here’s my method—lay everything out on the floor first in the corner configuration. Take a photo from above. Adjust until it looks right. Then trace each frame on paper, tape the paper templates to the wall, and use them as guides for hanging. This saves you from a million unnecessary nail holes.
What to include: Mix different types of art for visual interest:
- Photographs (personal or artistic prints)
- Illustrations or prints
- Typography or quotes
- Small mirrors to bounce light
- Three-dimensional elements like small shelves or shadow boxes
The corner challenge: The actual corner line creates a natural break in your gallery. I embrace this by treating each wall as its own section that relates to the other but doesn’t need to match perfectly. Some people place their largest piece right at the corner intersection as an anchor. Both approaches work.
Spacing consistency: Keep the spacing between frames consistent—usually 2-3 inches works well. This unifies the collection even when frame sizes and artwork styles vary wildly. I use a small cardboard spacer to check gaps as I hang.
Adding dimension: Not everything needs to be flat against the wall. I’ve incorporated a small corner shelf into my gallery that holds tiny objects and adds depth. This three-dimensional element breaks up the flat surfaces and creates more interest.
Corner Desk Workstation
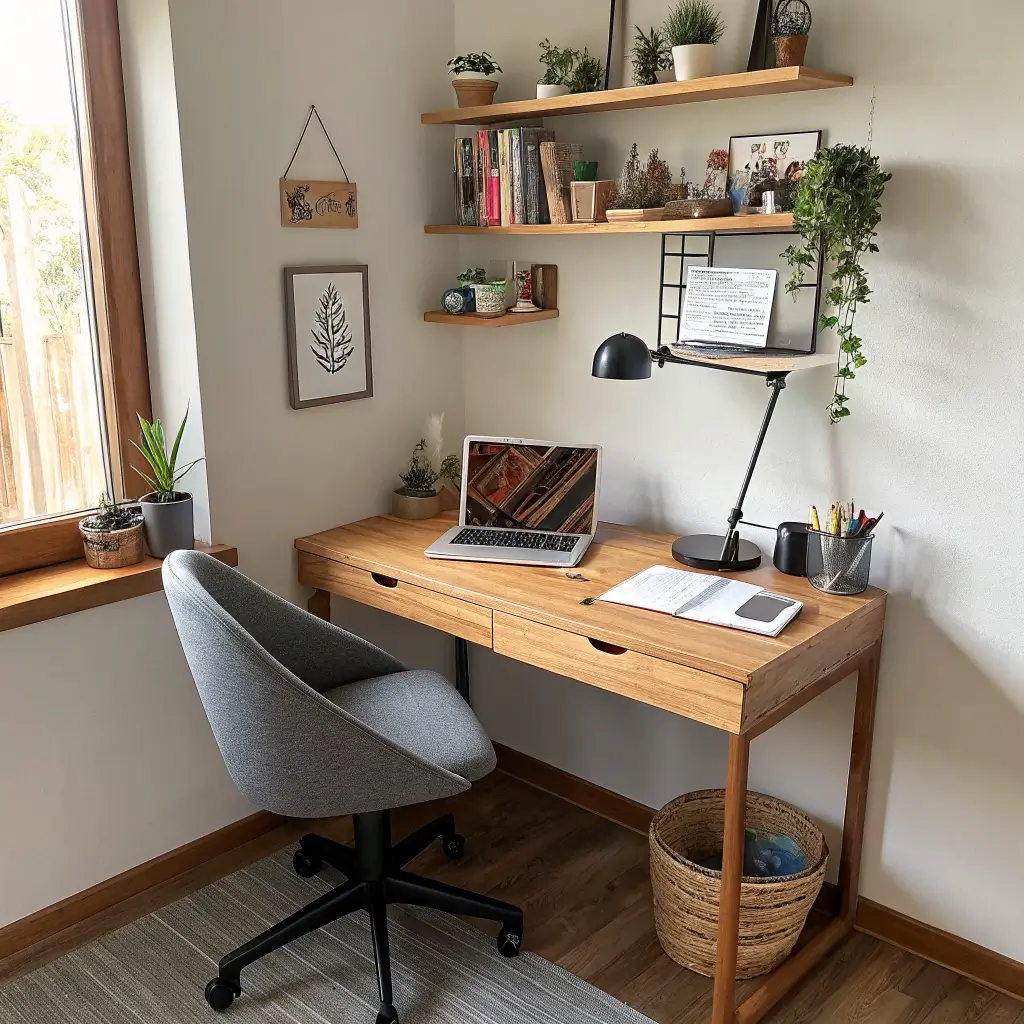
Working from home taught me that corners make surprisingly excellent workspace locations. You get walls on two sides for storage and decor, you’re tucked away from main traffic flow, and you can create a defined work zone without eating up the whole room. I converted a bedroom corner into my office setup, and the wall decor plays a huge role in making it functional and inspiring.
Desk placement options: You can angle a standard desk into the corner or invest in an actual corner desk that maximizes the space. I went with a simple floating desk mounted to both walls—it’s clean, doesn’t take up floor space, and leaves room underneath for storage or leg-stretching.
Wall organization systems: This is where corner wall decor becomes functional, not just pretty. I installed:
- Pegboard on one wall – Holds everything from headphones to small plants to notes
- Cork board on the other wall – For inspiration, reminders, and current project materials
- Floating shelves above the desk – Storage for books, supplies, and decorative elements
- Cable management solutions – Because visible cord chaos ruins any aesthetic
Decorative elements that work: Even a functional workspace deserves to look good. I added framed motivational prints (cheesy but they work for me), a small gallery of inspiring imagery, and a cool vintage clock. The key is balancing function with form—everything should either be useful or make you happy to look at it.
Lighting considerations: Corners can be darker than other wall spaces, especially if you don’t have windows nearby. I use a combination of a desk lamp for task lighting and a wall-mounted swing-arm light for flexibility. String lights along the corner edges add ambient lighting that’s easy on the eyes during long work sessions.
Color psychology: I painted one wall a soft blue-gray (supposed to enhance focus and creativity) and left the other white to keep things bright. Whether the color psychology actually works or it’s all in my head, I don’t know, but I like how it looks.
Personal touches: Add things that make you actually want to sit at this desk. I’ve got photos of places I’ve traveled, a small speaker for music, and a succulent that’s somehow still alive. These personal elements transform a corner workspace from “makeshift office” to “intentional creative zone.”
Minimalist Corner Vignettes
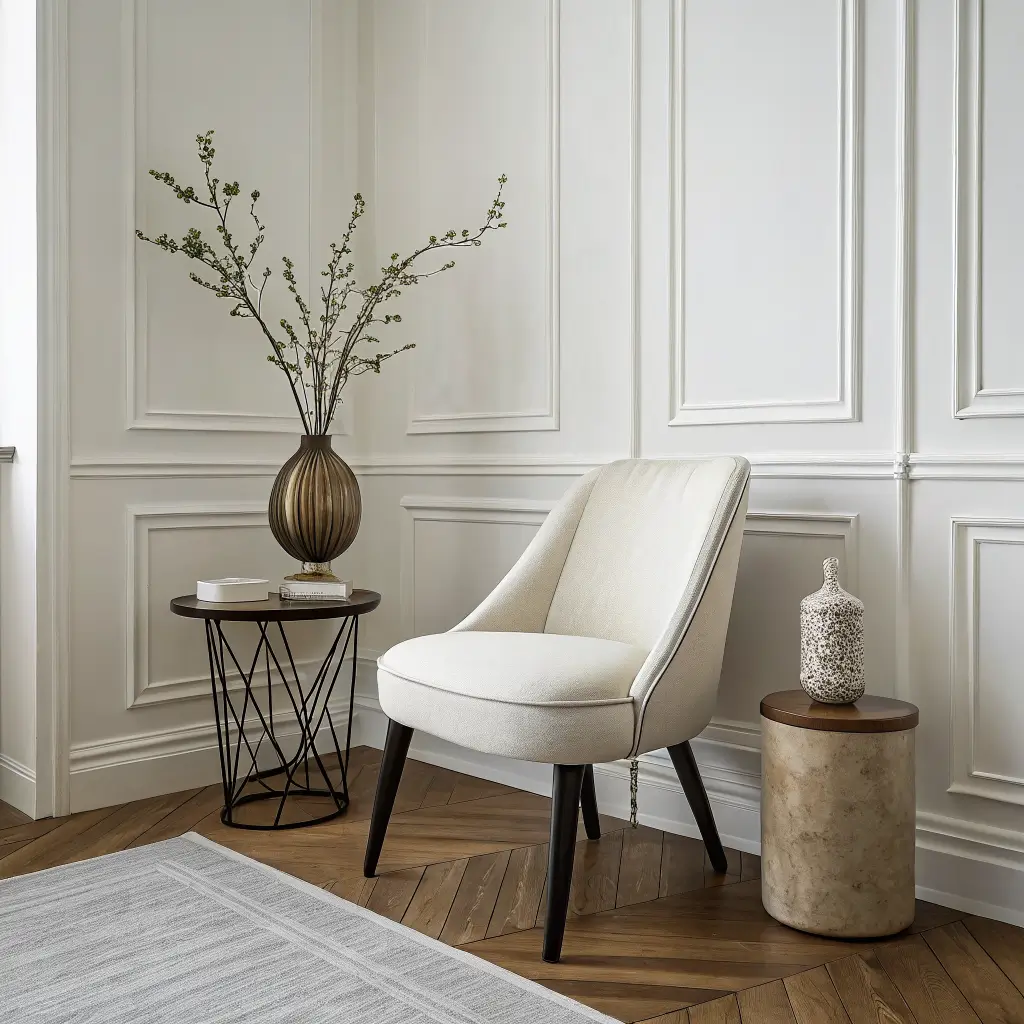
Not every corner needs to be a full production, you know? Sometimes the most impactful corner decor is simple, edited, and minimal. I created a minimalist vignette in my entryway corner, and it makes a statement without screaming for attention.
What makes a vignette minimalist: Restraint is the name of the game. You’re choosing a few perfect elements rather than filling every inch of space. Think quality over quantity, breathing room over abundance, and intention over randomness.
My minimalist corner formula:
- One substantial piece (sculpture, large vase, or statement plant)
- One or two wall elements (single piece of art or small shelf)
- Negative space (this is crucial—don’t fill it all!)
- A cohesive color palette (usually neutrals with maybe one accent color)
Choosing your anchor piece: This is the hero of your vignette. I use a tall ceramic vase with dried pampas grass in mine. It’s sculptural, interesting, and requires zero maintenance. Other options include a beautiful floor lamp, a simple wooden ladder with a draped throw, or an architectural plant like a snake plant in a stunning pot.
Wall elements: Keep it simple. A single large-scale piece of art makes more impact than multiple small ones in a minimalist setup. I hung one black-and-white photograph in a simple frame. That’s it. The restraint is what makes it work.
The power of negative space: This might feel counterintuitive, but the empty space around your carefully chosen elements is what makes them stand out. Don’t panic and fill it. The breathing room is doing important visual work.
Texture variation: Even in minimalism, you want textural interest to avoid boring. My vignette combines smooth ceramic, rough dried grass, and the wall’s flat paint surface. Three different textures create depth without adding clutter.
Lighting for drama: A simple picture light or even a minimalist sconce can add subtle drama to your corner vignette. I angled a small spotlight from above to create interesting shadows—it transforms the space, especially in the evening.
Common minimalist mistakes: Too matchy-matchy looks sterile rather than serene. Allow for slight variations in your neutrals. Also, don’t confuse minimalist with empty—you still want the space to feel intentional and complete, just not cluttered.
Also Read: 10 Inspiring Nursery Wall Decor Ideas for Modern Parents
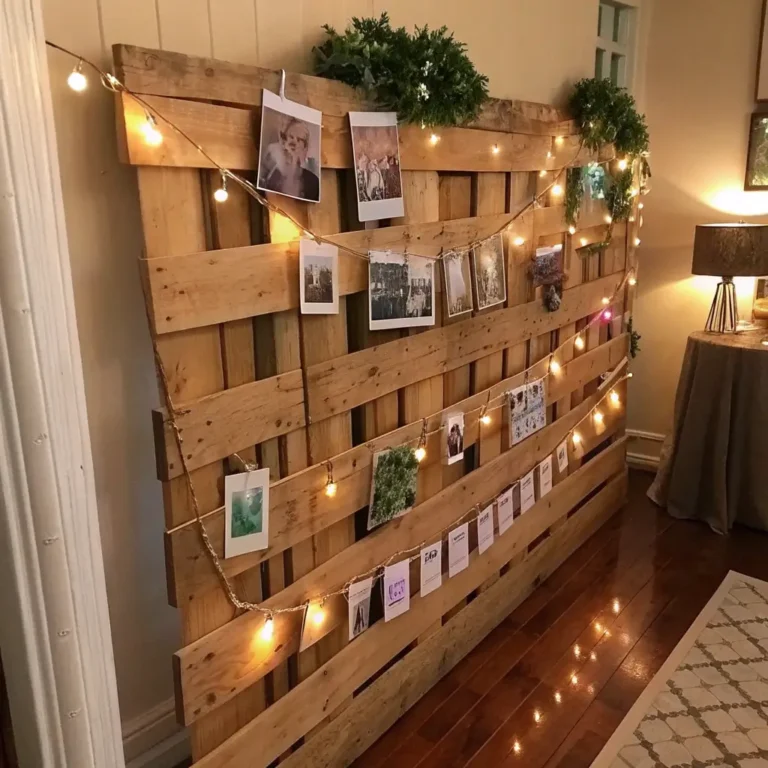
Accent Lighting Corner Glow
Want to know the secret weapon for transforming corners? Lighting. Strategic lighting turns forgotten corners into focal points that literally glow with atmosphere. I experimented with different lighting setups in various corners throughout my place, and the right lighting genuinely changed how I use and feel about those spaces.
Types of corner accent lighting:
- Floor lamps – Classic and versatile, especially arc lamps that curve over seating
- Wall sconces – Mounted on one or both corner walls for ambient glow
- LED strip lighting – Hidden behind shelves or along crown molding for modern edge
- String lights or fairy lights – Creates cozy, magical atmosphere
- Uplighting – Placed behind plants or objects to cast dramatic shadows
My favorite combo: I use warm-toned LED strips hidden under floating shelves combined with a vintage-style floor lamp. The layered lighting creates depth and lets me adjust the mood depending on the time of day or my vibe.
Color temperature matters: Warm white (2700-3000K) creates cozy, inviting ambiance perfect for living spaces and bedrooms. Cool white (4000K+) works better for task-oriented corners like workspaces. I’m firmly team warm white for most corners—it just feels more welcoming.
Creating wall art with light: This is where it gets fun. I’ve seen people use wall-mounted light fixtures arranged in patterns to become the decor themselves. Geometric sconce arrangements, color-changing LED installations, or even vintage marquee letters create visual interest while providing illumination.
Smart lighting options: IMO, smart bulbs are worth the investment for corner lighting. Being able to adjust brightness and color from my phone means I actually use different lighting scenes instead of defaulting to one setting forever. Plus, scheduling lights to gradually brighten in the morning? Game changer.
Shadow play: Don’t underestimate the power of interesting shadows. I placed an uplight behind a large plant in one corner, and the leaf shadows cast on the walls became instant wall art. It’s dynamic, changes with the plant’s growth, and costs almost nothing to achieve.
Practical installation tips: Hide those cords! Use cord covers, run them behind furniture, or choose battery-operated options for true flexibility. Visible cords ruin even the best lighting design. Also, put accent lights on separate switches or smart plugs so you can control them independently from overhead lighting.
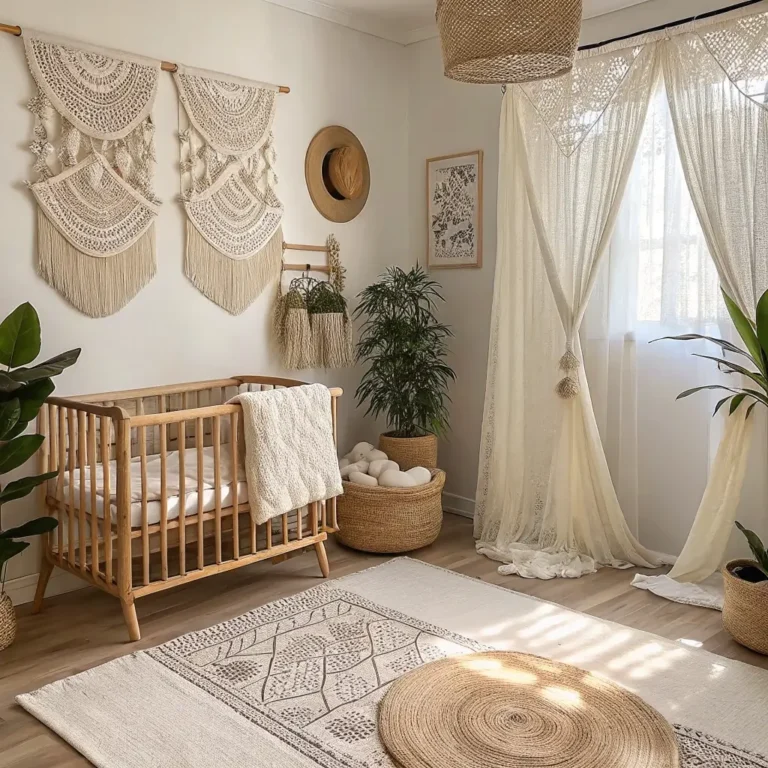
Boho Chic Corner Setup

If you’re into that relaxed, eclectic, collected-over-time vibe, a boho corner setup might be calling your name. I created one in my spare room, and it’s become everyone’s favorite spot to hang out. There’s something about the layered textures and warm, lived-in feel that just works.
Essential boho elements:
- Textiles, textiles, textiles – Tapestries, woven wall hangings, macramé, patterned rugs
- Natural materials – Rattan, jute, wood, and plenty of plants
- Warm, earthy color palette – Terracotta, mustard, cream, olive green
- Vintage or handmade pieces – Nothing too matchy-matchy or mass-produced looking
- Layered lighting – String lights, lanterns, candles (real or LED)
Wall decor approach: Boho style embraces maximalism, so this is your permission to layer it on. I hung a large macramé wall hanging as the anchor, then surrounded it with smaller woven pieces, a vintage mirror, and some dried flower arrangements. The key is making it look collected rather than chaotic.
Floor and seating: I brought in a colorful vintage rug to define the corner space, then added floor cushions and poufs for casual seating. A low wooden side table holds plants, candles, and my current book. The low furniture keeps sight lines open while creating that cozy, sit-on-the-floor vibe.
Plant integration: Boho corners need plants—lots of them. I use a combination of hanging plants, floor plants, and plants on stands to create that jungle-meets-living-room aesthetic. The more greenery, the more authentic the boho feel.
Textile layering: This is where boho style really shines. I layered a Turkish kilim rug over a jute rug, threw a chunky knit blanket over the cushions, and added various patterned throw pillows. The mixing of patterns and textures creates richness and depth.
DIY opportunities: Boho decor is perfect for DIY projects. I made my own macramé plant hangers (easier than they look, trust me), painted terracotta pots with simple patterns, and created a wall hanging from driftwood and yarn. These handmade elements add personality and save money.
Avoiding boho clichés: Yes, you can have a boho corner without the overdone “live laugh love” vibes. Focus on authentic pieces with history or meaning rather than just buying everything marketed as “boho” from big box stores. Thrift stores and artisan markets are your friends here.
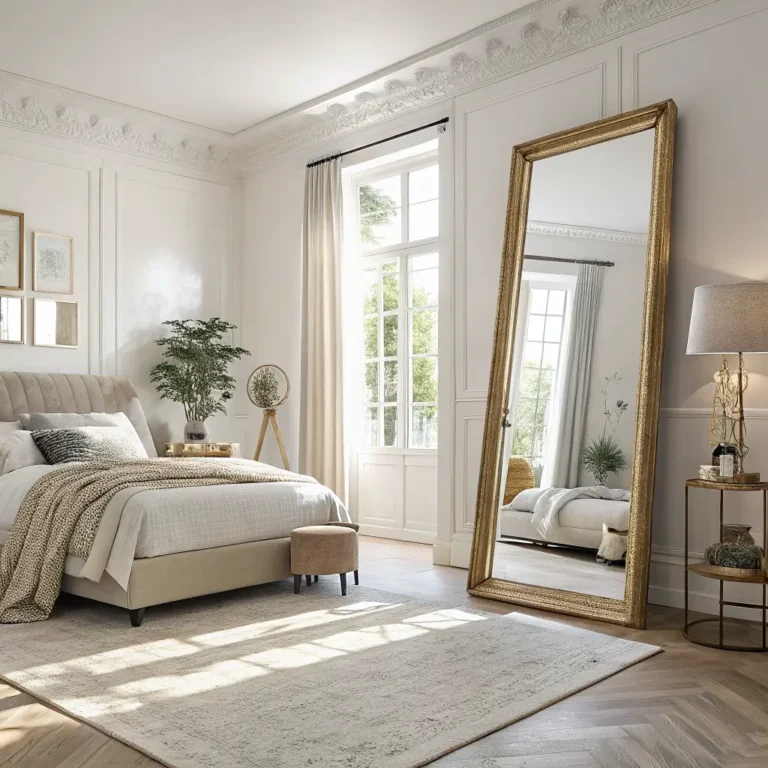
Corner Mirror Magic
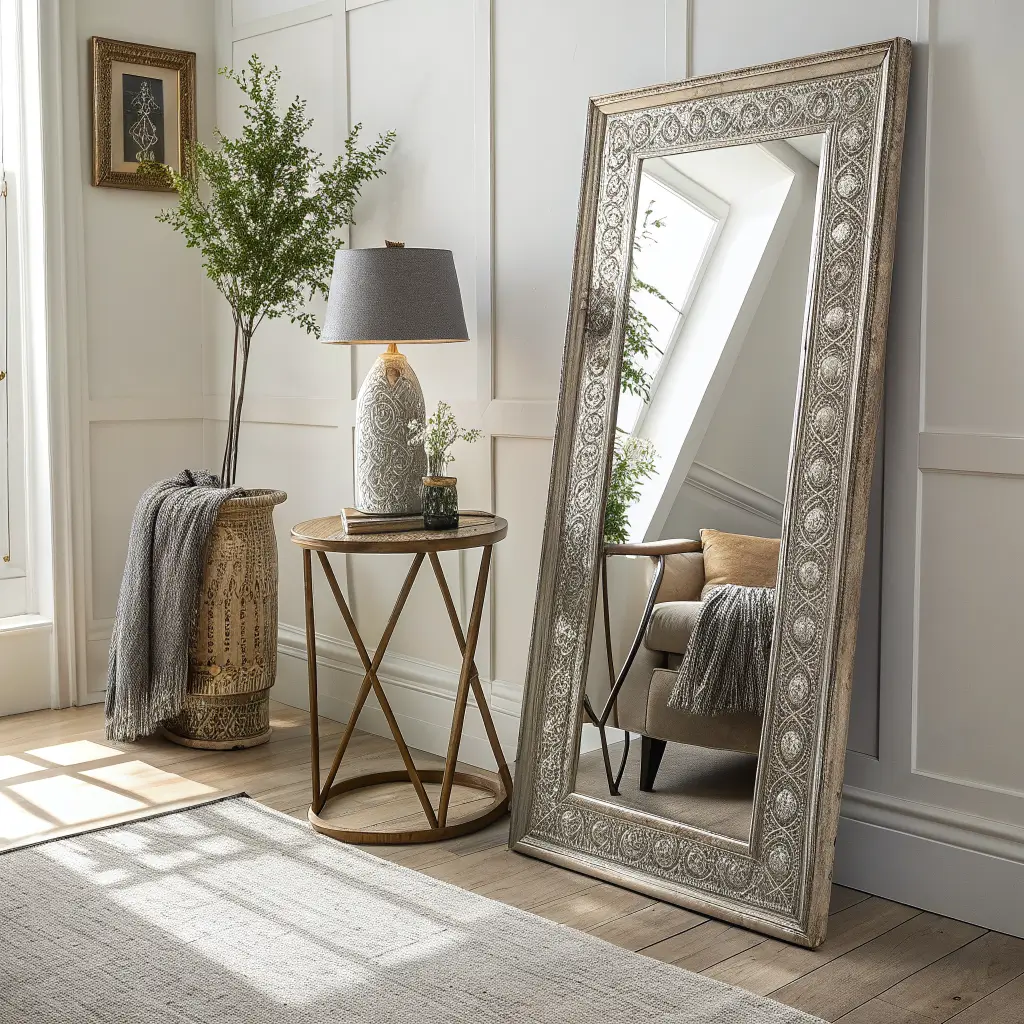
Mirrors in corners do serious visual heavy lifting—they reflect light, create the illusion of more space, and add architectural interest to otherwise flat walls. I installed a large leaning mirror in a dark corner of my bedroom, and it completely transformed both the light levels and how spacious the room feels.
Mirror placement strategies:
- Leaning floor mirror – Propped in the corner, angled slightly for interest
- Wall-mounted corner mirrors – Hung on one or both walls flanking the corner
- Multiple small mirrors – Arranged in a gallery-style cluster
- Corner-fitted mirrors – Custom or specialty mirrors designed specifically for corner installation
Size considerations: Go bigger than you think you need. A too-small mirror in a corner looks like you couldn’t decide where to put it. A substantial mirror creates a deliberate focal point and maximizes the light-bouncing benefits.
Frame styles matter: The mirror frame contributes significantly to your overall decor style. I chose an oversized vintage gold frame that leans boho-glam. Modern spaces might call for a sleek frameless option or minimal metal frame. Traditional rooms could use ornate carved wood.
What the mirror reflects: This is crucial and often overlooked. Position your mirror to reflect something attractive—a window, artwork, your plant collection, or an interesting architectural feature. Don’t position it to reflect clutter, the toilet, or anything else you’d rather not duplicate visually 🙂
Layering with mirrors: I don’t just hang my mirror and call it done. I’ve placed a small wooden stool in front of it holding a plant and some books. This layered approach creates depth and makes the corner feel more curated.
Lighting tricks: Place a light source where the mirror will reflect it—this doubles your light output. I positioned a small table lamp on a side table that the mirror catches, effectively creating two lamps worth of glow from one actual lamp.
Safety first: Secure leaning mirrors properly, especially if you have kids or pets. I used museum putty at the base and top to prevent shifting. For wall-mounted mirrors, use appropriate anchors for the weight—these can be heavy, and you don’t want one crashing down.
Functional benefits: Beyond aesthetics, a corner mirror serves practical purposes. My bedroom corner mirror functions as a full-length mirror for outfit checks, catches natural light from the window and spreads it around the room, and makes the bedroom feel significantly larger than it actually is.
Also Read: 10 Simple Small Wall Decor Ideas with Big Impact
Functional Storage Corner
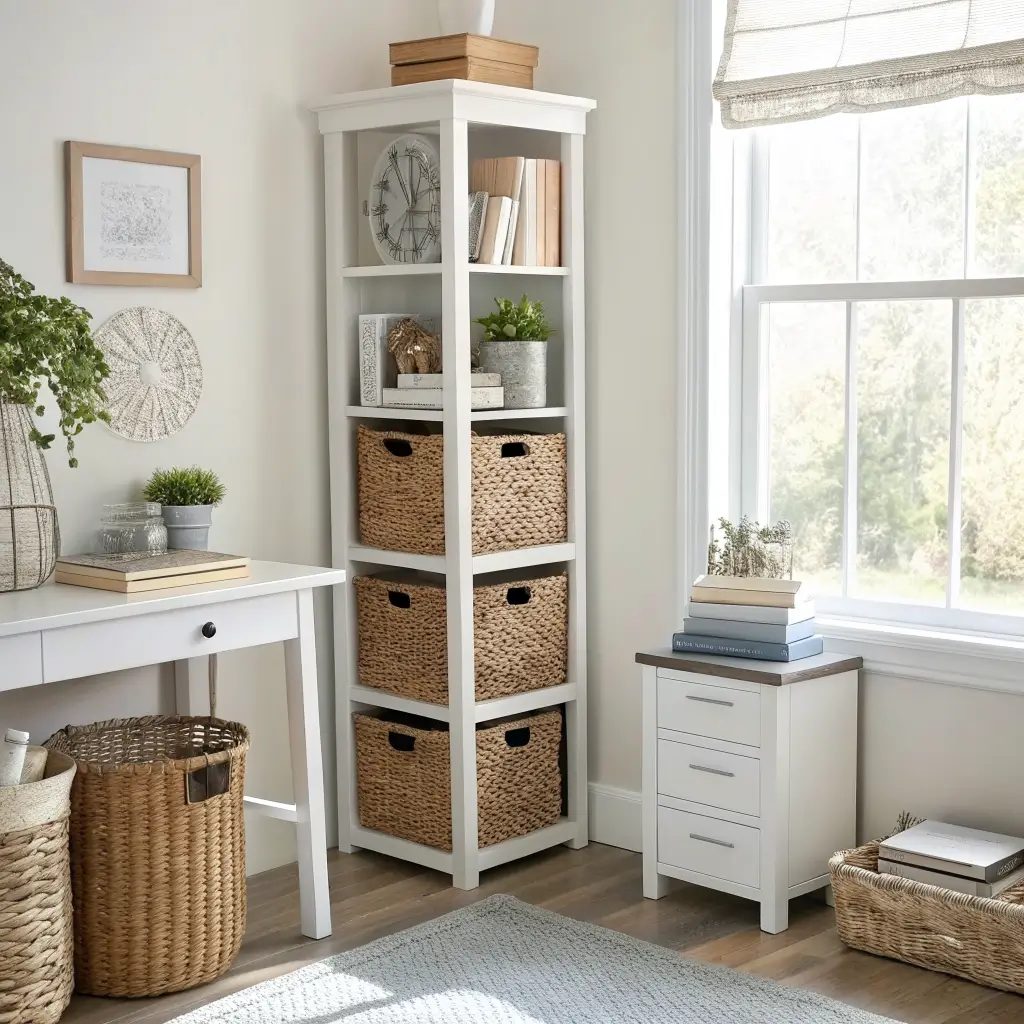
Let’s get real—sometimes corners need to work hard, not just look pretty. I converted a wasted corner in my small apartment into a functional storage solution that also happens to look intentional and attractive. The best part? It cleared clutter from other areas while actually improving the room’s overall aesthetic.
Storage options that don’t scream “storage”:
- Corner ladder shelf – Leans against the wall, provides multiple levels for storage and display
- Built-in corner shelving – Custom or DIY shelving fitted precisely to your corner
- Corner cabinet – Closed storage that hides clutter while using awkward space
- Basket system – Attractive baskets on the floor or shelves combine storage with texture
- Pegboard organization – Visible storage that becomes wall decor when done right
My solution: I installed a corner ladder shelf in white oak that holds a mix of practical items and decorative pieces. The bottom shelves contain baskets with actual storage (seasonal items, extra blankets, craft supplies), while upper shelves display books, plants, and pretty objects. The mix of hidden and visible storage keeps it functional without looking cluttered.
Making storage attractive: Choose storage containers and baskets that match your decor aesthetic. I use natural woven baskets, white ceramic containers, and wooden boxes—all cohesive with my overall style. When your storage looks intentional, it becomes part of the decor rather than an eyesore you’re trying to hide.
Wall-mounted solutions: I added hooks on one corner wall for hanging bags, scarves, or jewelry. The right decorative hooks become wall art themselves while serving a practical purpose. I chose brass hooks with a vintage feel that add warmth and visual interest.
Vertical maximization: Corners offer vertical space that often goes unused. I extended my storage almost to the ceiling, using those higher shelves for items I don’t access daily. A small step stool lives nearby for when I need to reach up there.
Labels and organization: Even pretty storage needs internal organization. I use simple labels on baskets (handwritten tags tied with twine for that handmade feel) so I actually know what’s stored where. This prevents the dreaded storage system that becomes a black hole for stuff.
Color coding: FYI, organizing items by color on visible shelves creates visual calm and makes the storage feel more like intentional display. I grouped books by color, chose baskets in natural tones, and kept decorative objects within a similar color palette.
Rotation system: I switch out what’s displayed seasonally, moving some storage to the back and bringing other items forward. This keeps the corner fresh and ensures I’m actually using what I own rather than forgetting it exists behind closed doors.
Final Thoughts on Corner Wall Decor
There you have it—ten ways to transform those awkward, neglected corners into spaces you’ll actually love looking at and using. Corners don’t have to be the forgotten stepchildren of your home design anymore.
The beautiful thing about corner wall decor is how it changes your perception of the entire room. When you activate those previously dead spaces, everything feels more complete, intentional, and pulled together. You’re literally getting more out of your existing square footage without adding a single inch.
Start with whichever idea spoke to you most. Maybe you’re dying to create that cozy reading nook, or perhaps the functional storage corner is calling your name because you desperately need somewhere to put all your stuff. There’s no wrong starting point—just pick one corner and commit.
Remember, you don’t need to tackle every corner in your home at once. I certainly didn’t. I started with one corner, lived with it for a while, and then moved on to the next. This gradual approach lets you learn what works for your space and style without overwhelming yourself or your budget.
And hey, if your first attempt doesn’t turn out exactly as planned, welcome to the club. I’ve definitely had corners I’ve redone multiple times before landing on something that worked. That’s part of the process—testing, adjusting, and figuring out what actually functions in your real life, not just in magazine photos.
The corners of your home are just waiting for you to give them some love and attention. Now you’ve got the roadmap—go make those spaces work for you!