15 Modern White Subway Tile Kitchen Backsplash Ideas for Style
Introduction
So you’re thinking about white subway tile for your kitchen backsplash? Smart move. I get it—you want something that looks clean, timeless, and won’t make you cringe five years from now when you’re scrolling through old kitchen photos. White subway tile is basically the little black dress of kitchen design: it never goes out of style, works with almost everything, and somehow makes you look like you have your life together (even if your junk drawer says otherwise).
I’ve spent way too much time obsessing over kitchen backsplashes, both in my own home and while helping friends tackle their renovations. Here’s the thing: white subway tile might sound basic, but trust me, the possibilities are endless. The pattern you choose, the grout color, the finish—all these little decisions can completely transform your space from “meh” to “wow, did you hire a designer?”
Let me walk you through 15 ideas that’ll help you figure out exactly what vibe you’re going for. Whether you’re into farmhouse chic, modern minimalism, or something totally unique, we’ve got you covered.
Classic White Subway Tile Backsplash Inspiration
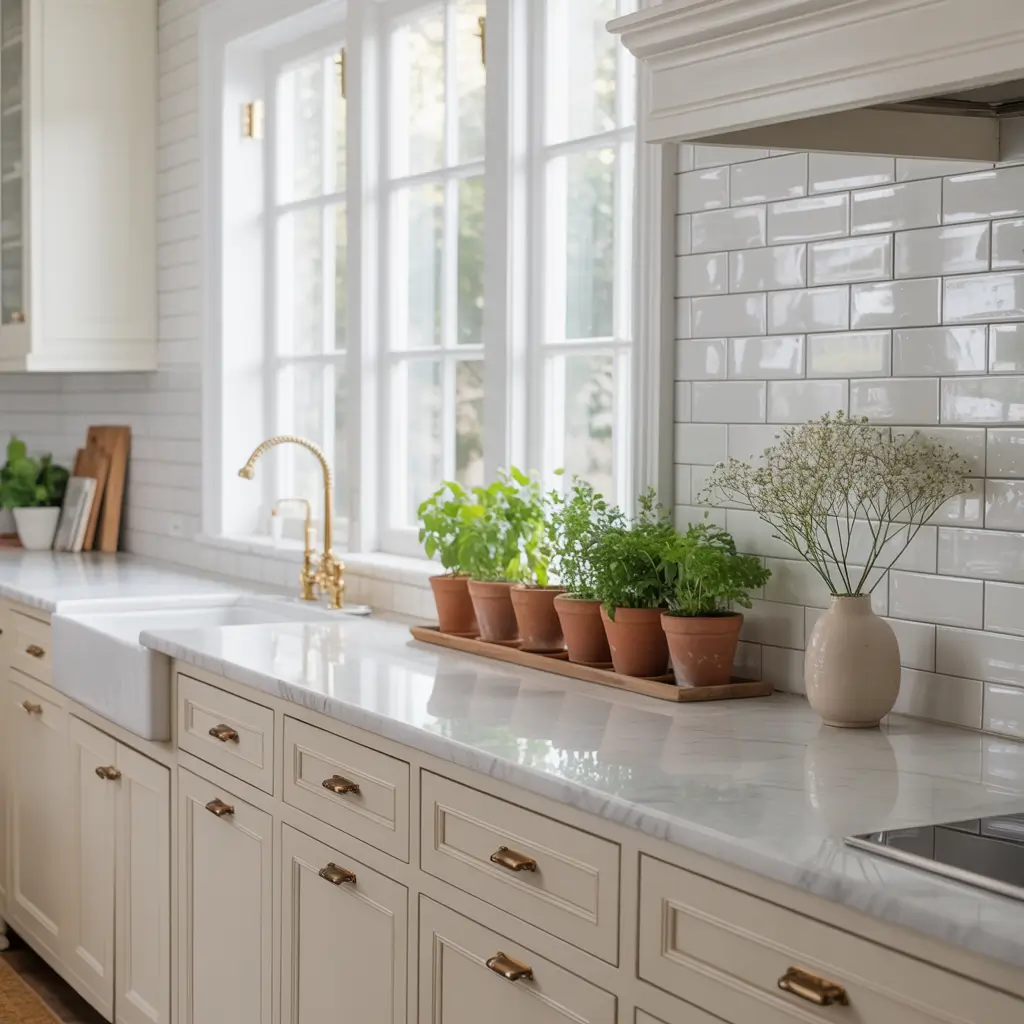
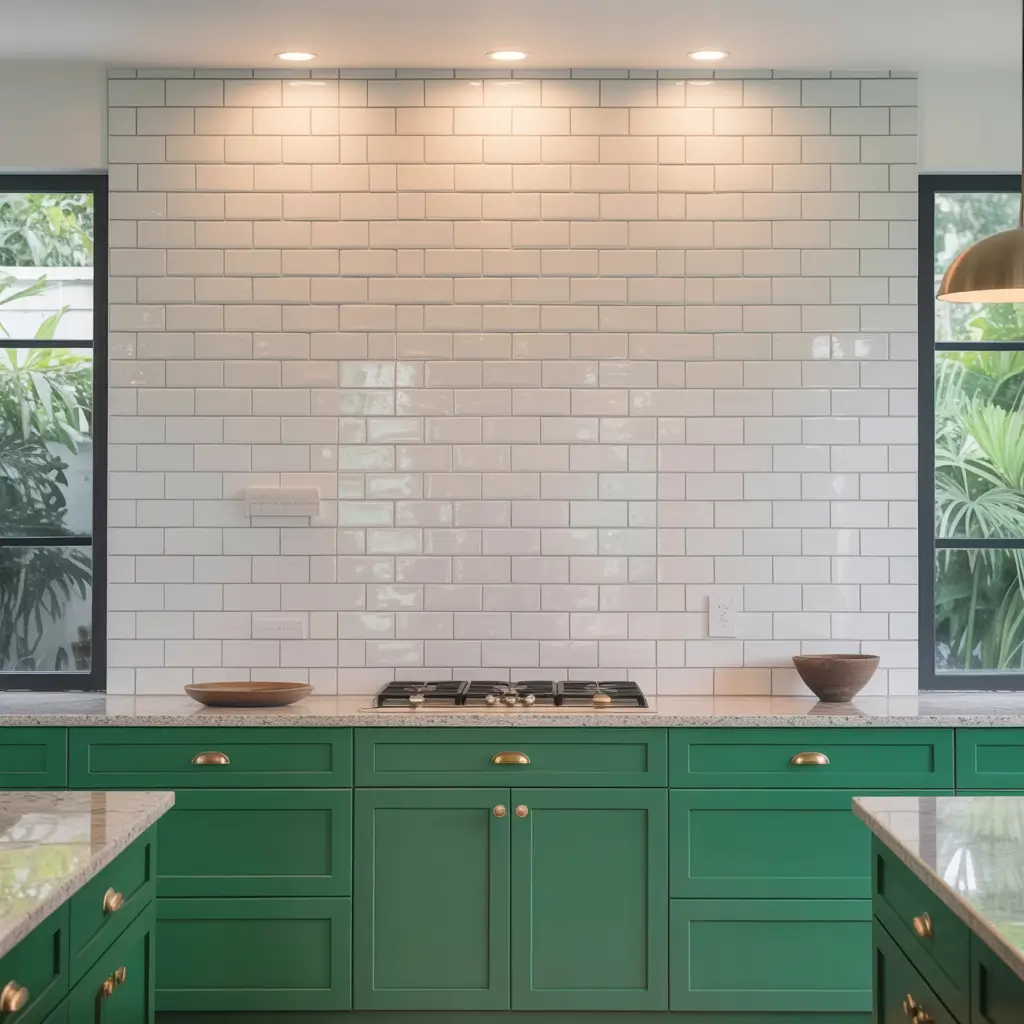
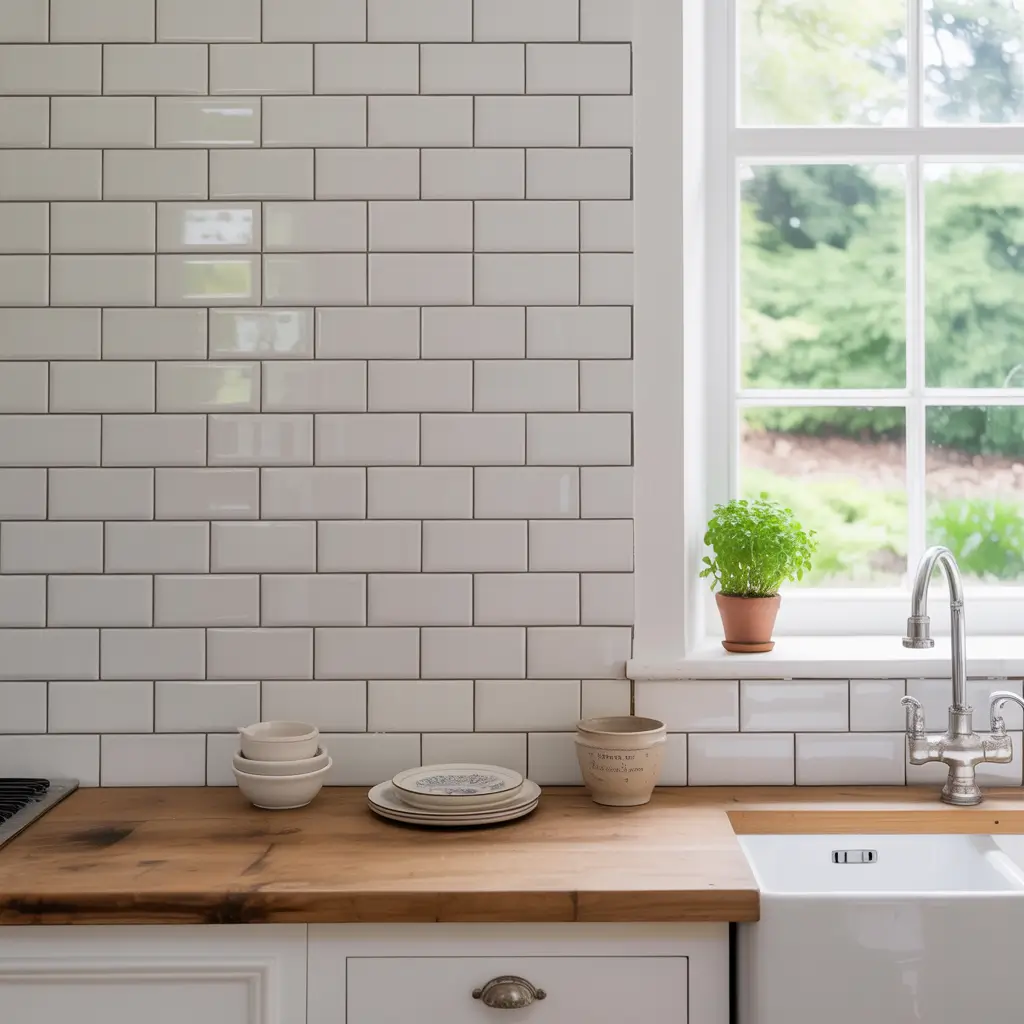
Let’s start with the OG. The classic white subway tile backsplash is called classic for a reason—it works. Period. You know that crisp, clean look you see in fancy kitchen magazines? Yeah, that’s usually this setup in action.
The traditional approach uses 3×6 inch tiles laid in a running bond pattern (that’s the brick-like layout) with white or light gray grout. It’s the foundation that literally everything else builds on. I installed this exact setup in my first kitchen renovation, and honestly? I was nervous it would be too boring. Spoiler alert: it wasn’t.
What makes the classic version so special is its versatility. You can pair it with white cabinets for that all-white, Instagram-worthy aesthetic, or use it as a neutral backdrop for colorful accents. Dark countertops? No problem. Butcher block? Looks amazing. Gold fixtures? Chef’s kiss.
The beauty here is that you’re creating a canvas. Your backsplash doesn’t need to be the star of the show—sometimes it just needs to show up and play nice with everyone else. And if you’re worried about resale value down the line, this is about as safe a bet as you can make.
Modern Minimalist Subway Tile Kitchen Ideas

Alright, minimalists, this one’s for you. Modern minimalist design takes the classic subway tile and strips away anything that isn’t absolutely necessary. Think clean lines, seamless integration, and a “less is more” philosophy that actually makes sense.
For the modern minimalist approach, you want to focus on creating visual calm. Go with large-format subway tiles—I’m talking 4×12 or even 4×16 inches. Fewer grout lines mean less visual noise, which is exactly what minimalism is all about. Pair these with matching white grout to create that almost-seamless look.
Here’s where it gets interesting: consider extending your backsplash all the way to the ceiling. I know, I know, it sounds like a lot of tile, but it creates this stunning, unbroken vertical line that makes your kitchen feel taller and more spacious. Plus, no more awkward gap where grease and dust collect (you’re welcome).
Keep everything else in the kitchen equally streamlined. Handleless cabinets, integrated appliances, and simple open shelving work beautifully with this approach. The subway tile becomes this quiet, sophisticated backdrop that lets your minimal aesthetic really shine through.
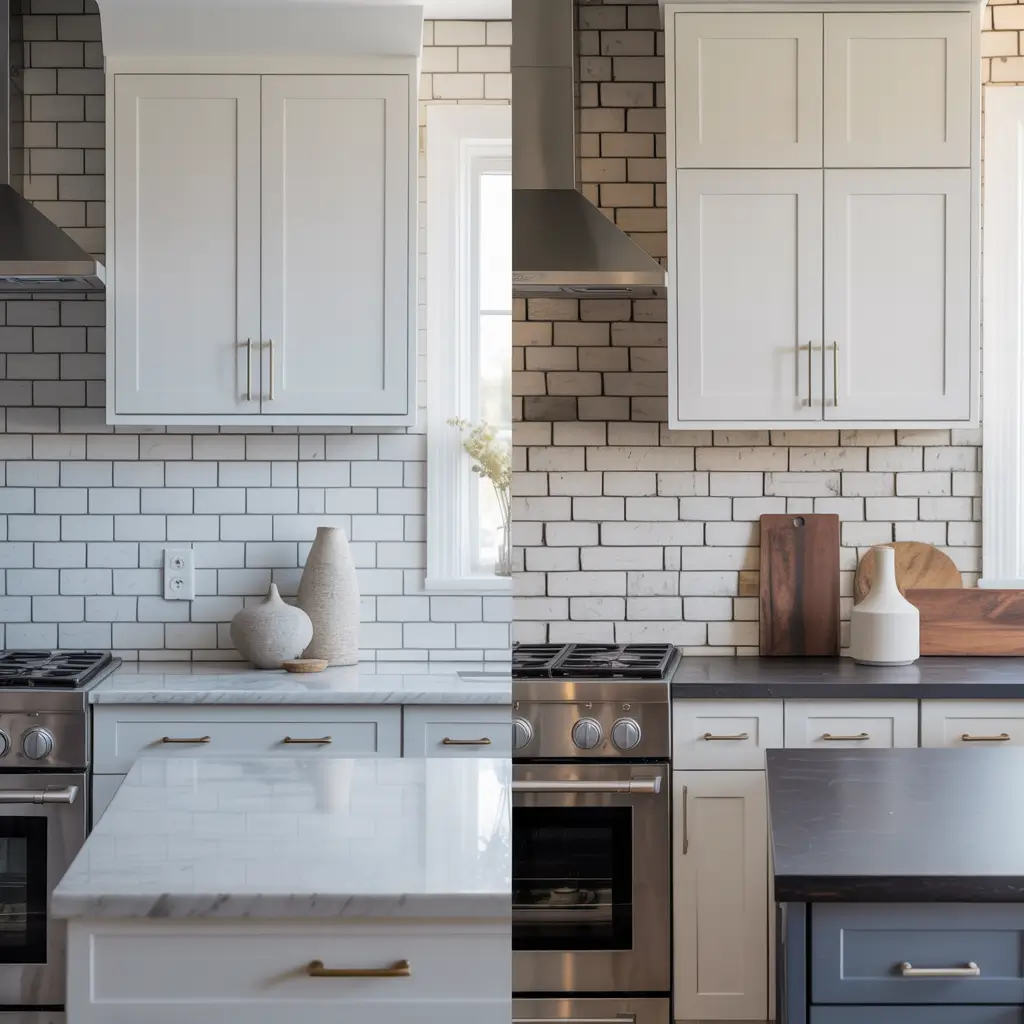
White Subway Tile with Contrasting Grout Designs
Want to know the easiest way to make white subway tile look completely different? Change the grout color. Seriously, it’s like magic. The tile stays the same, but suddenly your whole backsplash has a totally different personality.
Dark grout—especially black or charcoal—creates this dramatic grid effect that highlights the tile pattern. It’s bold, it’s modern, and IMO, it’s one of the coolest trends in kitchen design right now. I recently helped a friend choose dark gray grout for her white subway tile, and the transformation was insane. The backsplash went from sweet and subtle to edgy and architectural.
But here’s the real talk: dark grout shows less dirt and staining over time. Light grout, while beautiful when fresh, can be a nightmare to maintain, especially around the stove. If you’re someone who actually cooks (as opposed to just reheating takeout), dark grout might save your sanity.
You can also experiment with colored grout for something truly unique. Navy blue, forest green, or even terracotta can add personality without overwhelming the space. Just remember: grout is way easier to commit to than patterned tile, but it’s also more permanent than paint. Choose wisely, my friend.
DIY White Subway Tile Backsplash Projects
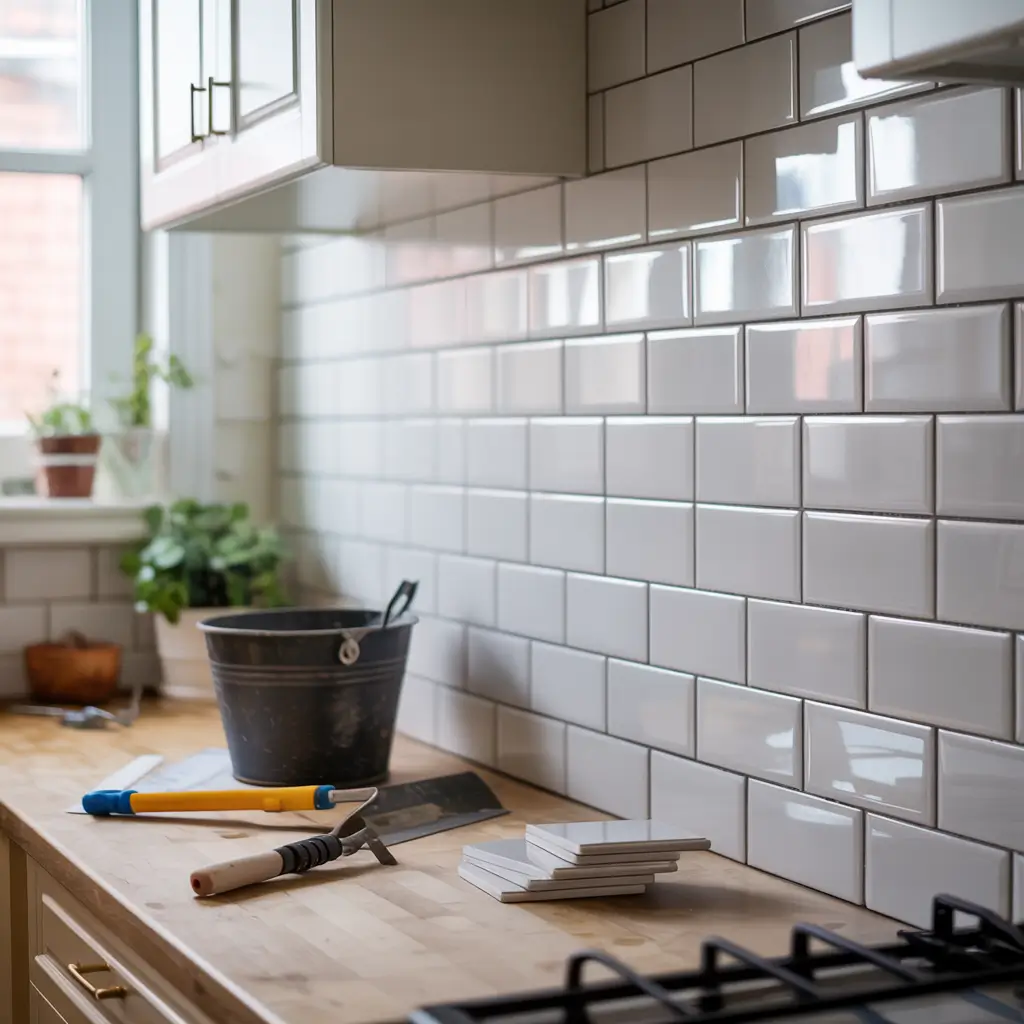
Let’s talk DIY, because here’s a secret: installing subway tile is actually one of the more approachable tile projects out there. The rectangular shape is forgiving, the pattern is straightforward, and you don’t need to be a master craftsperson to get professional-looking results.
I tackled my first subway tile backsplash with exactly zero tiling experience, armed with YouTube tutorials and probably too much confidence. And you know what? It turned out great. Well, mostly great. That one corner behind the stove we don’t talk about. 🙂
Here’s what you actually need:
- Tile (obviously)
- Thin-set mortar or tile adhesive
- Grout and grout sealer
- Tile spacers
- A wet saw or tile cutter
- A notched trowel
- A grout float
- Level and measuring tape
The key to a successful DIY install is preparation. Your wall needs to be clean, dry, and relatively flat. Mark your layout with pencil before you start spreading adhesive—trust me, once that mortar goes on, you’re committed. Use spacers to keep everything aligned, and don’t rush the drying process between steps.
Start from the bottom and work your way up. Cut tiles as you go, and remember that outlet covers and edge pieces will hide a lot of imperfections. The whole project took me a weekend (with drying time), and I saved probably $1,500 in labor costs. Plus, there’s something genuinely satisfying about looking at your backsplash and thinking, “Yeah, I did that.”
Also Read: 15 Gorgeous White Countertops Kitchen Layouts to Explore
Herringbone Pattern Subway Tile Kitchens

Ready to level up? The herringbone pattern takes standard subway tile and arranges it in a zigzag pattern that’s basically visual poetry. It’s more dynamic than the classic running bond, but it still maintains that timeless appeal.
Here’s why I love herringbone: it adds movement and interest without introducing color or new materials. You’re using the same white subway tile, just laying it differently, and suddenly your kitchen has this sophisticated, almost luxurious feel. It’s the design equivalent of putting on a blazer—instantly more polished.
Fair warning though: herringbone requires more planning, more cuts, and more patience. If you’re going the DIY route, this is definitely a step up in difficulty. You’ll need to be precise with your angles and spacing, because any inconsistency becomes really obvious in a geometric pattern like this.
The payoff is worth it, though. I’ve seen herringbone subway tile backsplashes that genuinely stopped me in my tracks. They work especially well in modern traditional or transitional kitchens where you want classic materials with a contemporary twist. Pair it with simple cabinets and let the pattern be the star.
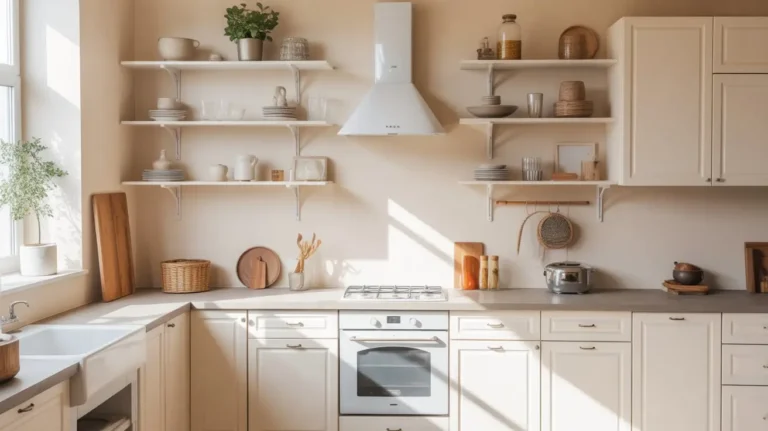
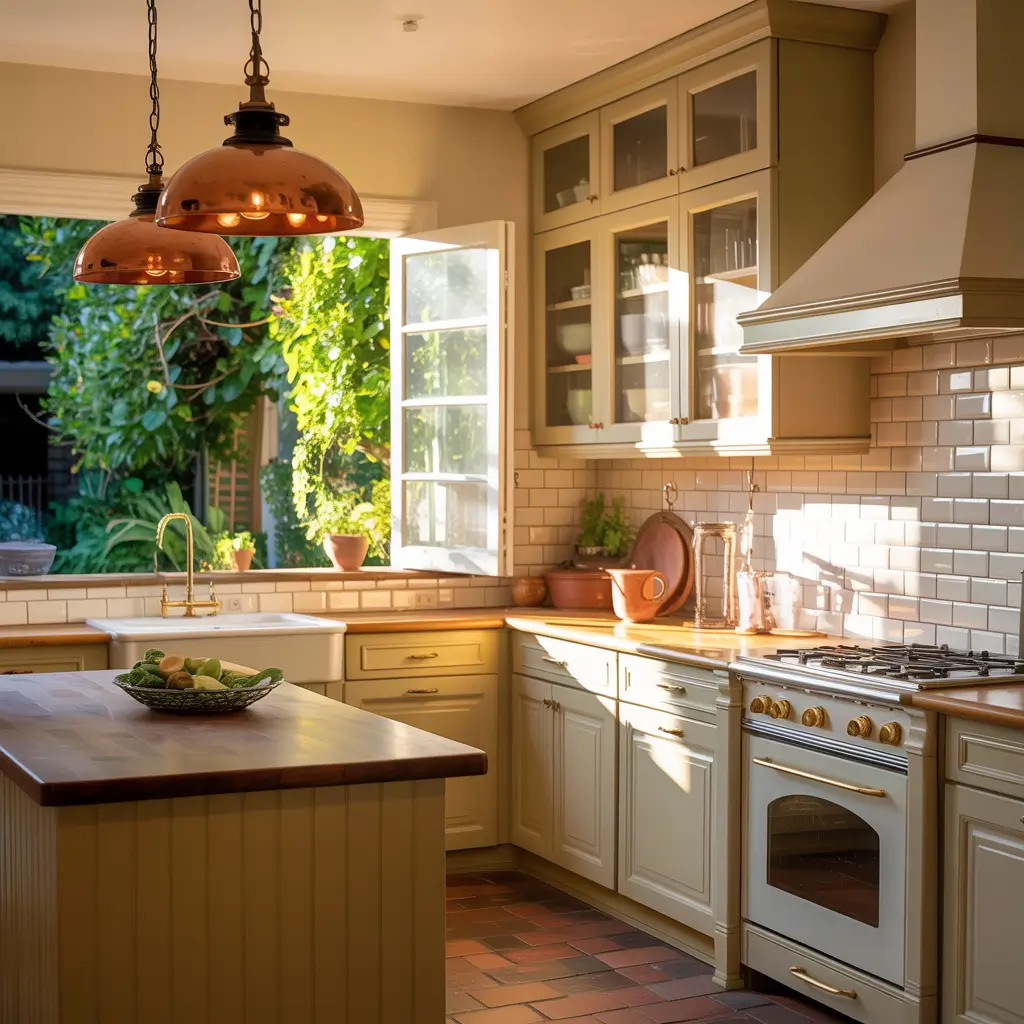
Farmhouse Style White Subway Tile Backsplash
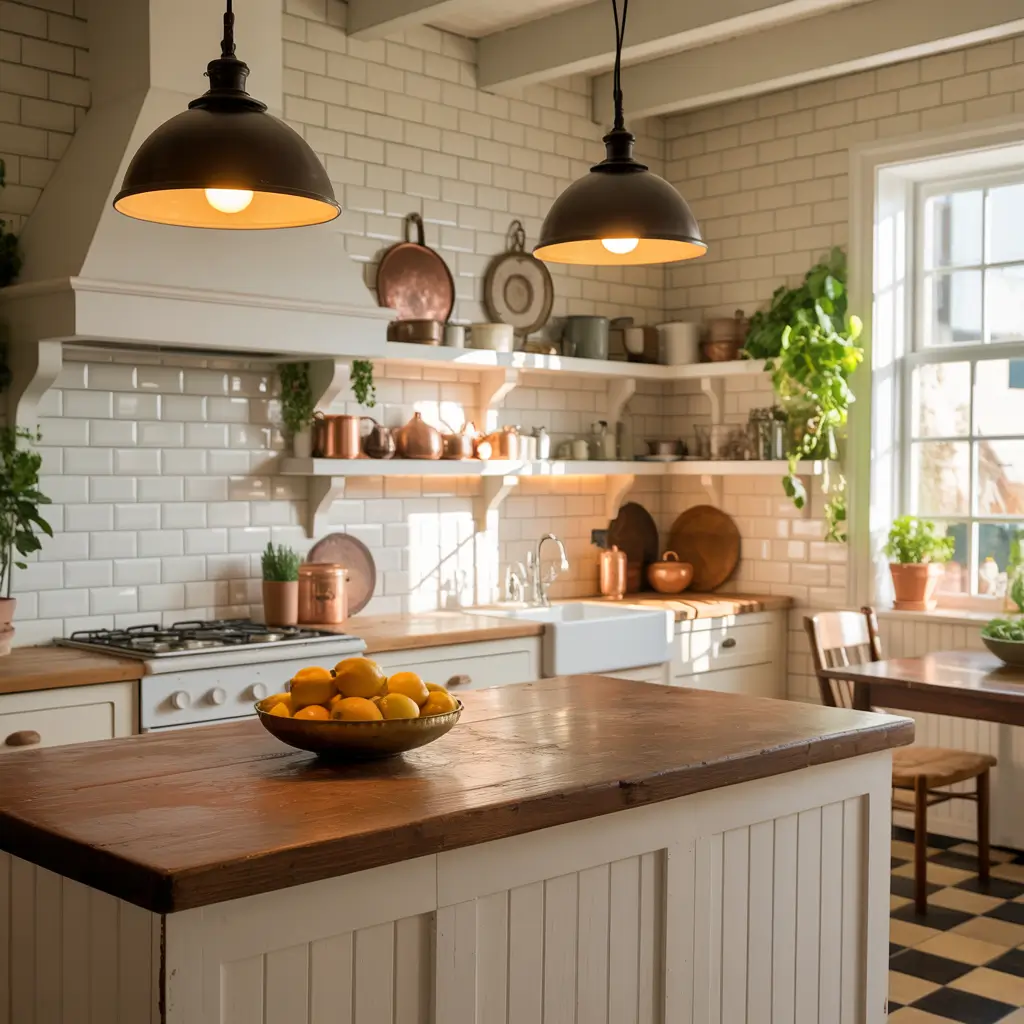
Ah, farmhouse style. Whether you’re all-in on the Chip and Joanna aesthetic or just appreciate the warmth of rustic design, white subway tile fits perfectly into this vibe.
The farmhouse approach is all about creating a cozy, lived-in feel while maintaining that clean, bright aesthetic. You want your subway tile to look crisp but not sterile, classic but not stuffy. The trick is in how you style everything around it.
Pair your white subway tile with warm wood tones—open shelving in natural wood, butcher block countertops, or wooden range hoods. Add some vintage-inspired details like oil-rubbed bronze fixtures, a farmhouse sink (obviously), and maybe some open shelving displaying your grandmother’s dishware.
For grout, stick with white or a warm gray to keep things light and airy. The farmhouse look isn’t about contrast and drama; it’s about creating a welcoming space that feels like home. I like to describe it as “the kitchen where you’d actually want to bake cookies on a Sunday afternoon,” which sounds cheesy but you know exactly what I mean.
FYI, you can also mix in some texture with beveled or handmade-looking tiles instead of perfectly flat ones. The slight irregularity adds to that authentic, collected-over-time farmhouse feel.
White Subway Tile with Bold Accent Colors
Okay, here’s where we have some fun. White subway tile is the perfect backdrop for injecting some serious personality through bold accent colors. Think of it as your neutral canvas waiting for a pop of excitement.
I’m talking about pairing your crisp white backsplash with vibrant cabinet colors—deep navy, emerald green, or even a daring yellow. The white tile keeps things grounded while the color makes a statement. You get to be bold without going overboard, which is honestly the sweet spot of good design.
Another approach? Use colorful accessories and decor against your white subway tile backdrop. Bright red appliances, colorful dishes on open shelves, or a statement range in a bold hue. The backsplash doesn’t compete—it enhances.
My favorite trick is to add a strip of colored tile within the white subway tile backsplash. Maybe a horizontal band of cobalt blue tiles at eye level, or some patterned cement tiles mixed in. It’s unexpected, it’s personal, and it shows you actually thought about your design instead of just defaulting to the Pinterest standard.
The beauty of this approach is flexibility. When you get tired of the bold color (and let’s be honest, you might), changing out accessories or repainting cabinets is way easier than retiling your entire backsplash.
Small Kitchen White Subway Tile Ideas

Got a small kitchen? White subway tile is about to become your best friend. Here’s why: it reflects light, creates visual flow, and doesn’t overwhelm limited space with busy patterns or dark colors.
In a compact kitchen, you want to create the illusion of more space, and white subway tile is basically magic for that. The horizontal lines of the traditional running bond pattern can make your kitchen feel wider, while vertical stacking (we’ll get to that later) can make it feel taller.
Keep your grout light—white or very pale gray—to maintain that seamless, spacious feel. Dark grout lines in a small space can feel choppy and closed-in. You want everything to flow together as much as possible.
Here’s a smart move: extend the subway tile beyond just behind the stove and sink. Take it all the way around the kitchen, or even up to the ceiling in one section. More tile = more light reflection = bigger-feeling space. Plus, in a small kitchen, having all that easy-to-clean tile surface is actually pretty practical.
Consider using slightly larger subway tiles too—those 4×12 tiles instead of the standard 3×6. Fewer grout lines and larger tiles trick the eye into perceiving more space. It’s like the interior design version of wearing vertical stripes.
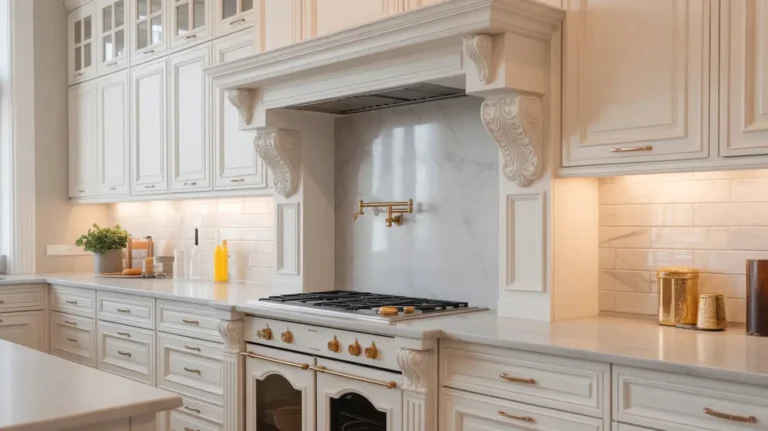
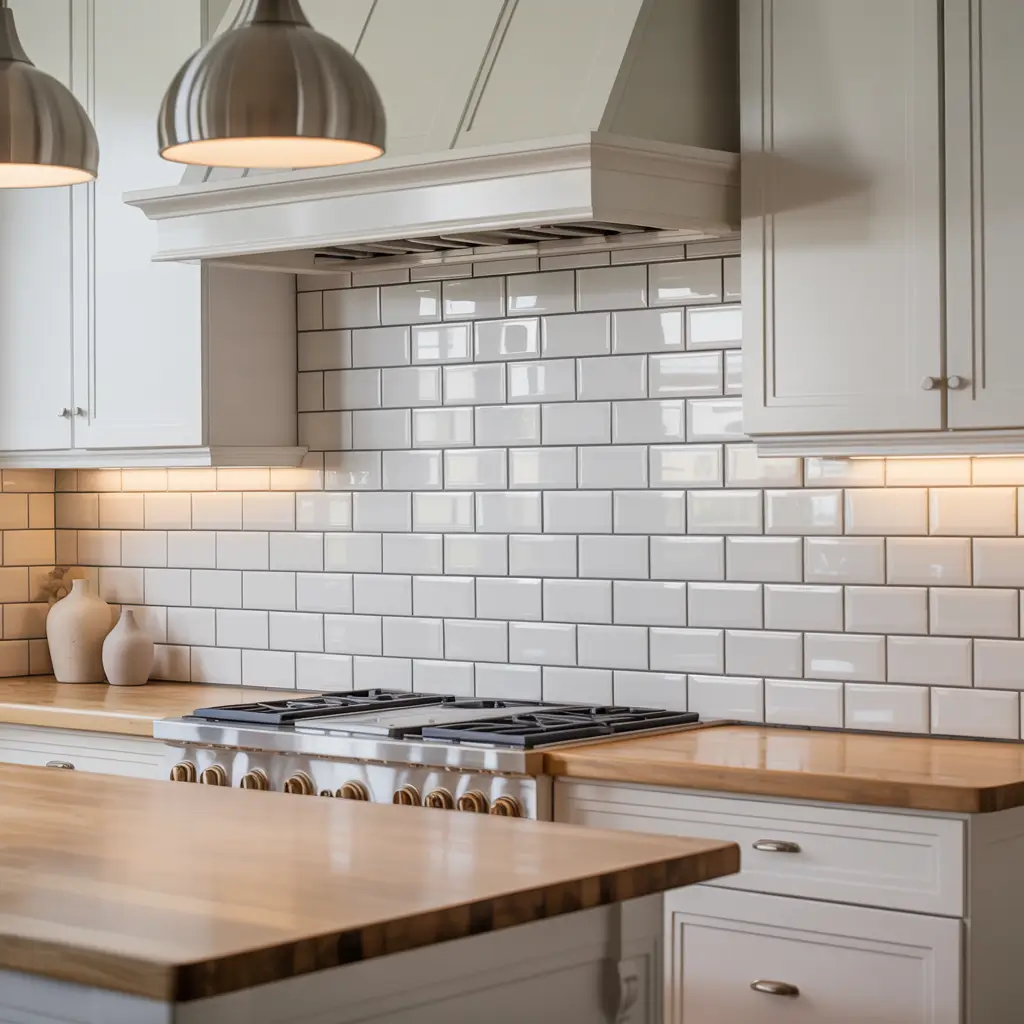
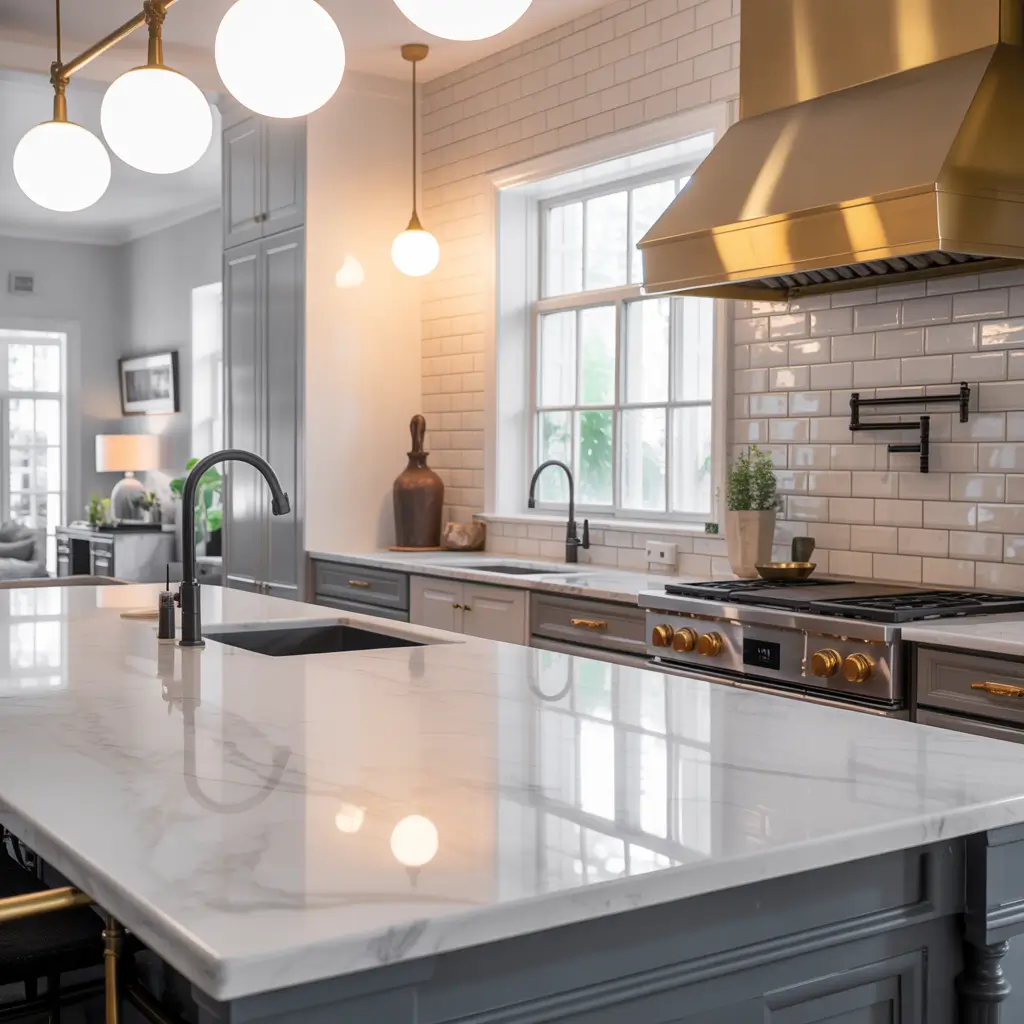
Luxury Kitchen White Subway Tile Styling
Who says subway tile can’t be luxurious? While it’s definitely an affordable option, you can absolutely elevate white subway tile to look high-end and sophisticated. It’s all about the details and how you style it.
First, consider premium materials. Not all white subway tile is created equal. Handmade ceramic tiles with slight variations in glaze, beveled edges that catch the light, or even marble subway tiles can take your backsplash from basic to bougie. I recently saw a kitchen with Carrara marble subway tile, and let me tell you, it was stunning.
The finish matters too. Glossy tiles create this beautiful, reflective quality that feels polished and upscale. They catch light from your pendant fixtures and create depth. Pair glossy white subway tile with marble or quartz countertops, high-end appliances, and thoughtful lighting, and suddenly your subway tile looks anything but basic.
Layer in luxury through your other finishes. Unlacquered brass fixtures that will patina over time, professional-grade appliances, and custom cabinetry make your white subway tile backsplash look intentional and elevated. It’s not that you couldn’t afford anything else—it’s that you chose this because it’s timeless and elegant.
Another luxury move? Impeccable installation. Perfectly aligned tiles with consistent grout lines and professional finishing details like bull-nose edges and clean corners make all the difference. Sometimes luxury isn’t about expensive materials—it’s about excellent execution.
Also Read: 15 Charming White and Gold Kitchen Layouts for Any Space
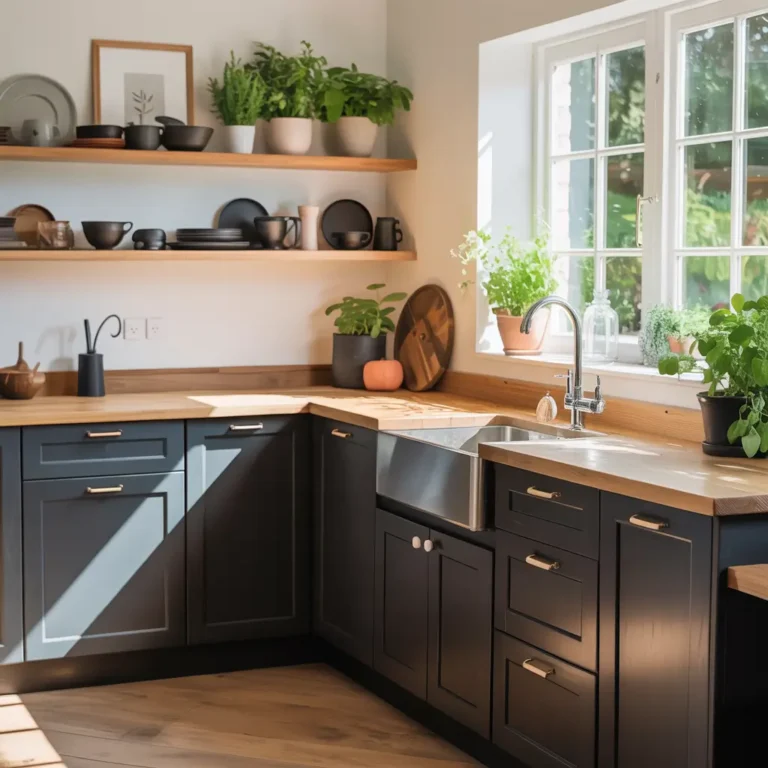
White Subway Tile Backsplash with Open Shelving

Open shelving and white subway tile are like peanut butter and jelly—they just work. The combination creates this effortlessly stylish look that feels both modern and approachable.
Here’s the thing about open shelving: it can look cluttered and chaotic if your background is too busy. But against clean white subway tile? Your dishes, glasses, and kitchen essentials become the visual interest. The tile provides a crisp, uniform backdrop that makes everything pop.
I love how this combination creates depth in your kitchen. The shelves stick out from the wall, creating shadows against the tile, which adds dimension. It’s way more interesting visually than flat cabinets against a backsplash.
Style your open shelves thoughtfully, though. This isn’t the place to store your mismatched plastic containers (we all have them, no judgment). Display your prettiest dishes, some cookbooks, maybe a plant or two. The white subway tile makes everything look more cohesive and intentional.
One practical tip: carry your subway tile all the way across, even in the sections with open shelving. The continuous tile creates visual flow and makes your kitchen feel larger. Plus, having tile behind your shelves means easy cleaning if (when) you inevitably spill something.
Easy-to-Clean White Subway Tile Tips
Let’s get real about maintenance, because a beautiful backsplash that’s a nightmare to clean is not worth it. The good news? White subway tile is actually pretty low-maintenance if you do it right.
Choose the right grout color first. We talked about this earlier, but it bears repeating: white grout looks amazing initially but shows every bit of grime. Gray or even slightly darker grout hides stains while still looking clean and modern. I learned this the hard way with my first backsplash. Never again. :/
Seal your grout. Seriously, don’t skip this step. Unsealed grout is porous and absorbs oil, tomato sauce, coffee splatters, and every other kitchen mishap. Sealed grout? Much more forgiving. Reapply sealer every year or two, and your grout will look fresh way longer.
Go for glossy or semi-glossy tiles rather than matte if easy cleaning is your priority. Glossy surfaces don’t absorb stains and wipe clean with just a damp cloth most of the time. Matte tiles have more texture where grime can hide.
For daily maintenance, keep a spray bottle of diluted dish soap and water handy. Quick wipe-downs prevent buildup. For deeper cleaning, a mixture of baking soda and water works wonders without harsh chemicals. And here’s a pro tip: a Magic Eraser gets grout looking fresh again without the elbow grease of scrubbing.
White Subway Tile Backsplash for Rental Kitchens
Renting but desperate to upgrade that tragic builder-grade backsplash? I feel you. The good news is there are actually some renter-friendly options that give you the subway tile look without losing your security deposit.
Peel-and-stick subway tile has come a long way, friends. I was skeptical too, but modern peel-and-stick options actually look pretty convincing. They’re made from various materials—some are vinyl, others are actual thin ceramic or glass tiles with adhesive backing. Installation takes hours instead of days, and removal is (supposedly) clean and damage-free.
I say “supposedly” because I haven’t personally removed peel-and-stick tile yet, but I have friends who’ve done it successfully. The key is following the manufacturer’s instructions and not leaving it up for years beyond the recommended time frame. Most are designed for 2-3 year installations.
If you’re handy and your landlord is cool, you might be able to install actual subway tile with the understanding that you’ll restore the original when you move. I know someone who did this and carefully saved all the original materials. When she moved out, she hired someone to put everything back. The new kitchen was worth it to her, and she actually got her full deposit back.
Another option? Temporary backsplash panels that sit on top of existing tile or wall. They’re less permanent than peel-and-stick but can still give you that fresh white subway tile look. They won’t hold up to the same scrutiny as real tile, but from a few feet away, they look pretty decent.
White Subway Tile Layouts: Stacked vs. Offset
Ever wondered why the same tile can look completely different in different kitchens? A lot of it comes down to layout pattern. The two main players are stacked (also called grid or straight stack) and offset (the traditional brick-like pattern).
Offset/Running Bond is the classic layout you see most often. Each tile is centered over the joint of the tiles below it, creating that brick wall effect. It’s timeless, it’s forgiving (small imperfections are less noticeable), and it creates nice horizontal movement that can make your kitchen feel wider.
Stacked/Grid Layout is more modern and geometric. Tiles line up directly above each other, creating continuous vertical and horizontal grout lines. This creates a cleaner, more contemporary look but requires more precision during installation. Even slight inconsistencies become obvious when all your grout lines should align perfectly.
I’ve used both, and honestly, it comes down to your overall aesthetic. Offset feels more casual and traditional, while stacked feels more modern and structured. Offset is definitely easier to DIY, while stacked really benefits from professional installation (or at least a very steady hand and good eye).
There’s also vertical stacking, where you install subway tiles vertically instead of horizontally. This creates strong vertical lines that can make your ceiling feel taller—great for kitchens with low ceilings. It’s a simple change that has a surprising impact on how your space feels.
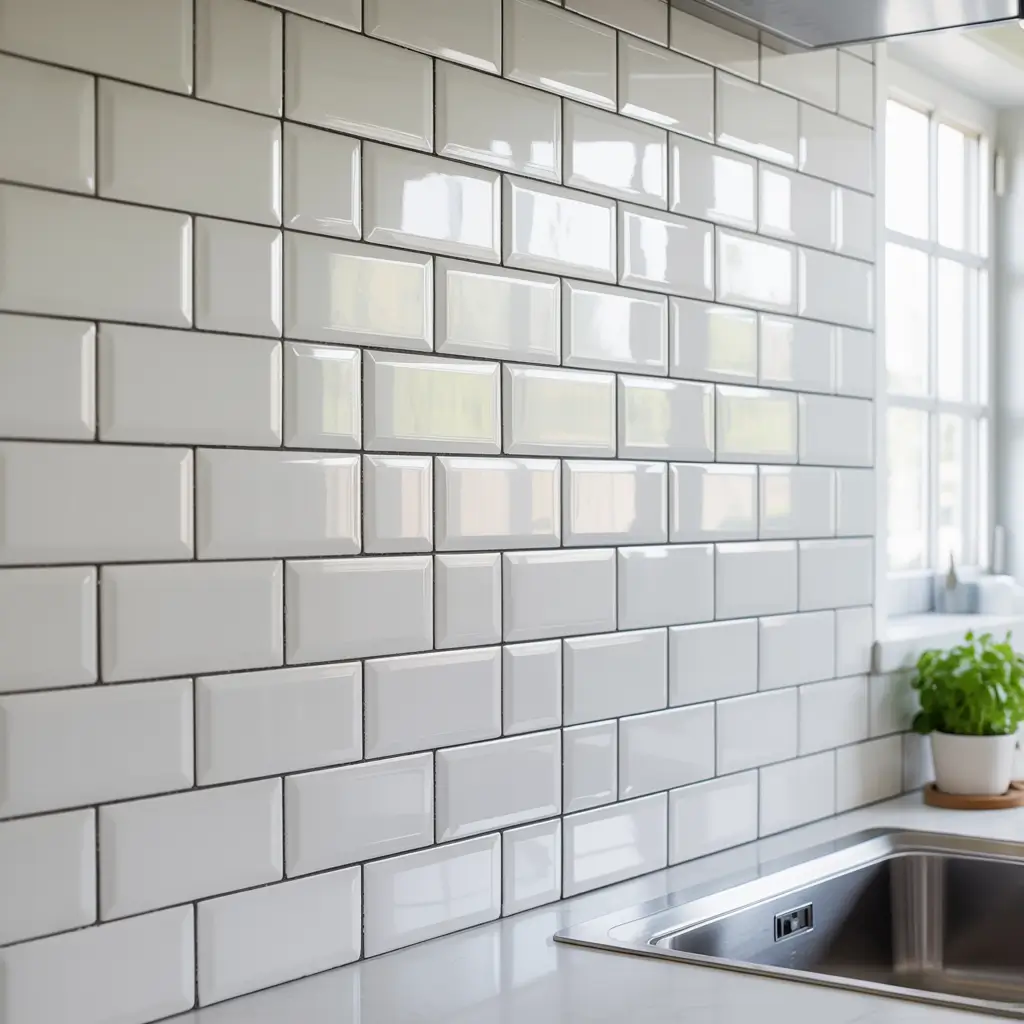
Vintage-Inspired White Subway Tile Kitchens
Want that charming, old-school diner or vintage apartment vibe? White subway tile is literally where that aesthetic started. Original subway tiles from the early 1900s lined—you guessed it—subway stations, and they’ve been a design staple ever since.
For authentic vintage vibes, look for beveled subway tiles. That slight edge catches light differently and creates subtle shadows that add depth. Beveled tiles immediately look more classic and nostalgic than flat modern tiles.
Pair your vintage subway tile with period-appropriate details. Think checkered floors, colorful vintage appliances (or modern reproductions in retro colors), and chrome fixtures. Display some vintage kitchenware or old signage. You’re creating a feeling, not just a backsplash.
Grout color matters here too. For true vintage appeal, use white grout for that clean, classic subway station look. Or go with very pale gray to nod to the patina that develops over time without actually dealing with stained grout.
I love mixing vintage and modern in kitchens. Maybe you have a vintage-style subway tile backsplash, but your appliances are modern stainless steel, and your cabinets are sleek and contemporary. It creates this interesting tension between old and new that feels collected and personal rather than too matchy-matchy.
Affordable White Subway Tile Renovation Ideas
Here’s the best part about white subway tile: it doesn’t have to cost a fortune. You can create a stunning kitchen backsplash on a reasonable budget if you’re smart about it.
Shop around for tile. Big box stores like Home Depot and Lowe’s have perfectly good subway tile for under $1 per square foot. You don’t need fancy designer tile to get great results—you need good installation and thoughtful design. I’ve seen $0.79/sq ft tile look amazing in well-designed kitchens.
DIY the installation if you’re remotely handy. We talked about this earlier, but it’s worth repeating: labor is often more expensive than materials for tile work. A professional might charge $10-15 per square foot for installation, but you can do it yourself for the cost of tools and supplies (many of which you can rent or borrow).
Start small if you’re on a tight budget. You don’t have to tile your entire kitchen. Focus on the area behind the stove and sink—the spots that really need backsplash protection and draw the eye. You can always extend it later when budget allows.
Keep the layout simple. Fancy patterns like herringbone require more cuts, more waste, and more time (which means more money if you’re hiring someone). A classic offset running bond pattern is affordable, timeless, and easy to execute.
Mix and match where you can. Use subway tile for most of the backsplash, then add a small strip of more expensive accent tile or a different pattern just in one section. You get visual interest without blowing the budget. Smart, right?
Conclusion
So there you have it—15 ways to make white subway tile work for your kitchen, your style, and your budget. From classic and traditional to modern and daring, this versatile tile really can do it all.
The beauty of white subway tile is that you’re not locked into one look. You can keep it simple and timeless, or you can get creative with patterns, grout colors, and styling. You can DIY it in a weekend or hire a pro for that perfectly polished finish. It works in tiny rental kitchens and sprawling luxury spaces alike.
My honest advice? Choose the approach that feels most “you.” Don’t just follow trends—think about how you actually use your kitchen, what makes you happy when you walk into the space, and what you’ll still love five years from now. White subway tile is forgiving like that; it adapts to your vision instead of dictating it.
And if you’re still on the fence, remember: worst case scenario, you end up with a clean, classic, easy-to-maintain backsplash that works with literally everything.